February 29, 2012

Hot Chocolate Cake

Happy Leap Day! First, I must wish my #3 child Happy Birthday today!!  He's four, but according to the calendar he's only one. Since his Leap Day birthday only rolls around once every four years we are celebrating BIG today. I took in homemade cinnamon rolls for his birthday snack at preschool and we'll be dining at IHOP at his request :) This weekend we are having a Super Fast Racecar Birthday Party to celebrate, so stay tuned for those photos. I don't imagine it will be as loud as last year's Marching Band party, but it will be just as much fun.

As promised, here is the Hot Chocolate Cake recipe. This is a doctored box mix cake that turned out fabulous!  Really, really, good. I don't usually like chocolate cake, but this one was great. It was moist and dense in all the right places. I served it with chocolate buttercream icing. My 8 year old decided on the the flavor, just assuming I could make it happen! I was pretty relieved when it came out delicious - nothing like letting your foodie child down. He would have been the first person to tell me if it was terrible.

Hot Chocolate Cake
1 box of chocolate cake mix, regular chocolate or devil's food
4 eggs
1/2 c water
1 c buttermilk
1/3 c vegetable oil
1 sm box pumpkin pie instant pudding mix (if you can't get this substitute 1 box chocolate or vanilla pudding mix and 2 tsp cinnamon)
1/2 c semi sweet chocolate chips
1 c mini marshmallows or cut up large ones

Put chocolate cake mix, eggs, water, buttermilk, oil and pudding in mixer bowl. Beat as directed on the cake mix box. Then add the chocolate chips and marshmallows and stir. Pour cake mix into greased cake pans and bake as directed on your cake mix box according to your cake pan size.

I used this to make my Magic Tree House birthday cake and it was moist and delicious. I frosted it with a chocolate buttercream icing.

Photobucket

February 22, 2012

Pizza Soup - Fast and Easy

When I was busy recovering from my fourth cesarean section with our last baby (who is now 16 months old - yikes) a neighbor made this wonderful soup for us. I was a little unsure over the name Pizza Soup, thinking it would be more of a "kid recipe". I am not the biggest pizza fan unless it's really good pizza. So far I haven't found a pizza joint in Roswell that I love. I guess I just prefer making it, kinda like how I am about Mexican food too. Do I sound high-maintenance? I don't feel that way, but when I actually say it out loud, I sound like a food snob. I'm not, I promise. In fact the food item I craved most when pregnant with all four of the kids was McDonald's french fries. Nothing else would cure that craving - nothing. And yes, I now they are soooo bad for you and contain all kinds of preservatives and sodium levels off the charts, but it's what my body said it NEEDED and who was I to deny? Since the kids turned out healthy and *mostly* sane, I guess I didn't do any damage. All that to say I do like junk food occasionally. I'm not much of a Mexican food fan (unless it's homemade), I don't like hot dogs and I don't crave pizza, but those McDonald's fries are my weakness.

I do have a twist on junk food with this pizza soup. It breaks the pizza mold by going into a bowl, not a crust. I loved it. It was a creamy soup with a little kick from the pepperoni. The great thing about it, well actually there are two. One, you can customize the recipe so easily just like making your pizza the way you like it. Two, the basic recipe is SIMPLE. Don't thank me, thank Sybil, who introduced me to the simple pleasure of....

Pizza Soup
1 jar of spaghetti sauce
6 oz cream cheese, I used non-fat
1 c milk, I used skim
Assorted pizza toppings: pepperoni (we like turkey pepperoni), candian bacon, mushrooms, black olives, spinach, mozzarella, oregano, hot pepper flakes, whatever you like

Put the sauce, cream cheese and milk in a pot and stir until it's all melted. Add toppings to warm the up and serve. How easy is that??? Dinner's ready in a hurry!

Photobucket

February 20, 2012

Soft Pretzel Bites


Two months ago I started participating in what's known as the "Secret Recipe Club". You may remember the homemade Butterfingers. The fun of this adventure is discovering new recipes and bloggers, never knowing what to expect. It's all a big secret until Reveal Day when we all find out who made what from who's blog.

I opted for something salty this time - Soft Pretzel Bites. I've made Soft Pretzels before but we made them in the traditional twisted shape. This recipe forms them into much easier to shape "nuggets". The other difference that I was curious about is the use of butter in making them instead of shortening. I wondered if it would change the texture or make the dough more difficult to work with. I'm happy to said it did neither and this dough worked perfectly for us. Just keep in mind, using butter means these pretzels won't keep fresh as long as the shortening ones, so plan on eating them or freezing them. I did both and the frozen ones were just as delicious when thawed on the counter at room temperature.
The recipe comes from the blog Making Memories created and nurtered by my twin-in-another-life, Erin. Just like me, Erin is a little obsessed with Family Fun magazine. All you have to do is search either of our our blogs for Family Fun and you'll see tons of things we've done - many of them the exact same projects (we just made the gumdrop arrows for Valentine's Day)! I actually cracked up when I saw the header photo on her blog because she has a photo of the milk jug Halloween ghosts just like the ones hanging in our basement right now!! Now if we could just get Family Fun to hire us as testers - right Erin?

Erin is one of those people that I'm in awe of. She's a single mom with two precious kids. I really am amazed at single moms. I mean there's no break, no..."wait til your Daddy gets home to deal with you". And she's not just going through life, she's making a FUN life with her obviously happy kids. She makes time to say, "yes" and I love that about her. Much of her blog is creative and clever ideas for crafts, gifts or goodies. When I read the recipe for Soft Pretzel Bites it sounded like she decided to make them almost as a challenge and she was pleasantly surprised at the results. They turned out better than she expected and easier than she expected. I hope you take the yeast challenge and your results are as delightful as Erin's.

Soft Pretzel Bites
(recipe originally adapted from Bobby Flay)

Ingredients
1 1/2 c warm water
2 Tbsp brown sugar
1 pkg active dry yeast (or 3 tsp of bulk yeast)
1/3 c unsalted butter, melted and cooled
2 1/2 tsp Kosher salt
4 1/2 c flour
vegetable oil
-----
6 c water
3/4 c baking soda
-----
1 egg beaten with 1 Tbls. cold water
Coarse sea salt, poppy seeds, sesame seeds

Combine water, yeast, brown sugar in glass measuring cup to allow yeast to proof (which is a fancy way of making sure the yeast is alive and awake). If you don't get foam in about 5 minutes you may have killed the yeast with water that was too hot OR it's not awake because the water was too cold OR the yeast is too old. Yeast is the big scary part of yeast breads (that's why it's so prominent in the name - to scare you off). Really yeast is easy, you just need to make sure it's alive and kickin. Proofing is way to make sure you aren't going to end up with unrisen flatbread. Once you have proofed it, you know it's gonna all work out. If you don't get foam, just throw away what you mixed up and try again. The water should feel warm to your fingers, but not hot.
this is what it looks like when the yeast is first added to the water (with a sprinkle of brown sugar)

this is activated yeast: foamy and smells yummy
Once your yeast is all foamy goodness, pour it into a mixer bowl and add the melted butter. Make sure the butter has cooled so it's not raging hot and kills the poor little yeasties. Mix on low to combine. Add the salt and 3 1/2 cups of the flour into the bowl and mix on low speed until combined. This is where a dough hook and a stand mixer come in handy, otherwise you are kneading the dough by hand on the counter. Incidentally, you could easily start this recipe in a bread maker appliance, just take the dough out after the first rise and hand shape it and continue following the recipe from there.

You want to knead the dough in the mixer for about 5 minutes until the it's smooth, adding small amounts of the remaining 1 cup of flour a little at a time until the dough pulls away from the sides of the bowl, forming a ball. You may not use all of the flour if it's a dry day or you may need a little more if it's a humid day outside, but you shouldn't vary more than 1/2 c more or less in what you need. When the dough is "right", the sides of the bowl should be really clean and the dough should all be gathered around the dough hook. The dough should feel soft and elastic. "Like your tummy", my darling 6 year old innocently stated. @#!! Ah the honesty of kids!

Put your dough into a clean greased (is that an oximoron?) bowl and cover it loosely with plastic wrap. Let it sit in a warm place (you may remember I use my turned off oven with the light on in the winter) until it doubles in bulk. This should take around 1 hour unless your kitchen is pretty cold. You can figure out if yeast bread is ready with the poke test. You poke your finger gently into the risen dough and see what happens. If springs back - then it's not ready. If the dent stays put - it's perfect. If the poke makes the whole thing collapse - then it's overrisen and you need to start over from the kneading stage to try to salvage it. All of this SOUNDS complicated, but it's not - I promise. You just have to try it out to see really it's not hard. It takes a little planning since there is waiting around, but it's not hard. When the dough passes the poke test, you need to gently deflate it by folding it or "punching" it down. That means put your fist into the middle of it. It's not a shazam move, but more of a gentle push. Then let the dough rest for 5 minutes or so (which means just leave it alone for a few minutes).
While the dough is resting you can get ready to make pretzel magic. Preheat your oven to 425 degrees. Then you need the secret to turning regular bread into pretzels. The trick is to boil the dough in water before you bake them - that's what gives it the lovely chewy texture. Last time, I wasn't too sure about put raw bread dough in pot of boiling water with baking soda. I mean, that sounds kinda gross, but it works. Whoever discovered this technique must have been a little crazy. *Do I hear a homeschool lesson coming up??*

Put your 6 cups of water in a pot or deep skillet and add the baking soda. Bring that to a boil.

Instead of watching and waiting for the pot to boil, go ahead and shape your bites. Cut the dough into 8 equal pieces, using a bench knife makes this much easier (my 8 year old was happy to volunteer). Roll each piece into 22" long ropes. If the dough is hard to stretch, it hasn't rested long enough. Then cut the rope into small bites approximately 1" wide. You can roll these into or just leave them cut like tiny squares.
By now your water should be boiling and you are ready to cook. Drop the individual pieces of dough into the boiling water working in batches. Watch as they magically rise to the top of the water within about 30 seconds. When they float fish them carefully out and put them on greased (or my favorite silicone mats) cookie sheets.

When you have a tray full of boiled bites, brush some of the egg white mixture over the top and sprinkle with course salt, poppy seeds, sesame seeds, Parmesan cheese, whatever floats your boat.

Bake at 425 degrees for 15-20 minutes. Watch carefully so they get brown, but not burned.
A few minutes after these started coming out of the oven, everyone of my kids was clamoring for some. I don't think they even waited for them to cool off. Even the baby stuffed one in her mouth. That girl loves her food just like her Mommy! :) Thanks Erin for sharing this bite sized snack!

Don't forget to enter my giveaway for two silicone baking mats to celebrate my birthday today!!
Photobucket

February 19, 2012

Crusted Butternut Squash Wedges


During the winter I love cooking with hard winter squashes, but sometimes I feel like I'm in a rut. I make butternut or acorn squash soup, we have roasted squash. I microwave it and serve it mashed with butter and salt. I needed something different. I finally found it with this recipe I discovered in one of my neighbors hand-me-down magazines. I adore hand-me-downs like those - thanks Trish!

This recipe sounded fancy and looked fancy, but ta dah, turned out to be pretty simple. I'm thinking it's the perfect recipe to keep in my arsenal for company when I want to whip something up, but not work too hard. All you really do it slice the squash (in the recipe they call for pumpkin, but I used butternut and it was perfect). Then you mix up the topping and sprinkle it over the slices and roast. See??? I told you it was easy!! And guess what, it's delicious too. Always a bonus :)
Crusted Butternut Squash Wedges
Yotam Ottolenghi

Ingredients
1 1/2 lbs of butternut squash (or pumpkin)
1/4 c olive oil
1/2 c grated Parmesan cheese (fresh is best)
3 tbsp dried bread crumbs
3 tbsp dried parsley
1 tsp dried thyme

zest of 1 lemon
2 garlic cloves
salt and pepper
sour cream, optional

Preheat oven to 375 degrees. Cut squash into 3/8 inch wedges (this part is pretty important as you want the slices to be uniform so they will all be cooked at the same time) and lay them on a greased (or lined with a silicone mat) baking sheet. Brush the slices with the olive oil.

Mix the cheese, bread crumbs, and seasonings together in a small bowl. Sprinkle over the slices until they are completely covered.

Roast in the oven for 30 minutes, until fork tender. Can be served with a dollop of sour cream, but I didn't think it needed anything. The seasonings make this a very flavorful dish.

Photobucket

February 16, 2012

Closed Silicone Baking Mat Giveaway

Congratulations Sherry!! lilsis_75@...


Happy Birthday to Me, Happy Birthday to Me! My birthday is this month and I'm celebrating! Okay, okay, I'm a little bit of a celebration freak - I know. Any excuse to have a party. Remember last year? It was all about the cupcakes. :) I just like celebrations and birthday parties, blame it on my Mom. She always throws a good party and raised me to do the same.

The problem is, when you're the birthday party chief in your house, there is no one to plan YOUR party. I guess I'll just have to bake my cake and eat it too! While I'm at it, I went out and bought YOU a present. There is nothing like sharing Mom always said. So I spent money generated from this blog and bought you something to show my thanks.

I bought TWO silicone baking mats to giveaway!!

You know, those mats that I'm always talking about for baking or roasting and telling you how much you MUST get them?? Yep, those are the ones.
Here are the ways to enter, be sure to leave a separate comment for each one you choose to complete...
  • Subscribe to Chickenville by RSS or Email and then leave a comment on this post (on the blog, not on facebook)
  • Share this post on Facebook by hitting the FB button at the top of the post and where it says "write something" share your favorite Chickenville recipe, then tell me in the comment here what recipe it was
  • Like Chickenville on Facebook and post about it on your page too
  • Tweet this giveaway with button on top of this post this time sharing your favorite birthday cake idea from Chickenville and tell me which one it was in your comment here
This giveaway ends on Friday Feburary 24th at 11pm. Open only to US residents.
 Photobucket

February 14, 2012

"Like Outback Steakhouse Bread" - Pumpernickel Loaf

My husband and I love Outback Steakhouse for DNI aka Date Night In. Tonight will be one of those nights. There is NO WAY I'm going out to a restaurant, waiting for a table, crammed in with others on Valentine's Day. All the while, thinking about how long it's taking and we're paying a babysitter. Love is in the air, but not when you're paying through the nose. No thank you. Tonight we will feed the kids an early dinner of leftovers and put them to bed on time. Then we will join up in the kitchen and either create something for just us, sharing time talking or pick up something from a restaurant without setting foot inside the building. That's why I love Outback (thanks Sandy for turning me on to this one). You can call or order online and when you pull up they will bring it right to your car. Raining outside where you live? Already in your comfy *ugly* pants? No problem, cause you're not getting out of the car! No, I'm not getting paid to advertise for Outback, in fact I'd like to let you in on one of their secrets - they are not really Australian. Shhhh, don't tell, but if you want Australian, you need a meat pie or Vegemite or maybe a Lamington cookie. It's funny what we American's will believe, guess it's like thinking Papa John's is Italian food.

This doesn't mean I don't love Outback, I do. I love the steaks, the salads, and their bread. Delicious. I wanted to recreate it at home for those months when it's just not in the budget to pick up takeout. So here's my best recreation to date. You're gonna love it (I told you I was in a baking mood).
Sweet Pumpernickel Bread - like Outback Steakhouse

1 pkg yeast or 3 tsp yeast
1 1/4 c water
1/3 c molasses
1/4 c sugar
1 1/2 c rye flour
1 c whole wheat flour (you can sub with white, but it won't be as chewy)
1 c white bread flour
1 tbsp vital wheat gluten (or just use another packet of yeast)
1 tsp sea salt
2 tbsp cocoa powder
2 tbsp vegetable oil

Put the yeast in warm water (not hot) with the molasses to proof it {see here for details about bread baking}. Combine sugar, wheat flour, rye flour, 1/2 c of the the white flour, gluten, salt and cocoa in large stand mixer bowl, whisk together. Add yeast mix when it gets foamy. Knead the dough with dough hook. Add the oil and knead again. Add the remaining 1/2 c of white flour as needed to form a ball around the dough hook. The dough should cleanly pull away from the sides of the bowl. Place dough in greased large bowl and cover loosely with plastic wrap.

Let rise in warm place (like your oven with only the light on) until doubled, maybe an hour depending on how warm your kitchen is. Deflate the dough. Form into a greased loaf pan. Cover loosely again and let rise for around 30 minutes. Preheat oven to 350 degrees. Carefully remove the plastic wrap and put in hot oven. Bake for 50 minutes. Cool on wire rack only until it won't burn your fingers because this stuff is delicious warm!

Photobucket

February 10, 2012

Candyland Birthday Party

WARNING - this post has LOTS of sugar and photos! You may need a toothbrush or a cup of coffee just to read it!
Oh how I adore Candy Land!! I loved playing it as a kid (actually I love playing it still). It was one of the first games I got for my kids. I mean it says right on the box, "A Child's First Game". I love that it doesn't involve reading, only color recognition. A while back in Taste of Home on the back cover I had seen a Candy Land birthday cake that I knew I HAD to make. I just had to convince one of my kids to let me. Finally this year, Banana Girl was bouncing from idea to idea, not really committed to anything and I said, "what about Candy Land?" She was not convinced saying, "Mommy, Candy Land is for three year olds!" But then I showed her the cake idea and she was on board. What kid wouldn't love a cake full of CANDY?? 
The prep work for this party was pretty easy since I started right after Christmas. I picked up a bunch of Christmas clearance items to fill the goody bags. You know, the candy and cupcake makeup/ bath items? A very inexpensive way to go and I knew I didn't want to send them home with more candy. I also tucked a toothbrush in the goody bag as a thanks to the parents.
We used one of Banana Girl's Christmas presents for a craft. It was a little American Girl kit that made a bunch of button rings. I figured they looked enough like candy, that it would work.
I picked up some fluffy socks that are always around at Christmas time. These I got from the Target dollar spot. I saw this cute idea on Pinterest and made them as favors for the girls...sock cupcakes.


We decorated around the house with all of our play kitchen candies, sweets and desserts like ice cream, cookies, cupcakes, etc. Of course, we also used the Candy Land game box, board and pieces to decorate.
We also made these adorable giant lollipops for the walkway. They are a white paper plate wrapped in colored cellophane and tied with a bow (or you could use colored paper plates and clear cello). My husband set them on sticks for the party, but the wind proved too much. The next choice was this beautiful piece of rusted rebar - which definitely help them. You could go all out and put them up with white pvc or slide a white painted wrapping paper tube over the rebar. 


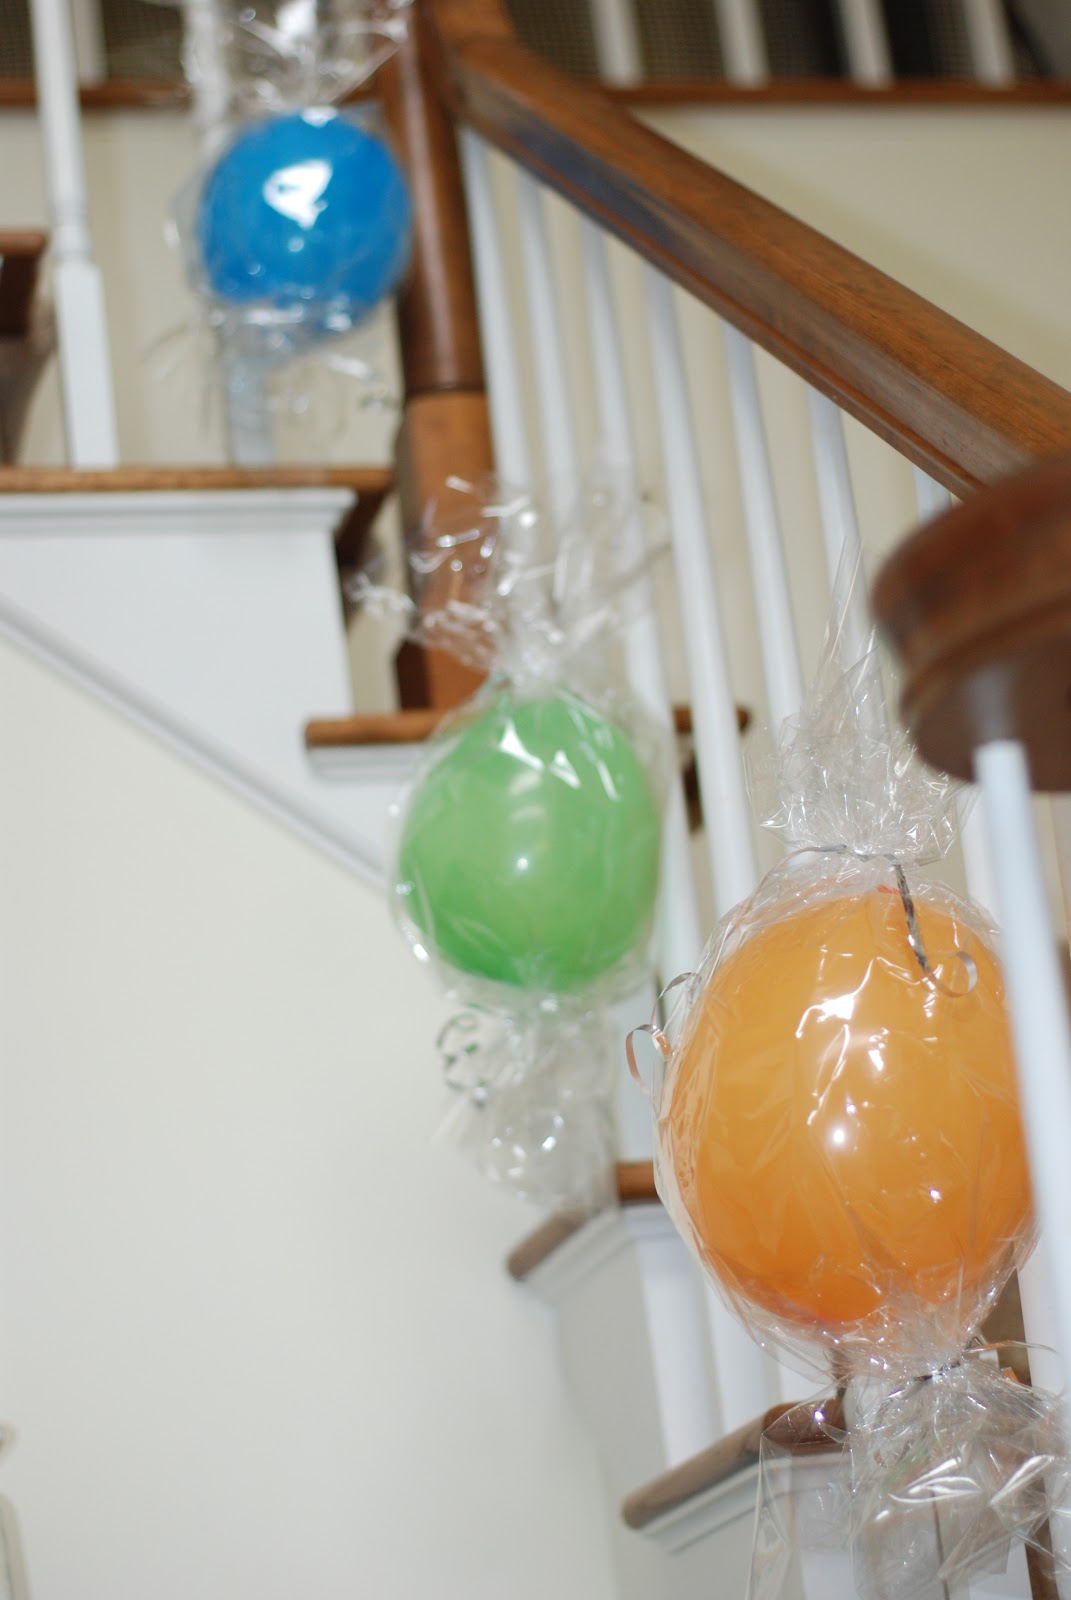
I also made giant candies to hang around the house.

So easy, you blow up a balloon and wrap it with clear cellophane, then tie the ends with ribbon.


For our fun and entertainment, the girls made the button rings. They also crafted beaded candy canes. I gave them green, red and white tri-shaped beads and a length of pipe cleaner. They strung the beads however they liked and I just bent up the ends to keep the beads on. It's an easy Christmas ornament and went perfectly with the Mr. Mint part of Candy Land.

The girls also made felt cupcakes. I saw this printable and set to cutting the pieces out. I made icing and cupcakes in a couple of "flavors". Then I cut put the liners and decorations. 

The girls had a great time creating their custom cupcake. I will say, don't use white glue as it won't work on the felt. We ended up using Aleene's Tacky Glue, which worked beautifully. I would also recommend doing this activity first, so the glue has time to dry.
We played a version of a "cake walk". I set squares of colored paper on the floor and had them walk around to the tunes of I'm A Gummy Bear, and I Want Candy, and such. Then we stopped the music and drew a card from the Candy Land deck, whoever was standing on the right color, got to pick out a piece of candy from a huge bowl. We played until everyone won multiple times.
We also played licorice limbo, which was a crack up. Those little girls are LIMBER! Of course, everyone got a giant string of licorice.
 The whole menu was determined by the Birthday Girl. She REALLY wanted a rainbow of fruit, since that is her current "favorite food in the world". I didn't want to mess with skewers like I had seen, so I just laid it all out on a platter with marshmallows on the ends for clouds. We also had mini hot dogs wrapped in croissants (like little gems). A rainbow of colored peppers (another of Banana Girl's current obsessions) with dip. Crackers and egg salad.
When the girls saw the cake, their eyes were as big as moon pies. They couldn't wait to eat it. The cake looked like a sugar fantasy come to life. They all wanted " a huge piece with lots of candy". Luckily with this cake it wasn't hard to satisfy their requests. I warned parents in the invite, their kids were going to come back with a sugar high and they needed to eat a good breakfast!
You can make this cake really anyway you like. I thought about it back in October and set aside some Halloween candy. I did have to buy a big bag of Starburst. I used these for the pathway. The only color I couldn't find was blue, I guess they just don't make blue starburst.
I added the real game pieces (after a good washing) for authenticity. You can see the Chocolate House which Grandma now lives in. She used to be Grandma Nut with peanut brittle and there was a molasses swap with Goopy - no longer. I guess kids today don't eat peanut brittle and molasses, well all except my kids :) I made the chocolate with mini Snickers, tiny Tootsie Rolls and chocolate icing. There is a small peppermint area (Mr. Mint has gone the way of Goopy) and some candy hearts in front.

The gumdrop forest was created using toothpicks to stack them high.

Lord Licorice's castle was very pointy and dark looking. Definitely not where you want to land!

The lollipop woods were easy, just unwrap and stick them in. The more random and tilted they were, the better they looked.

I had to make a bridge for the shortcut. I used star sprinkles and mini marshmallows, crowned with Trix cereal. There is also an ode to the Birthday Girl. She LOVES chewing gum and has just figured out how to blow bubbles, so I put a couple of sticks on there for her.
King Kandy's Castle was made from small ice cream cones that I already had, towers of icing and topped with sprinkles and a red gumdrop.
I added sprinkles all over the whole cake at the Birthday Girl's request. I think it made the cake VERY busy looking, but she adored it and I have to remind myself, it is HER cake! All and all this cake didn't require any special skills (I did pipe a border of stars, but you could easier do more candy). It just took some planning because I didn't want to buy all of this candy. Saving a little here and there as the kids got it from Halloween, Awana and the bank, saved me from spending too much.
The party was a roaring success and another confirmation of why I love creating special birthday parties for my kids. There is no place like home!! 


Photobucket

LinkWithin

Related Posts Plugin for WordPress, Blogger...