January 28, 2011

Baby Love: Custom DIY Car Seat Cover

{This post is a continuation of the series titled Baby Love. If you came for the food, I'll be back to that in February.}

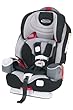
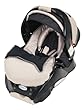
People often ask me about this carseat cover. Our firstborn is a boy. When I found out our second child was a girl, I didn't want to purchase another carseat, but I did want to "glam it up" a little from the original Graco Snugride Infant seat cover.


The Original Carseat Cover Pattern
I looked online for carseat covers and promptly passed out from sticker shock! Wow, those things are expensive, like two hundred dollars expensive! I knew I could make some MUCH cheaper, even if it wasn't as fancy as what I saw online. My incredibly talented Mom agreed to come over and help so I wasn't completely on my own.
Turned out this project was really easy and even with my entry level sewing skills I was able to make something that looks really nice. I started out by taking the carseat to a fabric store. I picked out a pattern that would go with the hood because I wasn't going to recover that. I also knew I needed a heavier weight fabric since it would be subject to a lot of use. Lastly, it had to be washable because babies leak out of all kinds of places. I picked the satiny butterfly fabric that worked really well, except if anything with velcro got attached to it like a bib, then it pulled the fabric. Even still, it was a great choice. For #3 child I made another cover in this cute dino pattern.

Dinosaur Pattern Cover
Sewing a Car Seat Decorative Cover
Lay the fabric in the seat to figure out how much fabric you need to buy (yes, very scientific). Be sure to account for a seam allowance (the part you are going to fold over and sew on the edge). Make sure you cover all of the old carseat cover when you are measuring because you are going to leave that on underneath the new cover you are making. Yours is only cosmetic, the original is still needed for padding. 

the original cover stays underneath your custom cover


be sure you don't cover the seat release for the base


At home lay the fabric in the carseat again and cut away any huge excess that hangs way over, err on the side of leaving too much if you are unsure. After you have the rough shape, lay it flat and cut the whole thing more or less symmetrical. Then fold over a small edge (1/4 of an inch) and iron it to hold the fold in place. Fold that edge over again to make a larger seam, about 1 1/2 inches deep to make a casement (a long pocket). This fold needs to be pinned in place and ironed. Put the cover back in the carseat to make sure everything fits, then sew the seam, starting and ending in the bottom middle of the cover (right where your darling baby's little legs rest). You must leave this opening so you can thread elastic through to get the cover to stay on with elastic. 

tie the elastic into a knot
Using 1/2" wide flat elastic, put a safety pin in one end to aid in threading it through. Just kept working the pin through the seam pocket around the perimeter of the cover. Kind of like when you lose the string on a pair of sweatpants.
After it is all threaded put the cover on the carseat again so you could mark the places to make holes for the straps. Be sure to smooth the fabric and fold it over where there is excess. Using a fabric pencil or washable marker, mark where each of the holes are for the five point harness to come through. That means you are making a minimum of 5 marks. Two where the straps come over the shoulders, two where the straps enter back through the seat near the bottom and one for the strap between their legs. I also had to make a hole where the adjustment strap comes out to tighten and loosen the harness. After you mark these, actually measure the real holes in the original cover so you are sure to make them long enough. You don't want anything impeding the safety of the seat.

button hole for straps to come through
To make the holes, you need to use a button hole feature on your sewing machine. I had never done this and had to read the direction that came with my machine. It was actually really easy and the machine does the work. After you create your "button" aka strap holes, you cut them open. Then you are ready to actually put the cover on. Once you get all the straps threaded through you need to tighten the elastic so the cover stays in place. Just tie it at the bottom and tuck the extra under the cover, making it easy to take off if you need to.

underside of carseat with elastic showing


tuck the elastic under the cover to hide it


And there you have it - a brand new look for your precious cargo!


January 24, 2011

Baby Love: Parenting Books

There are some wonderful books on parenting out there. The "What to Expect" series has great info for pregnancy and beyond. Say Goodbye to Whining, Complaining, and Bad Attitudes..in You and Your Kids is great for tips on getting through the bad stuff. Parenting is Heart Work and Bringing Up Boys (and now Girls) are fantastic general parenting books. Out of the Spin Cycle: Devotions to Lighten your Mother Load is one of those "keeping it real" kind of books about the struggles moms go through. I loved this passage quoted from the book.
SAHM
aka Sleepy Anxious Hysterical Mom

When Brandon and I started a family, my heart's desire was to stay home. However, since we were making obscene piles of cash, what with my teacher's salary and his youth pastor's check (sarcasm intended), I wasn't able to stay home until my second child, my daughter, was born. Thus I began a new life with an infant and a two-year old. . . all day.

Seeing how I'd begged for this and cried real tears over it, you'd think I'd be somewhat immune to the "downside" of being an SAHM. But you would be wrong. I was unprepared for the exhaustion, the drain of emotional energy, and the constancy of it all; when Brandon asked about my day once, I snapped, "Oh, me? I set limits and enforced discipline all day long. It was awesome. You?"

In my mind, Brandon was off at his fancy job, eating at restaurants, laughing casually, and kicking his feet up on his desk (he's never done the last one, but it fit with my imagined scenario). He did whatever he wanted while I was neck-deep in diapers and tantrums. I slipped into a pit of resentment in record time, keeping tally of the zillion tasks I completed with no acknowledgment.

I told Brandon once: "Do you know that I am literally keeping all these children alive? If I was not on this planet, they'd all be un-immunized, starved anarchists with overgrown fingernails who would never have haircuts or gifts for birthday parties!"

I'm sure he couldn't wait to get home every day.

As I was wallowing in self-pity, Brandon popped the imaginary bubble I'd constructed around his perfect life of freedom. He said, "Here's my side of the story. While I'm stuck in pointless meetings with imbeciles, I'm thinking of you watching the kids learn to walk, which I'm missing. While I'm filling out paperwork, getting chewed out by disgruntled parents and paying invoices, I'm wishing I was you - liberated fro the professional grind, spending time with your friends, singing our kids to sleep for naps. My career is not the picnic you've envisioned, but my solace is that I am giving our kids the gift of their mom."

Pffheeeeeeew (air out of bubble).

[Jesus said,] "So in everything, do to others what you would have them do to you, for this sums up the Law and the Prophets." Matthew 7:12

I withheld from Brandon the very things I wanted from him: respect, acknowledgement and gratitude. If I wanted him to notice my efforts at home, I should've started by saying, "Thanks for working so hard today." If I was hoping to receive some credit for b ringing three kids to the pediatrician for shots by myself, maybe a better place to start was, "I'm really grateful for all you do for our family."

We can't expect star treatment from our husbands without doling it out liberally ourselves. To do so is horribly unfair. We aren't competing for the prize of "who works hardest." We work differently; both tasks require gargantuan effort, and we each need the labor of the other. We are a team. It's not a contest or a war; we are on the same side.

For a season, Brandon raised the money while I raised the kids. Or course, he parented too, but while he was at the office, I was in mine - a mobile office that included parks, doctors' offices, Little Gym, the backyard, my overstuffed chair in the playroom, the library, Chick-Fil-A, the swimming pool, the kitchen, friends' houses, and the snow cone stand.

Girls, reframe the way you think about your husband's job and the time and energy it requires. He's not slamming back a scotch and water at 11am in order to make his noon tee time. He's laboring too, keeping a roof over your babies' heads and supplying the funds for their organic baby food. I know he's never clipped their fingernails once, but you haven't filled out his expense reports either. Treat him like you'd love to be treated - with appreciation, thankfulness, and compassion.

"This sums up the Law of the Prophets."


Photobucket

January 17, 2011

Baby Love: Sign Language


Babies...so cute and sometimes so frustrating. As a new mom I was always worried about my baby's comfort. How do I know if he's hot or hungry or sick of sitting in a wet diaper? One of the smartest things we ever did was teach each of our kids signs. We used American Standard Sign Language and taught them words like "more", "hot", "all done", "dog", "milk", "hungry", "no" and lots of others. I loved being able to communicate with my babies before they could talk. Imagine your precious little baby crying in complete misery: they know exactly what they want, but they can't get you the obtuse parent to help them! How frustrating for both of you. Then along comes the little squeezing sign "milk" and the light bulb comes on. Life just got so much better for everyone. Course now there are all kinds of studies that have been done that so signing is great for getting their verbal skills in order. For me it was more about establishing another connection with my baby. Another way to see into their precocious little minds.

My oldest child used the signs for a very short time and then began talking. For my second born, she didn't talk in full sentences until she was about two, so the signs were a huge help. I started signing to each baby around 4 months old. They in return started using the signs themselves around 6 months, but I know they understood what I was signing around 5 months. I especially loved being able to sign "no" or "stop" without having to command them verbally in a room full of people. Some signs we made up (these are called family signs). For instance, the photo above shows Super Bear, then aged 10 months using our family sign for "yea!" My kids still remember most of the signs from babyhood and sometimes use them just for fun.

One resource that really helped us learned sign language was Signing Time with Alex and Leah DVDs. They were a fun way to learn signing for me and the kids because they include music and kids themselves. One interesting aspect of watching them was seeing how different kids make the signs slightly different, just like vocal speech. Each child puts their own stamp on the sign, but mommy and daddy will understand and that's the beauty of the whole concept.

There are also a ton of free resources on the web. If I wanted to know a more obscure sign, I went to Internet to look it up. In fact, Misty from Baby Sign Language.com agreed to share a few tips with my readers. This web site is a fabulous resource to see video clips of specific signs in action.

Baby Sign Language Do's And Dont's
Misty Weaver, Baby Sign Language.com

Sign Language For Babies is a really cool way of teaching your pre-verbal child to communicate with you. It is easy to learn and – once you’ve got the hang of it – a lot of fun. To make a start all you need is to learn a some basic signs and practice, practice, practice. Here are some important dos and don’ts for baby sign language beginners…

DO start off with signs you and baby can practice every day – signs like Mommy, Daddy and Milk are great for beginners. You will need to make signing a natural part of your interaction with your baby, so finding signs you can incorporate into all your usual activities works really well.

DON’T forget to learn the signs yourself first. It’s a good idea to practice a few times before signing to your baby. Go to a baby signing class or look up some online resources to help you.

DO practice often. Once you have learned a sign, you should make this sign every time you say the word or do the action with your baby. It is important to say the word clearly, with good eye contact, while pointing to the thing or person you are describing.

DON’T use too many signs. Limit yourself to four or five signs to begin with – you can add more when you and baby are more confident.

DO sign when your baby is alert and not tired, using something which is exciting to her, such as Milk or Mommy.

DON’T forget repetition. It’s important to make the sign and say the word every time you do an action or use an object. Babies learn through repetition and it can take about two months of exposure to a sign for babies over six months to learn the sign and be ready to use it themselves.

DO use baby sign language when you’re shopping, playing, feeding – anywhere you get the chance. Be creative. Make it fun.

DON’T be results-focused. Baby Sign Language is about having fun and learning about each other. The attention and bonding you share with your baby while you are signing is as important as signing itself.

DO be patient with yourself and with baby – if you forget to sign for a day it’s OK. Start again the next day. Give yourself and baby plenty of time. Signing is worth it.

DON’T expect too much too soon. Have fun and enjoy Baby Signing, making it a part of your day. Remember, it can take at least two months of exposure to, and repetition of, a sign for a baby to learn it properly.

DO encourage all your baby’s efforts! Don’t worry if your baby hasn’t got a sign quite ‘right’. Give plenty of praise, attention and eye-contact to show her you are impressed with her efforts. When you and baby are ready you can move on to another group of signs. Encourage all the way.
Photobucket

January 12, 2011

Toralene Casserole - Great Winter Food


My favorite dish as a kid and still a favorite with me and my family. This is what we call Toralene. No one knows why it's called this weird name, just like the Russian Tea. It doesn't really matter what it is called because it's cheesy pasta goodness. This is one of the rare pasta dishes I do make. It's a great dish for cold nights and another fantastic excuse to use my amazing Lodge enameled cast iron pot. I could seriously be a spokesperson for them..anyone from Lodge out there listening??

As always, you can make this your own and adapt depending on what you like and don't like. You really can't go wrong. Change it to ground turkey and fat free cheese (which in my opinion is gross but to each their own), leave out the olives, add in mushrooms. Whatever your family might like. I'd love to hear your adaptations in the comment section.


Toralene


1 onion, chopped
2 tbsp oil
1 lb ground beef
salt and pepper
1 tbsp minced garlic
1 can tomato soup
1 can chopped tomatoes (with garlic and onions if you like)
1 can water
2 1/2 c uncooked egg noodles
1 can corn (or 15 oz of frozen)
1 can black olives
1 1/2 c grated sharp cheddar cheese


Heat oil in large dutch oven (aka a pan you can use on the stove and in the oven). Cook onions until soft, add beef and cook until browned. Drain beef fat off into an empty can (don't put down the sink drain.). If you put it in a can, it will harden and you can toss it in the trash.

Add the garlic. Add soup, tomatoes, a soup can of water, noodles, corn, olives and 1 c of cheese. Mix well. Put remaining cheese on top. Bake at 350 degrees for 45 minutes.
Photobucket

January 8, 2011

Baby Love: The Real Deal on Gear


I remember the first time my husband and I went into Babies R Us to register for our baby shower. Wow. It was completely overwhelming, and not in a good way. I can make me some decisions, but that place was awful. When it's your first, how are you supposed to know what you REALLY need. I had even been reading the parenting magazines (which I'm convinced are in cahoots with the manufacturers because they say to buy everything). Truth be told a baby doesn't need much beyond a car seat, some one piece outfits and diapers. I mean, my parents put me in a dresser drawer to sleep! I did find after trial and error, certain things make life so much easier (and a wipes warmer was NOT one of them). I have put together an Amazon store with some of my favorite things and will be adding more as I think about it this month. You can click on the link down on the right side of the page to get to the actual Amazon store, but I've listed the baby/ kid stuff below. They grow so quickly, so you really don't need much for the infant stage - I promise!

PS. My husband made me say how we love zip up sleepers so it's easy to change their diaper without trying to match up all of those snaps!


A Listmania! list by A. Christian

The list author says: "We started out completely overwhelmed with all the baby gear choices when we had our first child 7 years ago. Since then, we've tried and tested all KINDS of equipment. I'm sharing this list to save you time, money and energy."

BABYBJÖRN Soft Bib 2 Pack - Red/Blue
1. BABYBJÖRN Soft Bib 2 Pack - Red/Blue by BABYBJÖRN

The list author says:

"The easiest to use and clean bib for as soon as they are feeding themselves. Wash it off with soap and water and hang it to dry and it's ready for the next meal. Or you can buy a couple and run them through the dishwasher. Catches all the mess!"
Baby Trend Single Snap N' Go Stroller
2. Baby Trend Single Snap N' Go Stroller by Baby Trend

The list author says:

"I'm ridiculous about strollers. I've owned 12! Seriously. I've finally resigned myself to realize I need a couple to serve all purposes. This snap and go is perfect for using with an infant seat. It's light (recovering from a c-section that's important) and fits in all cars. No moving the baby from the car seat and gets you where you need to go. No frills needed, it's an infant after all!"


Maclaren Techno XT Stroller, Black
3. Maclaren Techno XT Stroller, Black by Maclaren

The list author says:

"Lightweight and portable. This is the best stroller for a child who can sit on their own. Folds up small."

BABYBJÖRN Little Potty - White
4. BABYBJÖRN Little Potty - White by BABYBJÖRN

The list author says:

"No nooks and crannies that you can't clean, which are so gross. Small, can be taken on the road easily."


Peg-Perego Prima Pappa Best High Chair, Paloma

5. Peg-Perego Prima Pappa Best High Chair, Paloma by Peg Perego USA

The list author says:

"Highchairs take an everyday beating. The kids push it around and of course they bang and drop food all over it. This tray cover covers the WHOLE tray area so you don't have to clean two parts. The padded seat can be wiped down: dry and ready in time. We replaced the padded seat after 2 kids because it got smelly and torn. We like that you can take the five pt harness and make it a lap belt."


Baby Trend Diaper Champ Deluxe, Blue
6. Baby Trend Diaper Champ Deluxe, Blue by Baby Trend

The list author says:

"I read the new ones aren't as good as the older ones, but I love that it uses regular trash bags and it really does keep out the smell."

Evenflo Triumph Advance LX Convertible Car Seat, Harbortown

7. Evenflo Triumph Advance LX Convertible Car Seat, Harbortown by Evenflo

The list author says:

"Great convertible car seat. This one transitioned us out of the infant seat (still rear facing) to a booster when the kids got too tall for this one. I would say we used it from 6 months to 3 years old.

Lansinoh 20265 Disposable Nursing Pads, 60-Count Boxes (Pack of 4)

8. Lansinoh 20265 Disposable Nursing Pads, 60-Count Boxes (Pack of 4) by Lansinoh

The list author says:

"I nursed my babies for one year. I leaked when I nursed, I leaked when the baby went too long between feedings, I leaked when I heard other people's babies cry! I tried washable and they stayed too wet, other pads shifted too much in my bra and were bulky. These are the only ones that were thin and actually worked."
Summer Infant Tiny Diner, Green
9. Summer Infant Tiny Diner, Green by Summer Infant, Inc.

The list author says:

"Love this for the feeding themselves stage and on the go. It stays in our diaper bag for restaurant visits. Forget those disposable ones, what a waste. This one you can dump out the big leftover chunks and wash the smaller ones at home."


Solar System Placemat by Crocodile Creek
10. Solar System Placemat by Crocodile Creek by Crocodile Creek

The list author says:

"We use these at home. Thin, educational and easy to wash. The kids love all the varieties. The only thing I don't like about them is you can't scrub too hard or the design will scratch off."

Cloud b Twilight Constellation Night Light, Turtle

11. Cloud b Twilight Constellation Night Light, Turtle by Cloud b

The list author says:

"a fun nightlight for all of my kids"


Graco Nautilus 3-in-1 Car Seat, Matrix

12. Graco Nautilus 3-in-1 Car Seat, Matrix by Graco Baby

The list author says:

"Perfect for the big kid in need a comfy booster seat, but this thing is heavy."


Fisher-Price Infant-To-Toddler Rocker, Blue/Green
13. Fisher-Price Infant-To-Toddler Rocker, Blue/Green by Fisher-Price

The list author says:

"I love that this seat has stood the test of time through four kids. The bigger ones can even sit in it without breaking it until I spot them and remind them they are too big! Has a stabilizer for times you don't want anyone to rock the baby."
Safety 1st Kirby Inflatable Tub

14. Safety 1st Kirby Inflatable Tub by Dorel Juvenile Group

The list author says:

"Perfect for the baby who is too big for the infant tub, but too small for the big tub. We take this when we travel too since it's inflatable."
Safety 1st Space Saver Fold Up Bath Tub, Blue
15. Safety 1st Space Saver Fold Up Bath Tub, Blue by Dorel Juvenile Group

The list author says:

"Great first tub for the newborn and infant. No slipping, no mesh parts to wash, no stinking fabric, and it folds up for storage. Doesn't hold much water, but that's better for the baby's safety. I really LOVE this tub and we had three before we arrived on this one."

Fisher-Price Laugh and Learn Fun with Friends Musical Table

16. Fisher-Price Laugh and Learn Fun with Friends Musical Table by Fisher Price

The list author says:

"All the kids love this toy. The baby can watch it and bat at the dangling parts. Then it changes to be a piano for a sitting baby and finally a standing piano."


LeapFrog Learn & Groove Musical Table
17. LeapFrog Learn & Groove Musical Table by LeapFrog

The list author says:

"Fun music, lots of activities, has lasted for all the kids. This toy was worth the money and the space it took to store it (the legs do come off). My highest recommendation."
Graco Snugride Infant Car Seat, Platinum
18. Graco Snugride Infant Car Seat, Platinum by Graco


The list author says:

"Still the best carseat for a newborn. Love the safety ratings and the price."

Photobucket


January 6, 2011

Baby Love: Packing a Diaper Bag

I have been submerged in babydom for a few months. This is our sweet littlest one. Yes, all four of my babies were born with a ton of crazy sticking up hair and no...I didn't put product in it. She's just started her oh-so-cute smiling, couldn't you just eat her up??

All of the milestones we've been through time and again, we are reliving for one last time and so they are all the more precious. I will miss having a late night bathtime with a newborn and their wonderful baby smell, I will miss having them snuggle in bed for a breastfeeding session. I will miss little tiny clothes and big beautiful eyes that seem to take over their chubby faces. My baby is already 3 months old and I want to slow it all down! I do, however, love watching them develop into little people. Each time I am fascinated when they discover their hands, or start smiling, or suck on their pudgy toes. I love introducing them to new foods and watching their reaction. Teaching them how to communicate and seeing the lightbulb come on - eureka! Because I'm so baby-brained right now, I am going to devote the month of January to baby stuff on the blog. If you come for the food, stay with me, I'll be back to that in February. In time to celebrate my big 4-0 with some of my favorite foods.

I am starting this series off with something I always get asked - what do you carry in your diaper bag?

With the first baby, seven short years ago, we used the free diaper bag that comes with the free formula sample. Mostly because I didn't want to carry Winnie the Pooh and there weren't too many other choices. Now there are a TON of choices and they are way-more stylish. However...the decision I made when #2 kid came along to convert to a backpack diaper bag was the BEST choice ever. We ordered our diaper bag from Lands End and had our last name put on it so we can use it at the church nursery (please people, put your kid's name on their bags). Land's End does not sell this bag any longer, they have changed it to a weird looking convertible type bag. I did find this Skip Hop diaper bag that looks like a great choice. I may not look at stylish as you uber cute moms with the shoulder straps, but I've never bonked my kid in the head as the bag slides down my shoulder either. I seem to always choose practical over stylish. Having a backpack means my hands are free for other things, like keeping my wild kids safe in the parking lot or carrying that HEAVY infant seat.

Here is our diaper bag with contents unloaded. I originally took all this stuff out so I could wash the bag which I do about every year. When I'm done, it seriously looks brand new! I love the light blue lining so I can find stuff in there and the changing pad which doubles as padding for your back. I can wear this thing all day and not be uncomfortable.


There are four compartments and this photo shows everything that is in the biggest one. I always keep a camera in there because you never know when there is a cute moment with kids. I have a snack bag - a ziplock filled with little munchies for when we are out and they are starving. The bag gets tossed every six months or so since invariably things accumulate in the bottom of it. I've got tissues, band aid, lotion, sunscreen samples, hand sanitizer, and right now with a newborn: a nursing cover, burp cloth and change of clothes for her in case of the dreaded blowout.


In the next smaller pocket I keep the diaper "station". Wipes, diapers, diaper cream, and extra pull up if my potty trained 2 year old has to take a nap somewhere unexpectedly, and grocery bags for stinky diapers or soiled clothes.

I use the next pocket for anything that I need to take with me at the moment, so often it stays empty. I could put my grocery list, coupons, or work stuff. It's the pocket I always empty at home.


The smallest pocket is for me only. It has my cell phone (yes, I got an iphone for Christmas woo hoo!), wallet, keys, pen and my business cards.

Recently I had dinner with a friend who has four kids (you know who you are) and she said she just throws a diaper in her purse! I was amazed and told her so. My kids would invariably want a snack or get a boo boo that needed a band aid. I would be lost without my diaper bag!!

Photobucket

LinkWithin

Related Posts Plugin for WordPress, Blogger...