I saw these great looking pom poms in Martha Stewart Living magazine and knew I wanted to make them for our playroom. They were super easy and really took no time to make. I do recommend using heavy duty tissue paper and not the cheapy thin kind. That way when you pull the layers apart - very gently - you don't rip the tissue and they also look fuller. You also need scissors and a little bit of thin floral wire
I made another one in red for the boys room because they turned out so cute. I hung the ones in the playroom along with a lime paper lantern I got from Hobby Lobby using fishing line so you wouldn't see it. You could also use ribbon to hang them. After a friend of mine saw these, she went and made pink and white ones for her baby girl's nursery, which looked fantastic.
Here are the step-by-step directions from Martha. I've also included my two cents from my experience.

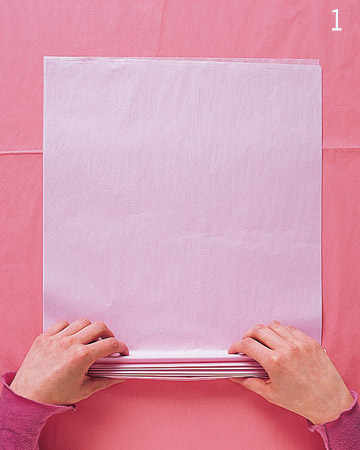
Step 1
Stack eight 20-by-30-inch sheets of tissue. Make 1 1/2-inch-wide accordion folds, creasing with each fold.

Step 2
Fold an 18-inch piece of floral wire in half, and slip over center of folded tissue; twist. Also, I wasn't the most perfect folder, so my ends when folded looked more ragged than this photo, but it doesn't really matter due to the trimming you do next. With scissors, trim ends of tissue into rounded or pointy shapes. My orange pom pom is trimmed with rounded edges and my yellow one is trimmed with pointed ends to give you an idea of the difference.

Step 3
Separate layers, pulling away from center one at a time. I can't stress this enough, this is the most time consuming part of the project. You must be GENTLE and slow when pulling the layers apart. You should also pull them apart all the way to the center where the wire is. This will give it fullness and body.

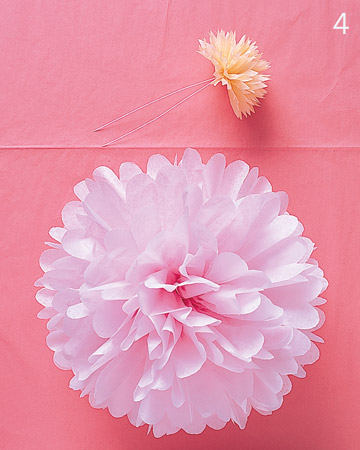
Step 4
You should now have a fluffy ball of tissue (see photo above to make flat one sided for flowers). Bend wire into a loop and twist to secure. This will hold the hanging filament or ribbon.
I hung mine with fishing line so you couldn't see it. They are a perfect, fun, inexpensive and easy decoration for just about anywhere. You could use them for a birthday party or baby shower.

No comments:
Post a Comment
I love reading your comments!! Write more, write often. I will respond to each of them either here or on your blog (if you have one). Thank you for spending time with me - come back soon and share the love on pinterest, facebook, twitter or however you social network.