Showing posts with label snacks. Show all posts

May 30, 2013

Cranberry Cheesecake Shakes

 
This was a start of the summer treat for my kids. It turned out with a beautiful pink color that would make a great drink for a girls summer party. Frosty pink happiness!

I keep cranberries in my freezer year round, because I love their tartness and they freeze so well. And then I always have cranberries to make Cranberry Coffee Cake or Cranberry Spice Granola or good old fashioned cranberry relish, which should not be relegated to just the Thanksgiving table.

I remembered years ago I tore a page out of Family Fun for a cranberry milkshake. I thought it was a little strange, but why not? Today was finally the day to make them. All the kids liked the recipe, since ice cream before dinner is a big deal. I think next time I'll actually make them with ricotta cheese instead of the cream cheese. I also used sweetened almond milk which I think added another layer of flavor, but you could use the original plain milk.

Cranberry Cheesecake Shakes
1 c cranberries
1 1/2 c almond milk
2 tsp vanilla
3 oz cream cheese or ricotta cheese
vanilla ice cream

Put the cranberries and milk in the blender. Pulse until smooth and a beautiful pink. Add vanilla and cheese, pulse again. Add enough ice cream to fill the blender and make a thick rich shake.

You could also add some vanilla whey protein powder to this one easily.


Photobucket

February 8, 2013

Moose Munch - Chocolate Covered Caramel Popcorn


See. I wasn't kidding.

I've been making everything. Chocolate covered caramel popcorn this go round.

My Mom made this addicting stuff for us for Christmas. It's a take on Harry and David's Moose Munch. I figured it would make great thank you gifts. One bag to a neighbor who has taken care of my kids during all this chaos and another bag to our marriage mentors, who keep us from taking the stress out on each other. The problem was: I tried it, the kids tasted it and I let my husband taste it. We ate the whole recipe! It's that crazy good.

There is no way you can eat just a little bit of this stuff. You have been warned. Make a double recipe and give a bag to your loved ones for Valentine's. Attach a note to let them know how much you love them. Send it to someone you haven't seen in a while and you miss. Don't wait for the "perfect time" to reach out. Now is the perfect time.


Chocolate Covered Caramel Popcorn

Ingredients
8 c popped popcorn
1 stick butter, cut into fourths)
3 tbsp corn syrup (the recipe will work without this, but the caramel won't be shiny or as crunchy)
1/2 tsp salt
3/4 c brown sugar
1/4 tsp vanilla
1/4 tsp baking soda
chocolate chips (Mom choose dark chocolate)
peanuts, m&m's, mini marshmallows (optional)
Preheat oven to 300 degrees.

Remove all unpopped kernels from popcorn and pour popcorn into a large bowl. Combine butter, corn syrup, salt and brown sugar in microwave safe bowl. Cook on high until mixture boils - watch this carefully - don't let it boil over. Remove, stir and microwave for another few minutes. (Or you can do this in a pot on the stove over med-high heat).  Cook and stir until mixture boils. Remove from heat and stir in baking soda and vanilla.
Pour caramel over popcorn and stir to coat. Work quickly before the caramel cools. Spread onto silicone lined (or greased) baking sheet and bake for 10-15 minutes (10 for chewy, 15 for crunchy).
Remove from oven and add chocolate chips, stir around on sheet to melt the chips. You can also melt the chocolate and drizzle over the popcorn for a fancier look. 
Photobucket

January 5, 2013

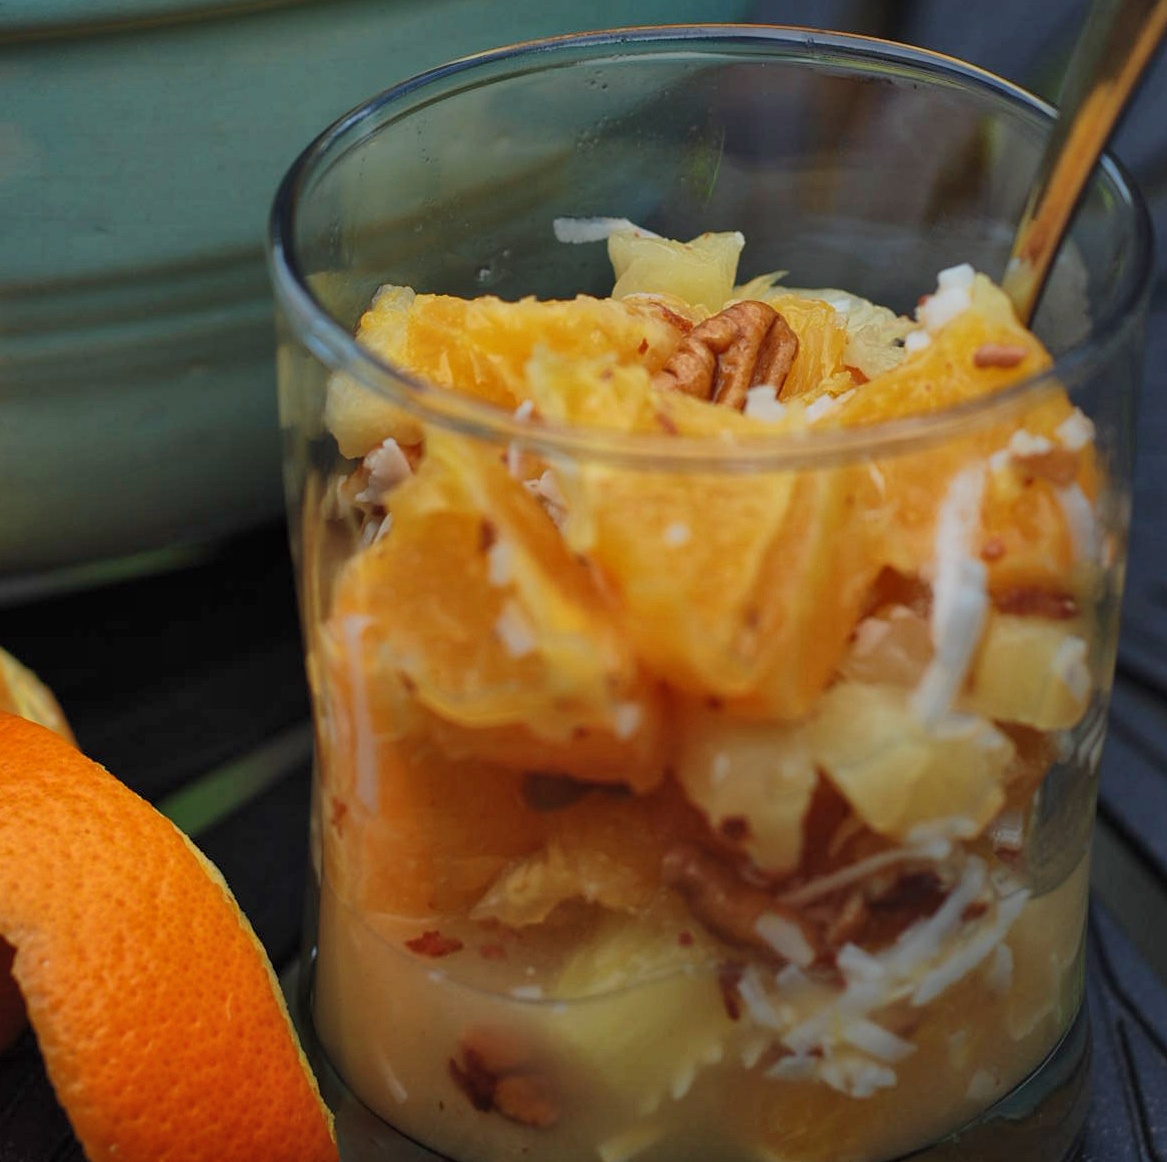
Ambrosia: Orange Pecan Salad


Ahh, the smell of a fresh new year! What a pleasure this time of year is for me. I love the quiet space after Christmas and before schooling gets in gear again. I have enjoyed laying around and doing...nothing.

And don't worry, my family is still eating, I just have not been posting. I've...been...lazy (gasp). Sometimes I have to take a break from routine or I think I will go crazy. The mundane of laundry, dishes, even getting dressed, just gets old to me every once in a while. I've been this way for as long as I can remember. Even when I was a teenager, life would just get "boring". It usually takes something fun and exciting to bring me back into motivated mode. At this moment in time, I have something REALLY exciting to look forward to!

I'm taking my two oldest kids to Disney World for the first time. I can't wait to see the magic of Disney through their eyes. I'm practically giddy with joy now that we are in the actual month of departure!! My husband jokes that the kids are along for MY vacation, not the other way around.

All the planning and waiting is finally coming to fruition and it's going to be great. Of course, there is one down side to Disney - the food. It's expensive and not delicious. Maybe I'm wrong, maybe things have changed since I was there 13 years ago, but I remember being glad I brought my own snacks. As I've mentioned, I can only handle so much junk food before I'd rather not eat. So part of my packing preparations are putting together healthy snacks and thinking about what we can eat quickly in the condo for breakfast or a late night snack.

Since we will be in the Citrus State, we will be enjoying grapefruits and oranges straight from the orchard. I plan on bringing bags home with us to share with the little kids and my husband (who are all staying home). This is one of our families favorite ways to enjoy citrus.

Ambrosia Salad

Ingredients

1/4 c pecans
6 oranges
1 grapefruit (optional)
1 can pineapple pieces (optional)
1/4 c sugar
1/4 c shredded coconut

Toast pecans in a dry skillet or toaster oven tray until they smell fragrant and lightly brown. Watch carefully so they don't burn). Let cool.

Slice the peel off the oranges, starting with the top and bottom. Then slice off the sides. When the pith (white part) is gone, slice knife in between each membrane and loosen the orange. Do this over a bowl to catch all the juices. Plop the segmented orange into the bowl. Repeat with grapefruit if you desire. Add pineapple to the bowl. Add sugar and stir. Add coconut. Chop the cooled pecans and add to the bowl. Give a good stir and then store in the fridge until you are ready to serve. Ah-maz-ing!


Photobucket


November 16, 2012

Apple Pie Smoothie


Perfect fall goodness in a cup. It's a guilt free apple pie smoothie. All of the flavor and sweetness of an apple pie, but healthy enough to drink after a run.

I made this one up because I like to drink a smoothie after working out, but I didn't have any fruit other than apples laying around. I have never blended a whole apple, only apple juice. Turns out the fiber makes it pretty filling. The kids tried it the next day and loved it, so we have a new smoothie in the rotation. I wonder how it would work as a popsicle in the summer?

We had these wonderful apples that we picked in Ellijay at our favorite stop: R&A Orchards like we have in previous years. This year was pretty hard on the harvest. Warm crazy weather will reek havoc on an orchard. All of the apples were dropping right off the trees and the Georgia Apple Festival hadn't even occurred! We managed to pick a few and of course I bought bags and bags of "seconds", which are perfectly good apples in my opinion. I made a bunch of applesauce, but no apple butter this year. I was going to make Apple Pie Soup and that's where the revelation came in - ah ha - I could make a smoothie with apples. Apple Pie Smoothie! 

Apple Pie Smoothie
1/2 small apple, peeled, cored and chopped
1/2 tsp apple pie spice
2 c vanilla almond milk 
1 scoop protein powder, optional
ice cubes

Put it all in a blender and whir into a creamy smoothie. 


{Almond milk is a new product in our household and we have enjoyed it. I like it because it keeps much longer than cow milk. I used Silk brand almond milk, pictured here and it's already sweetened, so I didn't add any sweetener to this smoothie. You could use milk and add honey and almond or vanilla flavoring if you like.}


Photobucket

October 22, 2012

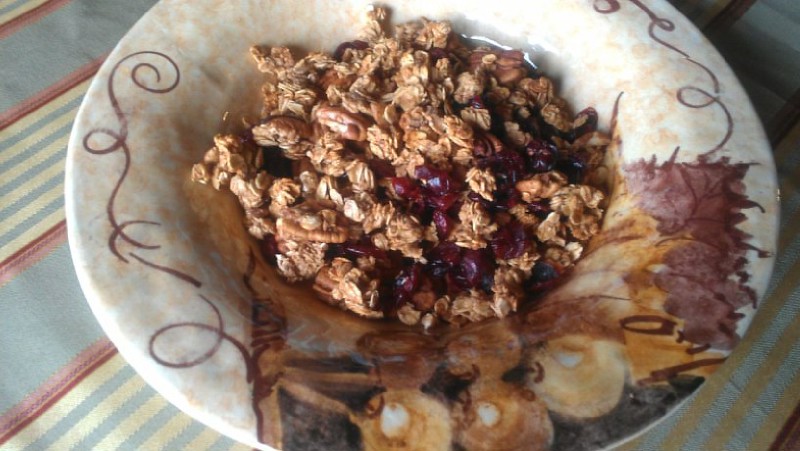
A Friend's Cranberry Pumpkin Spice Granola

Blogging is weird. I mean it's kinda like that Julie chick described in Julie and Julia. You put your thoughts and ideas out there and no one reads them. Then time goes by and someone might actually leave you a comment. You join a few networking sites and suddenly more people are reading YOUR thoughts and recipes. Then you become famous and are offered a book deal (well at least my husband wishes it worked this way for me.)

In any case, you start seeing some people around the virtual water cooler that you might actually like to have an extended conversation with. People who seem nice, not like stalkers, at least as much as you can tell online. Sometimes one of these individuals turns out to be someone you would actually like to be friends with - like in real live life. This happens so rarely that it's thought to be an urban legend. I'm hear to tell you, it's not legend. It has happened to me.

I met someone in the blog world that I really like. She's self-effacing, kind, to the point, and a great cook. I know I could ask her any cooking question that I needed help with and she would go all out to answer. She gardens in a BIG way with fruit trees, herbs and vegetables. And she practices the old fashioned art of canning, so I don't feel like a crazy person around her.

She is one of those people you really, really hope will invite you over for dinner, because you just know it will be better than the fancy restaurant around the corner. She is my special foodie friend.

There is only one thing that stands in the way of BFF status...she lives on another planet. Ok, it's really only OK, but Oklahoma is seriously far away. I mean it's the west. Yes, ye of the windy plains and surreys with fringe. Someday I may visit, but it's gonna take some effort!

In the meantime, my sweet new friend, Debra and I communicate through email. We've laughed over our manly men and their need to kill woodland creatures. We have a virtual canning party planned for next peach season. I've offered to send her cranberries when her local store ran out. (Apparently there is not a strong desire for cranberries off the east coast - go figure.)

I was actually looking at her blog, Eliot's Eats (named after her beloved cat) just this weekend because I needed some inspiration. The funny part is, I was assigned Eliot Eats as my Secret Recipe Club pick. Shock! Imagine my delight. Especially, since this will be my last SRC post. I just have decided to move on and let someone else have my spot from the waiting list. I knew the granola that I had on my pin list was the recipe I would pick from Debra, even though there are a ton of other great recipes on her blog.

My family goes through granola like we go through everything else - way too fast. I figured making Debra's recipe would maybe make them slow down and enjoy it, instead of scarfing.

I was wrong. Yes, I admit it.

My family LOVED this granola and therefore decided to eat it for breakfast,  lunch and snack (they were a little surprised it had pumpkin in it, because you can't really taste it). I used a small container of oatmeal to make the recipe - about 6 cups, next time I will make the giant 42 oz container. I was actually trying to take the photos for you all when a small two year old child snuck over to me and proceeded to eat my photos!

She was very delicate with her sneaking. When I called her out for her transgression, she gave me this face. How could I say no??

Before I knew it, there was another (not so small) child eating my hard work. I'm telling you, food does NOT last long around here!


Here's Debra's recipe and yet another reason I like Deb. She gives you the links to where she got the recipe from and even the original recipe link. I love reading through all the iterations, so for me, that's a treasure. I was actually thinking pumpkin seeds would be great in this and it turns out one of the other folks did that too. See, each person adds a little knowledge and depth to the original recipe. Brilliant.

Cranberry Pumpkin Spice Granola
from Eliot's Eats

Ingredients
1 18 oz container old fashioned oats
1 c pecan pieces
2 tsp cinnamon (OR you can sub 2 tsp pumpkin pie spice for ALL of the spices: cinnamon, cloves, ginger, nutmeg, allspice and cardamom)
1/4 tsp cloves
1/2 tsp ginger
1/4 tsp nutmeg
1/8 tsp allspice
pinch ground cardamom (optional)
1 tsp salt
1/2 c brown sugar
1/2 c pumpkin puree
1/2 c applesauce
1/2 c maple syrup
1 tsp vanilla extract
1 c minced fresh cranberries

Preheat the oven to 325° F. Line two baking sheets with parchment paper or a silicon pad and set aside.

In a large bowl, combine oats, pecans, spices and salt. Carefully toss to mix well.

In a medium bowl combine brown sugar, pumpkin puree, applesauce, maple syrup, and vanilla extract. Whisk until smooth. Pour wet ingredients into large bowl with oat mixture and stir until the oats are evenly coated. They will be moist. Add cranberries and stir again. Evenly spread half the mixture onto each of the prepared baking sheets.

Bake for 20 minutes. Stick your hand into the hot oven and stir, all while being careful not to burn the skin off your hand - don't ask, just remember Burn Stuff is the best burn product on the market. 

Bake for an additional 15-20 minutes or until the granola is golden and crisp. Remove from the oven and let cool. Store in an airtight container.

To my sweet foodie friend Debra, thank you for bringing joy into our life. You know I'm still here for you if you need cranberries!! I completely forgot to tell you, I made venison stew with Coke the other day - it was delicious. If you are ever in Georgia, come for dinner.

A big thank you also to the ladies that run Secret Recipe Club. It has been a blast these past couple of years. I'm proud to have been part of it. Thank you for making the introductions to my new friends.
Photobucket

August 26, 2012

Carrot Orange Muffins


We are back from vacation and settled into the routine of school. For the first time ever we have an actual schoolroom to have our homeschool class. We ended up bunking the boys together and the girls together and that gave us an extra bedroom to finally dedicate to homeschooling. It's wonderful to finally have all of our books, supplies, art stuff and science kits all in one place!! Before, we forever carting things around the house and trying to keep the baby from getting into them. There have been plenty of times when scribble magically appeared on someone's workbook. That baby is so smart, she can already operate my cell phone and the dvd player!

Back to school or back to homeschooling, however you roll in your house, you are gonna need to eat. These are the BEST snack, breakfast or lunchbox muffins going. My kids loved them and I'm sure yours will too. They have lots of good stuff in them including nuts for protein. I used pecans, but you could use walnuts, cashews, whatever you like. 

These freeze well. Do what I do and wrap each one a plastic wrap and then throw them all in a freezer bag. When you need one, just pull it out. They thaw very quickly and it's such a timesaver!

Carrot Orange Muffins

Ingredients
1 c flour
1/2 c brown sugar
1/3 c grated carrots
3/4 c oats
1/2 tsp cinnamon
1 c buttermilk
3 tbsp butter, melted
2 tsp baking powder
1/2 tsp baking soda
2 oz roasted nuts, chopped
1/2 c dried apricots, chopped finely
1 tbsp poppy seeds
1 lg orange, zest and juice
1 egg
1/8 tsp salt
1/3 c granola cereal

Preheat the oven to 400 degrees.

Mix the flour, baking powder, soda, cinnamon, salt and sugar in a large bowl. Add nuts, carrot, apricots, poppy seeds, oats and orange zest. Mix well.

In a medium sized bowl, mix buttermilk, egg, melted butter, and orange juice. Pour this wet mixture into the dry mixture bowl and stir together lightly with a spoon. Leave lumps. Lumps are good when making muffins or quick (non-yeast) breads.

Spoon mixture into greased or lined muffin pan. Bake for 15 minutes.
Photobucket

June 18, 2012

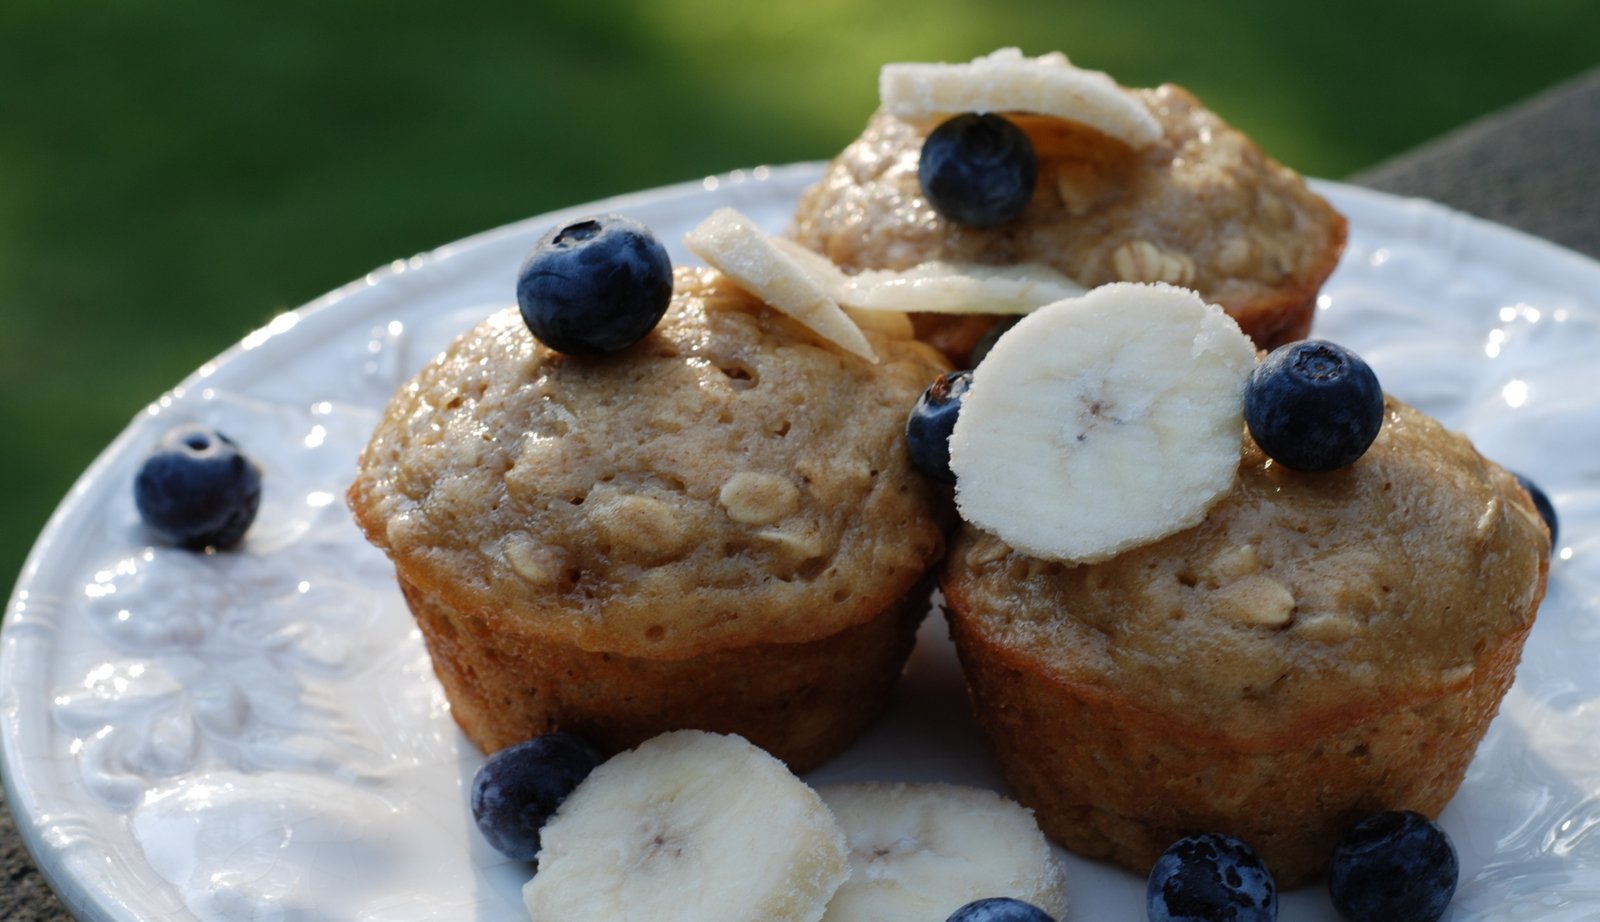
Baked Oatmeal Cakes

For Father's Day breakfast I wanted to make something quick this year. Usually we go all out and cook eggs, bacon, grits, pancakes biscuits, fruit salad, sausage, jam, honey, coffee, orange juice - pretty much everything breakfast! My husband adores breakfast, so it's how we celebrate. This year we went out on a limb and changed things up. We grabbed a quick breakfast and headed to the Atlanta Botanical Gardens to enjoy this incredible weather. It has been absolutely perfect outside lately and we've taken advantage of every moment. Lucky for me, when searching for my special breakfast, I had an easy place to start. It was Secret Recipe Club time and I was assigned the food blog NYCityeats. The blogger, Lacy has tons of breakfast recipes. The girl likes her breakfast, strike that, the girl likes her food. So nice to be in good company.

I searched around the blog, but quickly decided on something with oatmeal, since I'm a little obsessed with the stuff. All you have to do is search my blog with the word oatmeal and you'll come up with all kinds of things, like oatmeal bread, oatmeal snack bars, instant oatmeal, and the ever requested "Help Yourself Oatmeal". Lacy calls these "Granola Mini Cakes" which sounds pretty fancy, but in my house we named them Oatmeal Cakes. The recipe was very simple and I actually put together the batter the night before and then baked them in the morning. I didn't make the icing from the original recipe, but I did add a little extra sugar to the batter. We scarfed them down with a few slices of bananas and some freshly picked blueberries from the backyard. This was a easy fast breakfast that the whole family enjoyed. MacGuyver was very thrilled with his Father's Day presents: a homemade birdhouse, newly stained picnic table and lawn marking spray (so we can have soccer and football games in the yard). And I think he enjoyed breakfast, although he did mention, he'd like eggs next weekend. :) I love you babe!! You are the most wonderful Daddy around.


Baked Oatmeal Cakes
Note: this only makes 6 cakes, so you may want to double the recipe
Ingredients
2/3 c flour
1/4 tsp baking soda
1/4 tsp cinnamon
1/4 tsp salt
1/3 cup brown sugar
1/3 cup sugar
3 tbsp vanilla nonfat yogurt
1 tbsp oil
1 tsp vanilla extract
1/2 c milk 

1 egg
2/3 c oats

Preheat oven to 350. Whisk flour, baking soda, cinnamon & salt together in a small bowl. Mix sugars, yogurt, oil, vanilla,egg and milk in a large bowl. Stir in dry ingredients & oats until blended. Scoop 1/4 cup batter into 6, nonstick spray coated, muffin cups & bake until toothpick inserted in center comes out clean, about 20 min. Serve immediately.


To see all of the recipes that were secretly made, click on a thumbnail below.

Photobucket

May 3, 2012

Kiwi Kale Smoothie

 
I have a confession to make, I've never tried a green smoothie, until now. Something about greens shredded up in a blender, just did NOT sound delicious to me. I love salads and adore my seaweed wrapped sushi, but mixed up with my favorite fruits...nah, I would always pass. It was way too Dr. Seuss- like. "I do not like green eggs and ham Sam-I-Am."

Last week, when my sweet friend Amy passed along some kale with that kohlrabi I figured I would saute it up like I normally do with greens like swiss chard or make these kale chips like I've done in the past.. But something on that stinkin Pinterest caught my eye (yes, I have an addiction and the boards to prove it). Those crazy green smoothies. They looked, well... yummy.  How bad could it be if so many people drank them? I had the kale and it was hot outside. Which at our house means I should be making smoothies or doling out popsicles. I figured if it was terrible tasting, I could always foist it off to the baby, because she'll eat/ drink just about anything. So I threw caution to the wind and made my first green smoothie!

I had a big bag of kiwi's from Aldi in the fridge. Hey, they are green and they would disguise the greenness of the kale. I had some apple juice and frozen bananas to sweeten it because adding my normal yogurt/ milk didn't seem right with vegetables.

Turns out this concoction was delicious, which probably most of you already know. I'm sure I'm the last green smoothie holdout, right? (It's like texting, I'm slow on the bandwagon, but I'm on now.)

This thing was REALLY tasty. Everyone liked it and asked for seconds. The baby finished hers first and was going around trying to steal from the others. So here's my endorsement, if you've never tried it, you might just like green smoothies....and ham, Sam-I-Am. Now please excuse me, I headed out to buy some kale.
Kiwi Kale Smoothie
8 leaves kale
1 c water
2 bananas, frozen is better but not necessary
3 kiwi, peeled
1 c apple juice
ice

Strip the kale off the stem just like you do with flowers. Hold the stem with one hand and pinch it with the other and pull up until the leaves slide off the stem. (Need a step-by-step of what I'm talking about?)

Stuff the kale into a blender. Add water. Blend until you have a very green smooth pulp. Add the banana, kiwi and apple juice. Blend again until smooth. Now top off your blender with the ice and whirl until you have a frosty smoothie. Serve immediately with straws for fun. :)


Photobucket

April 22, 2012

Cheesy Crackers

We made these delicious, crispy cheese crackers in animal shapes to celebrate the arrival of spring. We made them in small animal shapes like pig, bunnies, and chicks. Please note: no animals were harmed in the making of these crackers! ;)

These are little like Cheeze It's but way better! Maybe more like a cheese straw (if you are from the south). They were for a preschool snack and were a big hit. What kid doesn't love cheese and crackers??

Besides the rolling out part, they were really easy. They were delicious plain, but you could serve them with a soft dip or hummus. They are pretty brittle, so it would need to be a smooth dip to keep them from breaking.

Cheesy Crackers
from Family Fun Super Snacks
Ingredients
1 1/4 c flour
1/8 tsp baking powder
1 c (4 oz) grated sharp cheddar cheese
1/2 c cold butter, cut into chunks
1 tbsp and 1 tsp ice water

Preheat your oven to 400 degrees. Pour flour and baking powder into food processor and turn on to combine. Add the cheese and the butter. Process until well mixed. Add the water and process again. You should end up with a dough like below.

Since we mixed the entire thing up in the food processor, it was easy clean up, we just tossed the parts in the dishwasher.

We rolled out dough out to 1/8 inch thick, but I think a little thicker would have been better. Use plenty of flour on your rolling surface and pin. Cut into your shapes with cookie cutters and place on an ungreased sheet pan. You know I'm going to say, use a silpat here! ;)

Bake for 7-9 minutes until the bottom is golden. Cool on the baking sheet. Store crackers in Tupperware for freshness.
 Photobucket

April 4, 2012

Mango Lassi Drink

 
We just got back from a wonderful vacation in Maryland and Virginia. We travelled around the coast and saw LOTS of the Chesapeake Bay. I miss living in the in area every time I go back, but then I look at the housing costs and I realize why we live in Georgia. One thing I loved while we were up there was all of the great ethic restaurants. We ate Vietnamese, Indian, Persian, and seafood. All of those make up for the awful food that I feel makes up most "American" restaurants. I get so sick of seeing chicken fingers and mac n cheese on kids' menus that I want to scream. I mean...really my kids don't want that junk everyday and I sure don't want them to eat it. Where are the veggies in today's restaurants?? We all felt a little better when we ate at the Vietnamese place and could enjoy the large adult portions to share. With four kids, we will order three adults entrees and share everything between us all.

We all enjoy the fresh taste of a mango lassi when we eat Indian food. We sometimes order tandoori chicken, spinach paneer, naan, vindaloo, lamb kabob, or aloo matar gobi. About the only Indian recipe I ever make at home is the mango lassi. It's easy and doesn't require a ton of spices. In fact, if you made the Chai Tea recipe (which is the other Indian recipe I make at home), you have the one spice you need, cardamom. You could always use the leftover cardamom to make this beautiful bread wreath for Easter.

Lassi's are a creamy yogurt drink that my kids love. They will often request it for a birthday party menu. It's so easy to make at home and perfect for an afternoon snack.

Mango Lassi

Ingredients
2 sm ripe mangoes or 1 large
3 Tbsp sugar
1 c yogurt
1/2 c milk
ice (optional)
Peel the mango and section the flesh. The best way to do this is to cut the entire fruit all the way around with a paring knife twice. In other words cut through the skin all the way around the fruit from top to bottom and then turn it 90 degrees in your hand and cut top to bottom again. Then you have a section of skin to grasp at the top that you pull off if the fruit is very ripe. If the skin does not come off easily your fruit is not ripe enough. When you get the skin off you need to cut the fruit away. The pit of a mango is shaped like a flat oval and it's pretty big so keep that in mind when you are cutting.
The fruit goes into the blender with the other ingredients. Blend on high until creamy and smooth. I like to add ice and blend some more at this point to make it more like a smoothie, but that depends on your personal tastes.
 
Photobucket

February 20, 2012

Soft Pretzel Bites


Two months ago I started participating in what's known as the "Secret Recipe Club". You may remember the homemade Butterfingers. The fun of this adventure is discovering new recipes and bloggers, never knowing what to expect. It's all a big secret until Reveal Day when we all find out who made what from who's blog.

I opted for something salty this time - Soft Pretzel Bites. I've made Soft Pretzels before but we made them in the traditional twisted shape. This recipe forms them into much easier to shape "nuggets". The other difference that I was curious about is the use of butter in making them instead of shortening. I wondered if it would change the texture or make the dough more difficult to work with. I'm happy to said it did neither and this dough worked perfectly for us. Just keep in mind, using butter means these pretzels won't keep fresh as long as the shortening ones, so plan on eating them or freezing them. I did both and the frozen ones were just as delicious when thawed on the counter at room temperature.
The recipe comes from the blog Making Memories created and nurtered by my twin-in-another-life, Erin. Just like me, Erin is a little obsessed with Family Fun magazine. All you have to do is search either of our our blogs for Family Fun and you'll see tons of things we've done - many of them the exact same projects (we just made the gumdrop arrows for Valentine's Day)! I actually cracked up when I saw the header photo on her blog because she has a photo of the milk jug Halloween ghosts just like the ones hanging in our basement right now!! Now if we could just get Family Fun to hire us as testers - right Erin?

Erin is one of those people that I'm in awe of. She's a single mom with two precious kids. I really am amazed at single moms. I mean there's no break, no..."wait til your Daddy gets home to deal with you". And she's not just going through life, she's making a FUN life with her obviously happy kids. She makes time to say, "yes" and I love that about her. Much of her blog is creative and clever ideas for crafts, gifts or goodies. When I read the recipe for Soft Pretzel Bites it sounded like she decided to make them almost as a challenge and she was pleasantly surprised at the results. They turned out better than she expected and easier than she expected. I hope you take the yeast challenge and your results are as delightful as Erin's.

Soft Pretzel Bites
(recipe originally adapted from Bobby Flay)

Ingredients
1 1/2 c warm water
2 Tbsp brown sugar
1 pkg active dry yeast (or 3 tsp of bulk yeast)
1/3 c unsalted butter, melted and cooled
2 1/2 tsp Kosher salt
4 1/2 c flour
vegetable oil
-----
6 c water
3/4 c baking soda
-----
1 egg beaten with 1 Tbls. cold water
Coarse sea salt, poppy seeds, sesame seeds

Combine water, yeast, brown sugar in glass measuring cup to allow yeast to proof (which is a fancy way of making sure the yeast is alive and awake). If you don't get foam in about 5 minutes you may have killed the yeast with water that was too hot OR it's not awake because the water was too cold OR the yeast is too old. Yeast is the big scary part of yeast breads (that's why it's so prominent in the name - to scare you off). Really yeast is easy, you just need to make sure it's alive and kickin. Proofing is way to make sure you aren't going to end up with unrisen flatbread. Once you have proofed it, you know it's gonna all work out. If you don't get foam, just throw away what you mixed up and try again. The water should feel warm to your fingers, but not hot.
this is what it looks like when the yeast is first added to the water (with a sprinkle of brown sugar)

this is activated yeast: foamy and smells yummy
Once your yeast is all foamy goodness, pour it into a mixer bowl and add the melted butter. Make sure the butter has cooled so it's not raging hot and kills the poor little yeasties. Mix on low to combine. Add the salt and 3 1/2 cups of the flour into the bowl and mix on low speed until combined. This is where a dough hook and a stand mixer come in handy, otherwise you are kneading the dough by hand on the counter. Incidentally, you could easily start this recipe in a bread maker appliance, just take the dough out after the first rise and hand shape it and continue following the recipe from there.

You want to knead the dough in the mixer for about 5 minutes until the it's smooth, adding small amounts of the remaining 1 cup of flour a little at a time until the dough pulls away from the sides of the bowl, forming a ball. You may not use all of the flour if it's a dry day or you may need a little more if it's a humid day outside, but you shouldn't vary more than 1/2 c more or less in what you need. When the dough is "right", the sides of the bowl should be really clean and the dough should all be gathered around the dough hook. The dough should feel soft and elastic. "Like your tummy", my darling 6 year old innocently stated. @#!! Ah the honesty of kids!

Put your dough into a clean greased (is that an oximoron?) bowl and cover it loosely with plastic wrap. Let it sit in a warm place (you may remember I use my turned off oven with the light on in the winter) until it doubles in bulk. This should take around 1 hour unless your kitchen is pretty cold. You can figure out if yeast bread is ready with the poke test. You poke your finger gently into the risen dough and see what happens. If springs back - then it's not ready. If the dent stays put - it's perfect. If the poke makes the whole thing collapse - then it's overrisen and you need to start over from the kneading stage to try to salvage it. All of this SOUNDS complicated, but it's not - I promise. You just have to try it out to see really it's not hard. It takes a little planning since there is waiting around, but it's not hard. When the dough passes the poke test, you need to gently deflate it by folding it or "punching" it down. That means put your fist into the middle of it. It's not a shazam move, but more of a gentle push. Then let the dough rest for 5 minutes or so (which means just leave it alone for a few minutes).
While the dough is resting you can get ready to make pretzel magic. Preheat your oven to 425 degrees. Then you need the secret to turning regular bread into pretzels. The trick is to boil the dough in water before you bake them - that's what gives it the lovely chewy texture. Last time, I wasn't too sure about put raw bread dough in pot of boiling water with baking soda. I mean, that sounds kinda gross, but it works. Whoever discovered this technique must have been a little crazy. *Do I hear a homeschool lesson coming up??*

Put your 6 cups of water in a pot or deep skillet and add the baking soda. Bring that to a boil.

Instead of watching and waiting for the pot to boil, go ahead and shape your bites. Cut the dough into 8 equal pieces, using a bench knife makes this much easier (my 8 year old was happy to volunteer). Roll each piece into 22" long ropes. If the dough is hard to stretch, it hasn't rested long enough. Then cut the rope into small bites approximately 1" wide. You can roll these into or just leave them cut like tiny squares.
By now your water should be boiling and you are ready to cook. Drop the individual pieces of dough into the boiling water working in batches. Watch as they magically rise to the top of the water within about 30 seconds. When they float fish them carefully out and put them on greased (or my favorite silicone mats) cookie sheets.

When you have a tray full of boiled bites, brush some of the egg white mixture over the top and sprinkle with course salt, poppy seeds, sesame seeds, Parmesan cheese, whatever floats your boat.

Bake at 425 degrees for 15-20 minutes. Watch carefully so they get brown, but not burned.
A few minutes after these started coming out of the oven, everyone of my kids was clamoring for some. I don't think they even waited for them to cool off. Even the baby stuffed one in her mouth. That girl loves her food just like her Mommy! :) Thanks Erin for sharing this bite sized snack!

Don't forget to enter my giveaway for two silicone baking mats to celebrate my birthday today!!
Photobucket

November 21, 2011

Homemade Butterfingers

I just started participating in what's know as the "Secret Recipe Club". It's a bunch of food bloggers secretly making each others' recipes. It sounded interesting, so I signed up. I really had no idea what to expect. For this month, I was referred to a blog called Hugs & Cookies XOXO with the instructions to, "go make one recipe off the blog". I discovered Danielle, the blogger is a talented cookie decorator and makes a bunch of gluten free desserts. I was having trouble focusing on the task at hand, since I was surrounded by treat after treat after treat on her blog. I was in a sugar high, when I arrived at this recipe, homemade butterfingers. Huh? This was a new one on me.
I know what you are thinking, "Aimee, why make this stuff when you can just go out and buy a bag of  Butterfingers?" I guess that's the question I could ask about most of the things I make. There are so many different reasons, beyond teaching my children to love good food, which i definitely my overriding reason. One is cost, sometimes I can save money when I make it myself, like oatmeal packets. Sometimes it just tastes better, like cake with fresh buttercream icing. Other times, it's more like a challenge...a throw down. Can I really make this???
This butterfinger recipe from Hugs & Cookies was just that. Would it be possible to make Butterfingers, which my husband LOVES, that really taste like that peculiar crumbly candy? I had to walk in faith with Danielle. Turns out the answer is....yes! With only three ingredients you too can make candy magic. You don't even have to use your stove or oven!! Here's the three ingredients you'll need....
{I know I have four things on this tray, but I just wanted to show you that you could use either chocolate chips or melting chocolate (I used a mix of both, since I didn't have a lot of either).}
 
Are you noticing the crazy secret ingredient for this recipe?  It's CANDY CORN! How wild is that? If you want to make these butterfingers, go out now and buy a clearance bag of candy corn, since it's only around during the Halloween season. Go now... I'll be waiting.....

.........back with your $.50 purchase? Good. Here's the recipe.
Homemade Butterfingers(makes 36 pieces of candy)
1/2 c candy corn
1/2 c creamy peanut butter
chocolate for melting
Put the candy corn in a glass dish (or just be lazy and melt it in the measuring cup). Zap it in the microwave for 1 minute and then stir. If it's not a melted mess like the photo below, put it back in for 15 seconds. You don't want to burn it which is easy since candy corn has a very high sugar content, like 99% sugar. The other 1% is food coloring, ha!
To this scary neon orange goop, you add the peanut butter. Stir until it's all mixed well. Your hand may fall off...mine did. Pour the ugly brownish mixture into a foil lined 8x8 pan. (If you want more bars, you could easily increase this recipe to fill a 9x13 pan, just keep the ratio 1:1 for the candy corn and peanut butter.)

 
Cool the mixture in the fridge (about 10 minutes) while you melt your chocolate. I'd like to use a double boiler for melting chocolate, that is if I had one. In the meantime, I just melted the chocolate in the microwave in a glass bowl. By the time you get the chocolate melted your mixture will be ready for cutting. I used a large bread knife, but I think a pizza cutter would work better in the future. I also cut my pieces TOO big. I had to go back and half them, which created about 36 pieces. This stuff is rich!

 
After you cut your pieces dip them in chocolate and let them cool. Or you could be really lazy smart and just pour chocolate over them, but you'd use more chocolate that way. The point is, you want them to be covered in chocolate just like the real candy bar. I wasn't very careful about covering the bottom, but enough dripped down on my wire racking to cover them mostly. Don't look too closely ;)


So how does the end result stack up against the real thing? I say, spot on! They taste so much alike people may not even know you made them. Since we just had Halloween I happened to have an original Butterfinger in the kids' treat drawer. I cut them both open to show you the color difference. I actually think the homemade version is prettier. The original is crunchier and flakier, definitely more crumbly (ie messy), but you can imitate that if you store them in the fridge. My Butterfinger Connoisseur Husband liked the original, but I noticed he ate quite a few of my version too. I sent most of them in to Awana to celebrate Super Bear's birthday (more on the amazing Magic Tree House birthday party we had soon). The kids and the grown ups there LOVED them. I was a little embarrassed to tell them how easy they were to make.  This is one cooking experiment I'm glad I took on. Danielle thank you for entrusting me with your delicious recipe!! I'll be back when I need another sugar rush. And I think I'll sign up for this Secret Recipe Club thing again. You never know what you'll discover.


Photobucket

LinkWithin

Related Posts Plugin for WordPress, Blogger...