

December 31, 2008
It Puts Itself Away
December 28, 2008
Merry Christmas!

Merry Christmas from our house to yours. This is our traditional European Christmas Breakfast: cheeses, meats, smoked salmon, yogurt and museli, fruit, breads, jams and spreads, coffee and juice and mom's famous homemade eggnog.
December 20, 2008
Even Mistakes can Taste Good

I have so many flops with things that I make, I thought I'd share one, because I do take photos of the flops too. This was a beautiful cake recipe from Martha Stewart for a Chocolate Cake with Snowy Meringue that I thought I'd make for my family's Christmas Eve celebration. My version...not so beautiful.
The cake was rich and over the top chocolate, but apparently I did not wait for the ganache to cool to the correct temperature because it just flowed right off. Then I didn't get the meringue to set correctly, so it just slid off too! Ugghhh. It was ugly, but at least it tasted wonderful and the decorations were super cute. I just melted green candles on wax paper and then cut the trees out with a warm sharp knife.
December 6, 2008
Brownie Bites

This is a wonderful recipe from Taste of Home that I made for a cookie exchange. The recipe makes the brownies from scratch, but you could also use your favorite box mix. The over the top fun part was coating the brownies with more chocolate! Then decorate as you like: red and green m&m's, crushed candy canes, icing, gumdrops, sprinkles, choc chunks, and my personal favorite - a coffee bean.
Chocolate Coating
3 c choc chips
2 Tbsp shortening
Melt in glass bowl in microwave (or in double boiler on stove) until it stirs smooth. Dip each brownie bite in melted choc using a fork to lift it out and gently tap off excess. Put on wax paper or cooling rack. Sprinkle with topping while still soft and then let stand until set.
December 5, 2008
Wrapping Up Organizing
 Getting ready for Christmas wrapping each year I set up a folding table downstairs and roll out my Container Store wire cart with all my wrapping supplies like bows, ribbons, tape, scissors, tags and tissue paper (this stuff is in all colors, so it works for gift wrapping birthday presents too). Then I have a rubbermaid container that has boxes of all sizes (you can just barely see it underneath the table). The cart, the table, the container and lastly a gift wrap container gets me all ready for wrapping in small doses as time permits. Of course, having a roaring fire in the background and Christmas carols going really brings out the joy.
December 1, 2008
Gingerbread Houses

I come by my organizational skills honestly. This is a photo of how my mom arranges the candy for my kids to make gingerbread houses each year. She puts a small amout in each muffin section. Now, why didn't I think of that??

November 15, 2008
Astronaut Cookies

I used a gingerbread cookie cutter and then iced the men in all white. I then did the visor and details with black and just a little red and blue to make them American astronauts. Since I did 24 of them, I got a little sloppy with the flooding, but the kids loved them.

November 11, 2008
Rocket Ship Cake

This is the birthday cake for the space party as requested by my 5 year old. He wanted rocket ships and astronaunts, not aliens. With that in mind, I started looking around for rocket ship cakes. A site I love to visit is coolest-birthday-cakes.com because it shows photos of real people making real cakes - I'm not talking pros here. It's right up my alley because I want to make birthday cakes for my kids and they really don't care how silly (or ugly) it turns out. I just need ideas. This cake is a hybrid of several things I saw. I really liked the idea of putting Super Bear's photo on the ship (just be sure to put a piece of wax paper under the photo) to personalize it. As you can see I used Twizzlers for the lettering and boosters, M&M's and Mike & Ike's for the decorations. The candles went into the rocket boosters at an angle for "fire power", so when it was lit up, it was way cute.


I also had fun making these astronaut cookies for the school party. They were a blast!

November 10, 2008
Space Jet Packs

I really have no idea where I came up with this idea, but it just really worked. I know my kids still play with their super cool space walk jet packs.
You take a small piece of cardboard, around 10"x10" and drill/ poke four holes in it, two at the top and two at the bottom. Then attach two empty juice bottles (the Juicy Juice ones work best because they are flat) with duct tape. Spray the whole thing with silver spray paint. Thread flat elastic through the holes going in and out of the holes to form two loops that come out the opposite side of the bottles like a backpack (see my terrible drawing). Tie the elastic together and cover with another piece of duct tape. Then I printed off the Nasa logo on sticky label paper, but you could use cardstock and a hot glue gun for on top of the bottles. Voila, an astronaut's jet pack for space exploration.

November 7, 2008
Kids in Spaaaaace
For the 5 year old's birthday party he really wanted a "Space Party" which I was totally on board with since how cool is space? I started with the invites with this wording:
I got the Nasa logo off their website.
Journey with Lt. Commander xxxxx
to Outerspace on Shuttle Adventure 5
Mission Date:
Launch Countdown Begins:
Return to Earth Around:
The shuttle crew will be served lunch and cake!
Report to Command Center: (your address)
Mission Control needs you, input your readiness at: (phone number)
October 25, 2008
Halloween Silly Snacks

Another cute idea from Family Fun magazine . This was perfect for a school snack for Halloween. The apples are quartered with a piece removed from the back to cut out the seeds. Then I cut a section of the quarter out from the middle being sure not to cut all the way through the apple. So I ended up with the basic mouth shape. Then I poked almond slivers into the apples, some broke, but that only added to the spooky/ silly factor. The school required snacks from two different food groups, so I decorated mini rice cakes with gel icing to make bloodshot eyeballs.
The mummy dog is simply a hot dog wrapped with a crescent roll and then dotted with mustard, but you could use ketchup. I think putting a dab on with a toothpick would keep it smaller and more controlled.


October 9, 2008
Chickens....Really

One day later and we own four chickens. I think I am in denial. My face says it all.

October 8, 2008
And so it Begins...
 This is how it all started. I went outside to see what my cherubs and my husband were up to. Turns out the racket that I heard was them building a chicken coop out of some scrap wood. Why does one need a chicken coop when one does not have chickens? Chickens were not in the marriage vows. Really, I know I should have been more open to the idea, but somehow the city girl in me was NOT interested. I just walked away and left them to their own, thinking this was a phase that would soon go away, I mean how many chickens could live in that little space anyway?
September 26, 2008
Fresh Caught Blue Crabs
 The truth of the matter is, I don't really like shellfish. I know it's pretty much sacrilegious especially growing up near the Chesapeake Bay. But I do love to shell the shellfish (guess that's what happens when you are sitting around watching everyone take forever to eat and your flounder is done) and I love to prepare it for others. This year, we went to the beach and caught our own crabs. It's amazingly easy. You just needs some stinky, slimy, nasty chicken necks, string, a stick and a net. So apparently crabs are not very smart because all you do is tie a piece of the gross chicken neck on the string and tie the other end on a stick. Once the chicken part is on the bottom, the crabs go crazy and climb on board to feast. All you have to do is pull up the string slowly and drop the whole thing, neck and crabs into a net. That's where I came in. I was "running nets" for the catchers and dumping the crabs into an empty 5 gallon bucket.
 Preparing them was just as simple. Follow the directions on the back of an Old Bay container. Course I do deviate or else I wouldn't be me. After I drain the water out, I load up with more Old Bay on the drying crabs so it gets all over your fingers and flavors it all (yeah, funny statement from the gal who doesn't eat them!) Then it's just matter of teaching all the kids how you shell the crab and what parts you can eat.
September 6, 2008
Food at Last!
 Just imagine, you are a baby and you finally hit that 6 month mark and you get to eat FOOD! How exciting, the world of taste opens up and baby foodies are created right before our very eyes! In this photo, you see my little Sausage enjoying his first "mush". I love this time, no matter how messy it is because it's exciting.
  I have made baby food for each of my three munchkins and I'm proud of it. (Photo tutorial here to make your own step-by-step)
 No matter what anyone thinks, it's easy and it's way cheaper than the store bought jars. In fact, it's so easy I'll tell you how in three steps: buy the food, cook it and mash it. Really, it's not harder than that. Course, some food like bananas and avocados you don't even cook, you just mash. I like to stock up and do some of the work before baby's arrival. So late in my pregnancy I buy a huge bunch of sweet potatoes, squash, peas, leeks, apples, pears, beets, mango, green beans, broccoli, carrots, etc and then microwave them until they are soft and cooked. I usually do this with some water in the pyrex dish. Then you can use the cooking water to "thin" the consistency of the puree when you whirl it in a food processor. Once you have a good pourable consistency, you pour it into ice cube trays and freeze. After they are frozen, I pop the cubes out and use my Vac Seal to seal up the frozen cubes. With each of my babies, I have done this while still pregnant and stored in our deep freezer. Then around the 5 month mark, I start pulling goodies from the freezer into our regular fridge. When you want to feed junior, you just thaw a few cubes in the fridge (or if you are desperate, in the microwave, course you have to stir well and test it out with your finger to make sure there aren't any hot spots).

The book, Super Baby Food, is helpful especially for the chart that lets you know when to introduce certain foods and if you are really ambitious, making your own baby cereal.
August 2, 2008
Tiny Bit of Cute Fabric??
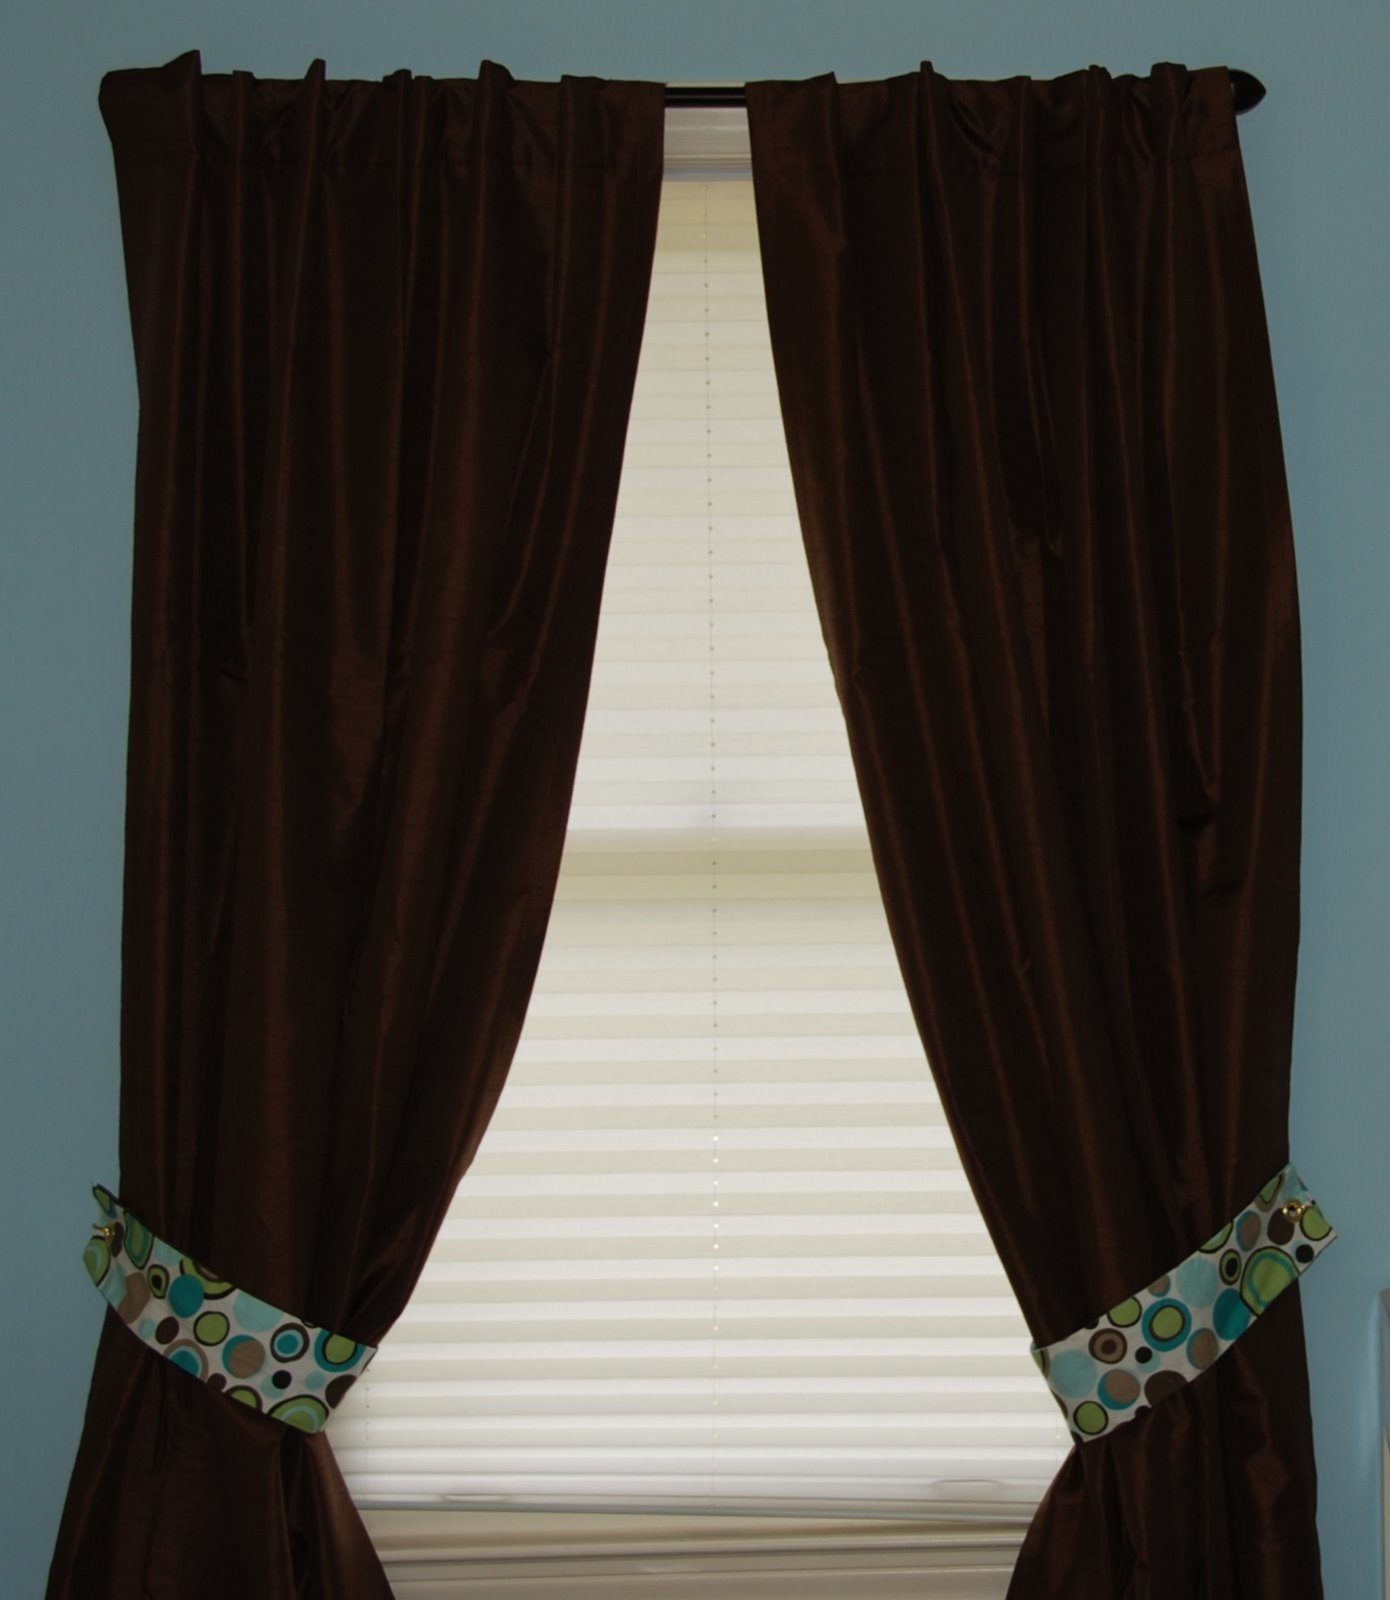
So, when the Sausage Boy was born, I made a valance for his window out of some cute fabric I had leftover from another project. Then we moved and he had two big windows. Well I broke down and bought curtains, cause I wanted them lined (his window faces bright sunlight) but...I couldn't just leave them plain. I decided to rip out the valance and cobble together some cute tie backs for the new curtains. I added large grommets on the ends to hook over a metal hook I screwed in to the wall. They are doubled sided with a contrasting fabric on the backside, but really it was just two seams and then two hems for each one.

July 14, 2008
Pesto Chicken - Fast and Easy
 So what do give to the man who has everything when he turns 60? A party of course! My Uncle turned 60 this month and we threw him a party with all the family. Well my Uncle is a very healthy eater - organic and whatnot, so I knew I had to step up my game. I made grilled chicken tenderloins based with homemade pesto (see recipe below). We had potato salad with a vinegar base instead of mayo, fruit salad, deviled eggs, fresh bread and for dessert watermelon sorbet and birthday cake.
Pesto
4 c basil leaves
3 cloves of chopped garlic
1/2 c pine nuts
1/2- 1 c olive oil
1 tsp salt
1/2 c grated Pecorino (or Parmesan) cheese
Put basil, garlic, and nuts in the food processor and blend. Add oil through the hole in the top as it processing. Finally add salt and cheese. Freezes beautifully in small baggies or the Food Saver Vac Seal. Course, you could use this over pasta, but I like to think of new uses, like chicken, fish, or even on crusty bread. Thin it out with more oil and some vinegar and you have a salad dressing.
July 12, 2008
Blueberries
 Tis the season...for blueberries that is. We have three blueberry bushes and they were loaded this year. Enough for us and the birds, but next year I'm buying some netting to keep ALL the berries. I think the best way to eat them is straight off the bush, but we also like them with yogurt and granola. Homemade yogurt is pretty easy even without a fancy yogurt maker, you really just need a thermometer.
 I also take a bunch of them and freeze them for blueberry muffins, blueberry crisp and to stir in our "help yourself" oatmeal during the winter time. I have not made blueberry jelly, but one of these days I'm determined to. What do you do with your blues?
July 10, 2008
Play at Play
 It's a crazy name for a place, but it's lots of fun. "Play" is a fun romper room kind of joint for kids. It goes beyond the standard jumpy place with trampolines, a ball pit, a foam pit and huge balls to bounce around. Not to mention the indoor picnic area, and mom's room complete with wifi. The good news is you can go with your kids or you can drop them off.
PLAY Activity Center
10930 Crabapple Road
Roswell, GA 30075
(Hwy 92 and Crabapple Road)
770-650-0122
July 4, 2008
American Apple Pie

We had some friends over for 4th of July for a cookout with Bambi burgers (okay I know it's sounds a little harsh, but they are yummy and better for you than beef), hotdogs, and apple pie for dessert. What could be more American?...putting the flag on the top of the pie. So easy and adorable. Cut out a rectangle of leftover pie dough and then a couple of small strips for the stripes and roll a couple of tiny balls for the stars.
I don't really have a recipe for my apple pie as I have been baking it since Jr High Youth Group. We used to go out to an orchard, pick the apples, spend the night at church and then bake pies the whole next day. They sold incredibly quickly at church that Sunday and they were delicious. You really just need apples, butter, spices like cinnamon, ginger, nutmeg, allspice, maybe anise seed or cloves if you are feeling wild and sugar (I use a mix of brown and white). I can almost smell it baking now!
Apple Pie "Recipe"
- Bag of apples, peeled, cored and sliced thinly (I like using an assortment of crisp varieties)
- Pie crust (make or buy, but you'll need two crusts, one for top and one for the bottom)
- Spices (see above for ideas, but this is really up to personal preference)
- 1 cup sugar, a mix of brown and white
- 1/4 cup flour approximately, to help thicken the sauce that forms
- 1/4 cup (half a stick) butter cut into slices (or pats as they are known)
Combine apples, spices, sugar and flour in a large bowl. Toss to coat the apples. Plop them into the bottom pie shell. I like to pile them up into a huge mound because I think the best part of the pie is the apples. Put the butter pats over the top of the apples, spread out. Carefully lay the top crust out over the apples and press the edges of the two pie crusts together to form a seal. You can make this pretty and flute it like I did above by pressing your first three fingers together on opposite sides of the crust. Kinda like you are giving the pie crust a good pinch. Moving around you do this on the whole edge. If you made your crust, you might have leftover that you can create into a cute topper like I did with the flag. No matter what, be sure to vent your pie so it stays crispy. Cut small slits or holes into the top crust before you bake it. Bake at 400 degrees for 45mins - 1 hour depending on how many apples you used. Be sure to put a cookie pan with edges under the pie in case it drips out. Let cool and then serve otherwise it will be a soupy mess.
June 15, 2008
Cute Summer Dress
 So, yes I do know how to sew and I really like the results of my sewing, but sometimes you have to source things out. I found this cute fabric at Joann's and sent a yard and some other fabrics over to Mom's. She sewed this incredibly cute dress for the Banana Girl, perfect for the beach.
June 14, 2008
Traveling with Young Kids

I go to the library and get a bag of 10 books (and keep the receipt so I know which books to return)and get a few new trinkets that I break out as the ride goes by. I also really like using a travel tray
For stops, we love Cracker Barrel, where they love exploring the store and rest stops to run around and potty all together in the family restrooms.
May 20, 2008
The King of Snakes

Yes, among the other animals we own, we do have a snake. It's a ball python and he's about 12 years old (for some reason, people really like to know how old he is) anyway, this post is not about our snake Einstein, but about the King snake we found just as we were moving. My husband knows a lot about snakes, well he knows a lot about animals in general. He spotted this snake and brought it to our new house so the kids could see it. As you can see Super Bear was thrilled! I know some of you are wondering what this has to do with anything. Well, I just wanted to share a picture of the King snake so if you EVER see one, you don't kill it. This is the most incredible snake of them all. They eat other snakes, including poisonous ones like rattlesnakes. This is the snake that you WANT to have around, because it won't harm you it will protect you. I know some of you really don't like snakes, but please don't kill everyone you see. Okay, I promise no more snake posts :)

May 10, 2008
I Love to Paint

- prep work is essential (and boring).
- take off the outlet covers and screw the screws which invariably get lost back into the outlet holes (thanks Dad)
- patch any holes or mark with drywall compound, see http://www.ehow.com/video_4150_patch-hole-drywall.html for great detailed instructions (i love ehow.com for learning new things)
- cut in (my favorite part) which means use a brush to paint all of the edges of the wall. you need a good brush here with no frayed edges, pros like Purdy, but I really prefer BM again, just a good and cheaper. I have a 2", angled brush that I love and take very good care of for cutting in.
- for good cutting in, you never dip your brush all the way in the paint, only the tip. you get a fair amount of the paint and carefully tap off the excess (don't scrape it on the side of the can, just tap inside the can wall) then the key is to turn your brush sideways and make a fat line of paint. You should be able to see where the paint is going so you don't have to tape ANYTHING.
- after your finish cutting in the top, bottom and corners, you roll the walls
- using a roller means you have to have a drop cloth, but you really shouldn't get paint on anything unless you have an accidental drip. keep wet lines between strokes and use paint, that's the thing i see often, not enough paint used
- both your brush and your roller can be wrapped in foil and put in a grocery bag to keep from drying out for up to two days, making getting the paint off your hands the hardest part about stopping
- throw away your roller cover when you are done - they are cheap and a huge pain to clean but you most clean your brush. Using a wire brush made for this purpose (and scraping old paint off exteriors) is the best tool - invest.
May 5, 2008
Moving Sucks

- pack clothes and toys like you are going on vacation - everything else gets packed several weeks before the move - they will love opening their "new" toys in the new place
- use one room as the "packed" room and put all of the boxes in there, stacked as high as you can
- label all the boxes with the room AND contents and if you are using movers, number all the boxes so you can check them all off at your new place
- get LOTS of boxes, more than you think you'll ever need and put everything possible in them. yes, it's easier to pack the pillows in trashbags, but it's not easier for movers to load and unload bags instead of boxes - remember boxes stack, bags don't
- craigslist is a great place for free boxes (contact me if you want my secret way for more boxes)
- purchase packing paper
, do not use free newspaper because the ink gets everywhere and then everything has to be washed - really do you want to do MORE work?
- pack books in smaller sturdy paper boxes. you know the kind that reams of paper are sold in and offices use?
- use wardrobe boxes for tall outdoor things like rakes, shovels, brooms and big light things like couch pillows and giant stuffed animals
- stretch wrap
your furniture if your movers won't, it's like industrial strength plastic wrap and it's amazing (incidentally to tear it just poke your fingers through it and then it will tear easily...see what working at Home Depot taught me?)
- most important - do a little at a time - taking breaks, playing with the kids, reading the paper, those are the things that keep you sane

Not everyone thinks it's an upstairs office, to them it might be just another bedroom. I labeled every room in the house to make it easier for the movers to unload without my direction.
March 13, 2008
Chuck Wagon Cook Off

We went to a Festival this weekend. The Cowboy Festival and Chuck Wagon Cook Off at the Booth Western Museum in Cartersville, GA. The weather was pretty cold, but that just meant it wasn't crowed. We got to talk with the people who own, maintain, and compete with their authentic chuck wagons. I have no idea how those cooks did it back in the day. I've seen Lonesome Dove and I realize a good cook was worth their weight in gold, no two ways about it. The funny part is, I can't even make biscuits under the best circumstances and here they were turning out perfect, flaky biscuits, beans, stew, cobbler and more all in their dutch ovens. I'm ready to take on the challenge - let's go camping.

Subscribe to:
Posts (Atom)
LinkWithin
