Showing posts with label entertaining. Show all posts

July 17, 2015

Watermelon Feta Salad


This is the opposite of complicated. It's so simple, it's not really a recipe. It's the perfect dish to bring to a summertime gathering. I just served it at our family reunion and was reminded how much people like it.

Ingredients
Half a seedless watermelon, cut into chunks
6-8 oz of crumbled feta (or blue) cheese
Bunch of fresh mint leaves, minced
Balsamic vinegar

Put watermelon chunks, cheese and mint into a large bowl and toss together. Drizzle balsamic over top if desired. You can also add strawberries to this salad if you like.


Photobucket

March 20, 2013

Beautiful Berry Cream-Filled Tart: My Favorite Dessert


This dessert seriously makes me swoon. It is my all time favorite dessert, ever since I was a teenager. I was that weird kid that was thrilled to see fruit in my lunch box (thanks Mom). I guess I have a special place in my heart for berries because they are so perishable and the season is pretty short. You gotta get 'em while the getting is good. Kinda like kisses from my kids - I'll take them whenever they are ripe for taking. Even the wet sloppy ones from the 2 year old!

The tart may look a little difficult because it's so showy (like the pavlova) but it's really not. Pull together the ingredients for the crust and press it into a pie pan or a tart pan (see below) and then make the creamy filling. After that, it's just a matter of piling on the berries!

Beautiful Berry Cream-Filled Tart

Ingredients
Pastry Shell
1 1/2 c flour
1/4 c sugar
1/8 tsp salt
8 tbsp cold butter, cut into small pieces
1 egg yolk, beaten with 2 tbsp heavy cream

Put flour, sugar and salt into a bowl of a food processor. Pulse to mix. Add the butter pieces and pulse. Add the egg/ cream and pulse until the dough is chunky and holds together when squeezed. (You can also do this in a bowl with a pastry cutter, it just takes more work.) Dump the dough onto was paper and chill in the fridge for 30 minutes. 

Roll dough out into the shape of your tart pan. This dough makes enough for a 9" round pan. (A tart pan has a bottom that comes apart from the sides like a cheesecake pan to make serving a cutting the tart easier. You just lift the bottom of the pan out of the sides and serve the tart on the bottom. You can use a pie pan, just serve it right out of the pan like a pie.) Fit the dough into the pan and cover it with foil or parchment paper. Put some pie weights or dried beans on top of the foil to keep it from puffing up and bake at 425 degrees for 5 minutes. Reduce oven temperature to 350 degrees, remove the weights, prick the bottom of the pastry with a fork. Bake 15-20 minutes, until golden. Cool on a wire rack.

Cream Filling
2/3 c sour cream
1 (8 oz) package cream cheese, softened
2 tbsp lemon juice
1/2 c sugar
1 tsp vanilla
1/4 c heavy cream
Beat sour cream, cream cheese, lemon juice, sugar, vanilla, and cream together in a large bowl. Spread mixture over cooled pastry shell. Arrange berries over the top and garnish with mint leaves if desired.

Chill between 1-4 hours before serving. This doesn't keep well in the fridge for more than a day, since the crust gets soggy.
 
Photobucket

February 15, 2013

Lemon Love Note Bars - Sweet and Sour


These bars are sweet and sour all at the same time

...kinda like marriage.

I love my husband. It's true, he's the man for me. He puts up with my moods and endless chatter. He brought me flowers and a huge balloon for Valentine's Day, and the man HATES balloons. He eats everything I put in front of him. He can build me anything I ask for. He's the most supportive and encouraging person I know. He's there for me whenever I need him. (Boy, oh boy, have I realized how much I need him lately.) We are a team and a great one at that. (I'm pretty sure we could win the Amazing Race.)

However, there are definitely times when we seem to treat each other more "sour" than sweet.

Everyone has some sour moments - right? At this point in our marriage (ten years) I'm pretty sure it's normal. I mean, you are not really supposed to get along with someone every single day right?

I logically knew it wouldn't all be roses before we got married. I even engraved it on the inside of his wedding band, "Come What May". And while I don't love being in the down times, I do love the wonderful tenderness that comes after we get out of the funk.

The sour, just makes the sweet all that much sweeter.

Honey, MacGuyver, Babe, Husband....this one is for you. I love you...come what may.

Lemon Love Notes

Ingredients
1 c butter
2 c flour
1/2 c powdered sugar
1 lemon, zested and juiced
4 eggs
2 c sugar
4 tbsp flour
1 tsp baking powder
1 1/2 c powered sugar
1 tsp vanilla
2 tbsp butter, melted and cooled
3 tsp milk

Blend butter flour and sugar together with pastry cutter or a fork. Pat into a 9x13" ungreased baking dish. Make sure this is very flat and even. Bake at 350 degrees for 15 minutes. Cool until you can touch the baking pan.

While that is baking and cooling, make the filling. Mix together zest of one lemon and the juice of the lemon with eggs, sugar, flour and baking powder. Pour this on the cooled crust and bake again at 350 degrees for 25 minutes. Cool again.

Melt butter. After the bars are cooled off enough you can touch the pan again, make the icing. In a small bowl, whisk together the sugar, vanilla, melted butter and milk. Pour over the top of the pan. Cut into small bars because these are super rich. They will keep fresh for only a few days.
Photobucket


February 9, 2013

Apple Carrot Slaw


I had some carrots in the fridge that needed a home and I just didn't feel like cooking them since the weather here in GA has been so warm. It's absolutely crazy... my daffodils are trying to come up. I have really missed winter this year. I know those of you up north think I'm crazy, since you are underneath a mound of snow.

Mom and Dad were flying back from Dad's chemo treatment yesterday and were delayed with all the flights being cancelled. I was a little worried about them, but they are home, safe and sound. Dad is exhausted, but hanging in there.

On the other side of the family, my father-in-law has moved into an independent living place so we are sleeping better around here, since we don't have to worry about him on the stairs. Thank you all for the kind words and prayers.

This recipe is perfectly refreshing with a roasted chicken and homemade wheat bread. I love the addition of celery seeds. I usually add those to our cabbage slaw because that's how MacGuyver's Mom makes slaw. I never thought to add them to a sweet slaw. 

I have the perfect imitation recipe for Chik-Fil-A's carrot slaw and this recipe somewhat reminded me of that, so I left the raisins out of the original recipe to make it different to my family. Let me know what you think.

Apple Carrot Slaw
Adapted from Feast on the Cheap, check out their beautiful photo and original recipe

3 crisp sweet-tart apples, cored and cut into matchstick-size strips
3 large carrots, washed, peeled and coarsely grated
2 tbsp sweet onion, minced
3 tbsp low-fat mayo
1/3 c cider vinegar
1 tbsp real maple syrup
1 tbsp celery seeds
Salt and pepper to taste
Whisk mayo, vinegar, celery seeds, maple syrup, salt and pepper in a medium bowl. Set aside. Prep the slaw ingredients and combine in a large bowl. Toss with the dressing, cover and refrigerate for 30 minutes before serving.  
Photobucket

January 5, 2013

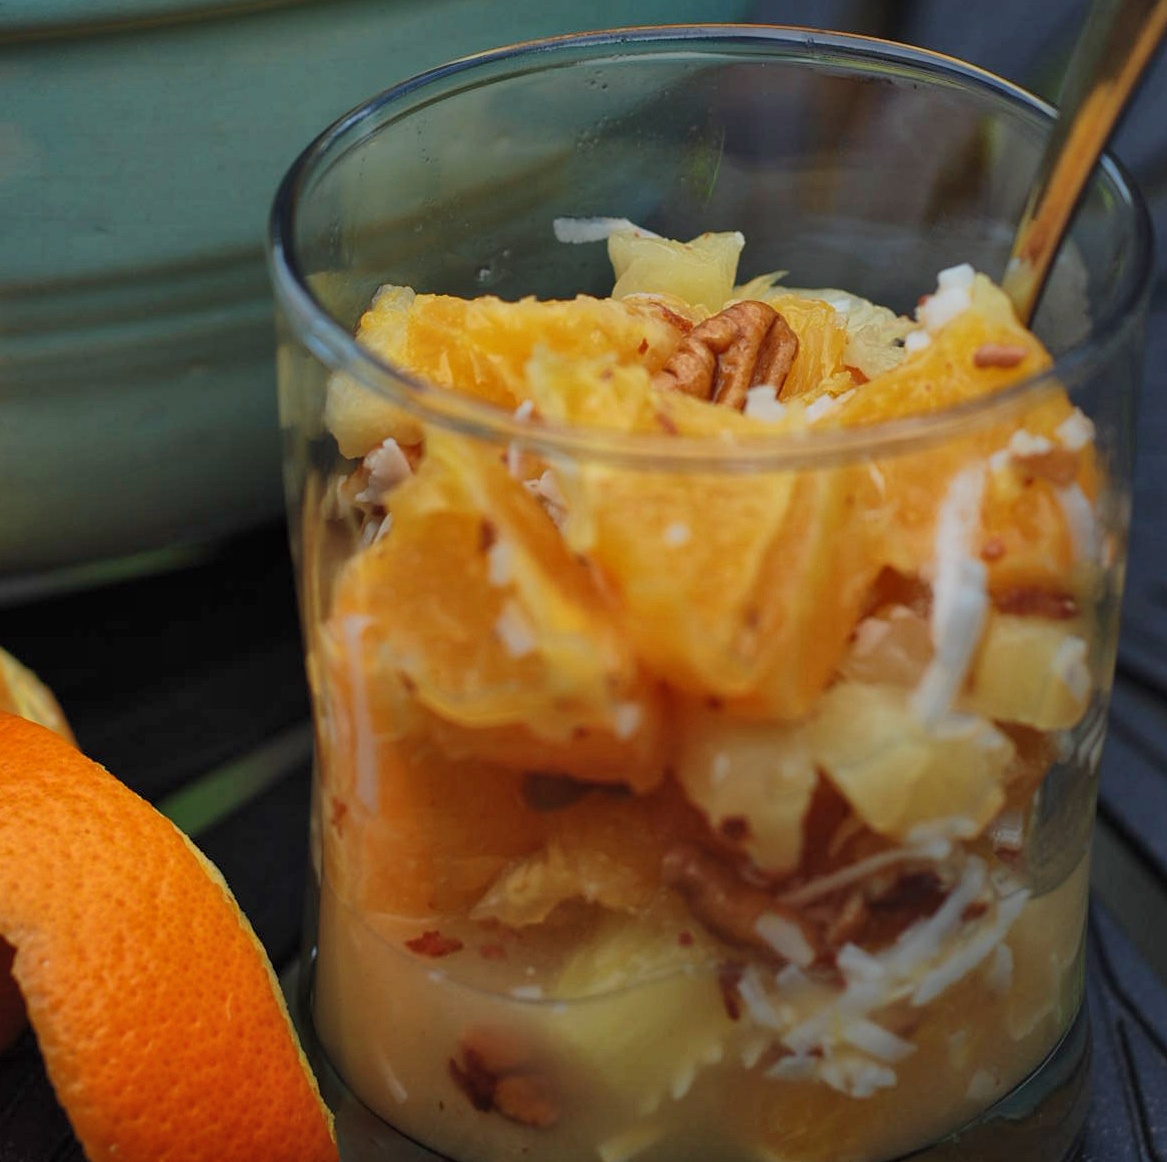
Ambrosia: Orange Pecan Salad


Ahh, the smell of a fresh new year! What a pleasure this time of year is for me. I love the quiet space after Christmas and before schooling gets in gear again. I have enjoyed laying around and doing...nothing.

And don't worry, my family is still eating, I just have not been posting. I've...been...lazy (gasp). Sometimes I have to take a break from routine or I think I will go crazy. The mundane of laundry, dishes, even getting dressed, just gets old to me every once in a while. I've been this way for as long as I can remember. Even when I was a teenager, life would just get "boring". It usually takes something fun and exciting to bring me back into motivated mode. At this moment in time, I have something REALLY exciting to look forward to!

I'm taking my two oldest kids to Disney World for the first time. I can't wait to see the magic of Disney through their eyes. I'm practically giddy with joy now that we are in the actual month of departure!! My husband jokes that the kids are along for MY vacation, not the other way around.

All the planning and waiting is finally coming to fruition and it's going to be great. Of course, there is one down side to Disney - the food. It's expensive and not delicious. Maybe I'm wrong, maybe things have changed since I was there 13 years ago, but I remember being glad I brought my own snacks. As I've mentioned, I can only handle so much junk food before I'd rather not eat. So part of my packing preparations are putting together healthy snacks and thinking about what we can eat quickly in the condo for breakfast or a late night snack.

Since we will be in the Citrus State, we will be enjoying grapefruits and oranges straight from the orchard. I plan on bringing bags home with us to share with the little kids and my husband (who are all staying home). This is one of our families favorite ways to enjoy citrus.

Ambrosia Salad

Ingredients

1/4 c pecans
6 oranges
1 grapefruit (optional)
1 can pineapple pieces (optional)
1/4 c sugar
1/4 c shredded coconut

Toast pecans in a dry skillet or toaster oven tray until they smell fragrant and lightly brown. Watch carefully so they don't burn). Let cool.

Slice the peel off the oranges, starting with the top and bottom. Then slice off the sides. When the pith (white part) is gone, slice knife in between each membrane and loosen the orange. Do this over a bowl to catch all the juices. Plop the segmented orange into the bowl. Repeat with grapefruit if you desire. Add pineapple to the bowl. Add sugar and stir. Add coconut. Chop the cooled pecans and add to the bowl. Give a good stir and then store in the fridge until you are ready to serve. Ah-maz-ing!


Photobucket


November 19, 2012

Italian Chopped Salad


It turns out that last month wasn't my last Secret Recipe Club post. Seems I was a month ahead of myself, which in my crazy, hectic life never happens.

B.K. (before kids) I was an on-the-ball kinda gal. I mean, I never forgot things, or misplaced things. I managed to remember to comb AND style my hair each morning. Really, I was pretty amazing. 

Now, not so much. Now, there are days when I never brush my hair, forget my sweet friend's birthday and simply not show up to some place where I'm supposed to be! *Gasp* I have become one of those people. 

I used to think my life was busy when I had a career, while rehabbing a house, volunteer work, bible study group, and dating. Ha!

Silly me. Now I now the truth...kids define the word busy.

For those of you out there without kids, have pity on people like me. Know that we are still in there somewhere and will (hopefully) re-emerge when the college years are upon us.

My scattered brain managed to produce another Secret Recipe Club treasure in time for today's deadline. I'm very proud not to have dropped this ball. I have unearthed a delicious chopped salad recipe. This one is very Italian and very delicious. (Sandy, you would even appreciate it.) It comes by way of Authentic Suburban Gourmet.

Lisa blogs from the sunny San Francisco Bay Area. She has a ton of delicious recipes, but what I was really intrigued about was her photography. Either she has subbed out the photography to a pro, been replaced by an alien expert photographer, or worked her tail off learning how to take better photos. I'm not sure which, but it is incredible to see the transformation of the photos on her blog. Just search "chopped salad" and you'll see some examples of what light can do for a photo. Not to mention her food styling. Her stuff just looks beautiful. Lisa blogs exemplifies how we can each improve our skills. Maybe there is hope for my mommy's brain after all.

This chopped salad recipe is from “The Mozza Cookbook” from famed chef, restaurateur and cookbook author, Nancy Silverton. I made a few changes like adding black olives and purple cabbage (because it is so much cheaper than radicchio). Be sure to check out Lisa's recipe if you like detailed instructions. And she has those beautiful photos to go with it.

The key on a chopped salad is to chop most everything in uniform sizes. That way you get a little of everything on your fork at the same time. Delicious!

Italian Chopped Salad
from Authentic Suburban Gourmet

Salad
1/2 sm red onion, chopped
1/2 sm head iceberg lettuce, cored and chopped
1 sm head purple cabbage, cored and chopped
1 pint sm sweet cherry tomatoes, halved
1 1⁄2 c garbanzo beans
1 c chopped black olives
4 oz aged provolone, chopped into sm pieces
4 oz salami, chopped into sm pieces
1/4 c banana peppers, chopped
2 tsp salt
1⁄2 c oregano vinaigrette
1⁄2 lemon juiced, plus more to taste
toasted pine nuts (see note at bottom)

Combine the onion, lettuce, cabbage, tomatoes, garbanzo beans, olives, provolone, salami, and pepperoncini in a large, wide bowl. Season with salt and toss to thoroughly combine the ingredients. Drizzle 1/2 cup of the vinaigrette and squeeze the lemon juice over the salad, then toss gently to coat the salad with the dressing. Taste for seasoning and add more salt, lemon juice or vinaigrette if desired. Pile the salad on a large platter or divide it among individual plates, piling it like a mountain.

Oregano vinaigrette
2 1⁄2 tbsp red wine vinegar
2 tbsp dried oregano
1 tbsp fresh lemon juice, plus more to taste
2 garlic cloves, 1 smashed and 1 grated or minced
1⁄2 tsp kosher salt, plus more to taste
1⁄4 tsp freshly ground black pepper, plus more to taste
1 1⁄2 c extra-virgin olive oil

Combine all ingredients in a glass jar and shake vigorously. Use the vinaigrette or transfer it to an airtight container and refrigerate it for up to three days. Bring the vinaigrette to room temperature, whisk to recombine the ingredients, and taste again for seasoning before using.


UPDATE: I actually tried this salad withOUT the lettuce and it was amazing that way and keeps longer since there is no lettuce to wilt. The general consenses was that it would make an amazing pasta salad! And toasted pine nuts sprinkled on top, take this dish to the next level.
Photobucket

November 17, 2012

Gingerbread Latte


I posted about this beauty back here, but some of you have asked for the specifics of this recipe, so this one is for you. Just in time for Thanksgiving and Christmas parties. Make a big batch of the spiced milk and keep it in the fridge. When company comes, warm some up in a pot on the stove, brew the coffee or espresso and combine the two in mugs. Top with whipped cream and cinnamon. Voila! You have a fancy drink in just minutes and you look like the Hostess with the Mostess (as Mom would always say).

Gingerbread Latte

1 cup milk (I use skim)
2 Tbsp molasses
2 tsp vanilla extract
1/2 teaspoon pumpkin pie spice (which is basically mostly cinnamon with ginger, cloves and nutmeg added) I just add a little of each, never measuring
1/2 tsp ginger (for that gingerbread flavor)
1 c strong brewed coffee or espresso

Brew the coffee. While brewing, get out a glass measuring cup, the kind you use for liquids. Measure the milk and then add the sugar and spices. Put it in the microwave on high for 1 min - 1:30. You want it hot, but not boiling. When the coffee is brewed, combine your coffee, spiced milk and vanilla in a large mug. You can top it with whipped cream and cinnamon if you want to go over the top, which I of course did!

Alternative method: Triple or quadruple the recipe and combine milk, molasses and spices. Heat and stir. Cool. Store spiced milk in a jar in the fridge until you are ready to use. When you want a latte, brew the coffee or espresso and heat up the spiced milk and combine for as many servings as you need. 

Photobucket

October 19, 2012

Acorn Squash Soup with Parmesean Cheese


Dinner tonight was AMAZING! Really. I'm trying to incorporate more vegetarian meals in our dinner routine both for health and for expense. I've encountered resistance from just about everyone in the family except the baby - she's happy to eat anything. My darling husband, Mr MacGuyver on the other hand insists on meat - protein for him he says. I think he might be finally softening after a few really good meatless meals we've had.

Tonight was one of them. Acorn Squash Soup that was delicious...creamy, tangy, sweet. So many flavors, it was hard to pin down and perfect for a cold night after everyone had played outside all afternoon. The recipe is pretty easy too, which always makes me happy on weekends when I really want/need to do other things besides cook. I'm guessing I'm the odd-ball there because most of you probably want fast dinners on weeknights. With homeschooling and really limiting what are kids are in involved in, weeknights are actually easier for me. I can start dinner anytime after 4pm when the baby wakes up, so I have plenty of time.

Weekends are are another story. There is NEVER enough time on the weekend. I want to play games with the kids, work in the yard, work on the computer, go on adventures, everything gets done on weekends around here. Whichever night you choose, this soup is one you should pin, stumble, or bookmark for an easy dinner meal.
Acorn Squash Soup with a Lime Twist
Adapted from Sargento's Website

Ingredients
2 large acorn squash
2 Tbsp. butter or margarine
1 small onion, chopped
1 can chicken or vegetable broth
1/4 tsp. nutmeg 
1/4 tsp. salt  
4 slices Parmesan cheese

Place whole squash on paper towel in microwave oven; cook on HIGH 5 minutes. Turn over; continue cooking 4 minutes more or until squash is barely tender when pierced with a knife. Let stand 5 minutes. Melt butter in large saucepan over medium heat. Add onion; cook 8 minutes or until onion is soft, stirring occasionally. Cut squash in half; scoop out and discard seeds and membrane. Keeping squash shell intact, scoop out flesh, leaving 1/4-inch thick shell. Add squash pulp to onion mixture; cook 1 minute. Add chicken broth, nutmeg and, if desired, cayenne pepper and salt; bring to a boil. Reduce heat; simmer, uncovered, 10 minutes or until squash is very tender, stirring occasionally. Transfer squash mixture to food processor or blender; process until smooth. Reheat soup until very hot. Arrange squash shells, cut sides up, in ovenproof bowls; place bowls on baking sheet; fill with hot soup. Top with toast and cheese. Place under preheated broiler 5 inches from heat; broil 3 minutes or until cheese is melted and golden brown.
Photobucket

September 17, 2012

Eggplant, Roasted Tomato, Polenta Stacks


When this month's Secret Recipe Club assignment arrived, I went straight to the blog of A Couple in the Kitchen. I was jealous you see. 

Oh, how I wish I could be part of "a couple in the kitchen". I wish my wonderful husband cared just a little about cooking, but that is just, not how he rolls. I mean, he REALLY enjoys the eating, and definitely helps with the cleaning, but he is never gonna join me in the cooking. It's just not his deal. With all of his other wonderful MacGuyver traits, I suppose that is okay. I guess I've come to terms with it. 

It's just, when I read the title of my new friends Amy and Chris's blog, I couldn't help but be a little jealous. I wanna be a couple in the kitchen...waaah. I know, I know. You are saying, "get over it Aimee"!

After I looked through Chris and Amy's blog, I came upon Slow Roasted Tomatoes and I knew this was the recipe I wanted to make. We have tomatoes coming out our ears. I canned some, sliced some for sandwiches, eat some right from the bush, gave away some, and even tossed a few rotten ones to the Girls in their coop. (Yes, until recently, they were still trapped in their coop so they didn't eat my hard work.) Roasting some tomatoes and storing them in oil, seemed like a perfect way to prolong our season.

Once I had some roasted lovelies, I had to think what to do with them. I froze several half pints for presents later in the year. Hee hee, I'm getting ready for Christmas already and I love it! I served some with my Roasted Chicken and saved some for Eggplant, Tomato, Polenta Stacks.

This easy vegetarian dinner was a product of what was laying around....lots and lots of Japanese eggplants! My one bush has given us a ton of these purple beauties. This dinner was fabulous!!! Course, if you don't have any eggplant laying around, you could always substitute zucchini for the eggplant or make orzo (small rice shaped pasta) dish also from A Couple in the Kitchen.

Eggplant, Roasted Tomato and Polenta Stacks

Ingredients
1 lg Japanese eggplant (or zucchini can be used)
salt and pepper to taste
3 c water
1 c polenta
1/4 c butter
1/2 tsp salt
olive oil
roasted tomatoes
1/4 c greek yogurt
2 tsp honey
chopped nuts for garnish (I just used an assortment we had from the pantry)

Slice eggplant into thin disks. Lay on paper towels and sprinkle with salt. Leave for 15 minutes or so.

Bring water to a boil in saucepan, add salt. Slowly add polenta and whisk into water. Reduce heat to low and cook for 5 minutes. Add butter and stir until melted and polenta is thick. Pour into a greased pan or bowl. Set aside.

Rinse eggplant with water and pat dry with paper towels. Heat a little olive oil in a saute pan or skillet. When hot, carefully put eggplant slices in pan and cook for a 1-2 minutes. Flip and cook another minute until golden brown. Cook in small batches until all the eggplant is done.

Mix honey and yogurt in a small dish.

Slice polenta into squares like you would brownies. Put a slice of polenta on each plate and then stack the eggplant on top. Sprinkle with roasted tomatoes. Add a dollop of yogurt and sprinkle with chopped nuts. Serve.


Roasted Tomatoes

Ingredients:
4 cups cherry or grape tomatoes, halved
2 tablespoons fresh basil, chiffonade (which is a fancy way of saying slice small strips)
2 tablespoons olive oil
kosher salt
freshly ground black pepper
4 cloves garlic
1/4 to 1/2 cup olive oil for storage
Preheat oven to 200 F. In a large bowl, place the halved tomatoes and basil. Drizzle with olive oil and season with salt and pepper to taste. Gently mix well with your hands. Line baking sheets with silicone baking mats (you know how I love these). Then line sheets with tomatoes in one layer, place garlic cloves in different areas on the baking sheet. Bake for 2-3 hours, until tomatoes look mostly dry. If storing, place them in canning jars, packing them in well and using a metal knife, get the air bubbles out. Cover completely with olive oil and seal with airtight lid. Store in refrigerator for up to six weeks or freezer for several months.

July 23, 2012

Brown Butter Glazed Pineapple with Vanilla Bean Icecream

Ahh, palm trees, ocean breezes, crabs, and snorkeling...you guessed it, I'm not in Georgia anymore! We are visiting relatives in sunny, steamy, south Florida. That's right -- at precisely the time of year when most people are fleeing the summer heat of the tropics, we're enjoying the quiet beaches and light traffic of Florida in the summertime. My kids are totally grooving on the screened in pool in the backyard, as well a diverse selection of Florida critters including lizards, snails, land crabs, cicadas and manatees. OK, it may not be everyone's idea of heaven, but we adore the beach in all types of conditions, and when you have a free place to stay that's (literally) right around the corner from the beach it makes us want to stay for a LONG time! And by offering to cook in exchange for a place to stay, I get the best of both worlds: wonderful food AND the beach!   

Since it's Secret Recipe Club time, I was hoping to find the perfect tropical desert. For our main menu, I made these fresh amazing chicken feta tacos (which I actually made into fish feta tacos this go round since we're, duh, at the ocean). I was hoping for something fresh & fruity, something light, something that tasted like.... well, Florida! And then, as I was searching through Cairns Manor, I came across the perfect dessert for the occasion:  Brown Butter and Rum Glazed Pineapple.

Fresh, fruity, tropical and delish -- what's not to love? Off we went to the store to get pineapple and few hundred other things I'll need on this trip. Along the way I made some adjustments to Jo's recipe, removing the rum and adding some extra spices, including salt and pepper because sweet and salty always go together. The end result was delicious with a great blend of tastes and textures and warm pineapple pairing nicely with ice cream.  

Before I get into this yummy recipe, a quick side note to introduce: Jo over at Cairns Manor: Jo is a Midwife, and people like her hold a special place in my heart because I could never do her job. I'm a real medical wimp and I stand in awe of those in the industry. My Mom was a Nurse  and actually is still involved in the medical field as a consultant. Jo and my Mom are heroes. I'm so glad God did not create us all alike, because wimps like me could never give anyone a shot!! Thank you Jo for all you do.

On Jo's blog, she made this pineapple dessert and served it with angel food cake. I decided on pound cake AND ice cream. Really good Breyer's Vanilla Bean ice cream. It was delicious. Everyone asked for seconds. The pineapple glaze ran over the cake. The heat of the pineapple melted the ice cream a little and they all mixed together for sweet, salty, tangy perfection. Go out and buy a pineapple, make this poundcake and serve this dessert tonight. If you don't want to heat up your kitchen, grill the pineapple. Ah-may-zing!


Brown Butter Glazed Pineapple
1 pineapple
1/2 c butter, unsalted
1/2 c packed brown sugar
1/2 tsp ground cinnamon
1/4 tsp ground cloves
1/8 tsp grated nutmeg
1/2 tsp salt
1/4 tsp pepper

Cut top and bottom off the pineapple. Following the curve of the pineapple and cut off the skin. Cut pineapple in half from top to bottom. Cut again in quarters. Now the core can easily be cut out by cutting off the point of the quartered pineapple. Cut into 1/2 inch slices and set aside.

Melt butter in a large skillet over medium high heat. Once melted allow to continue to cook until it foams up, the foam subsides and the butter starts to brown, then let it cook to your desired browness. Just be very careful not to let it burn! Add in the brown sugar and spices. Cook until slightly thickened, about 1 minute.

Add the pineapple to the pan. Lower heat to medium low. Cook until deep golden, about 8 minutes. Transfer the pineapple to a bowl, leaving as much glaze as you can in the skillet.

Return the pan with glaze to medium-high heat. Simmer until again thickened, about 3-4 minutes.

Grilling option: melt butter in microwave. Mix butter, sugar and spices in a large bowl. Toss with pineapple to coat. Grill pineapple over med direct heat for 5 minutes until warm with lovely grill marks.

Serve immediately with ice cream and pound cake if you dare.

Photobucket

July 9, 2012

Fresh Chunky Guacamole: Only 7 Ingredients

I'm addicted.


I need this stuff at least once a week. I have been known to serve this to my family with veggies and chips and call it dinner. That can be dinner - right?? It's not wrong to wish you didn't have to feed your children is it? Especially when your air conditioning is NOT working. Ugghh. Hopefully it will be fixed today and then I'll feed my kids a real dinner...promise.

This recipe showcases the best in summer. Much like the Summer Fresh Peach-Tomato Salad (which you absolutely MUST make in July and August when the tomatoes and peaches are plentiful and just dripping with flavor.) Using what's in season makes everything better. If you haven't tried my new seasonal search categories, you need to check them out. Look down on bottom right side. Click on "summer" and you will find all kinds of delights perfectly in season right now.


I first tasted this version of guac at On the Border Mexican Restaurant. We went with my parents and my brother and sister-in-law to celebrate my Mom's birthday. I had never been there, mostly because I like Mexican food the way I make it and not out at restaurants. I have to say I LOVED the guacamole there. The kids and I were fighting over who could hold the dish!! In fact, I don't think my sister-in-law (who actually ordered the guac) got more than one chip's worth. Sorry Nadia :) The tricks on this recipe are no garlic and lots of fresh cilantro. Very yummy.


Fresh Chunky Guacamole

Ingredients
3 tbsp minced red onion
2 tbsp chopped fresh cilantro
1 chopped tomato
1 tbsp minced jalapeno 
1/4 tsp salt
1/8 tsp pepper
2 limes
4 ripe avocados


Put the minced onion in a medium bowl. (Hint: Mince the entire red onion and store the remainder in a baggie in the freezer for the next batch of guacamole.)
 Strip the cilantro from the stems and chop the leaves, add to bowl. Chop the tomato. I know many people tell you to discard the insides, but they taste the same and really, I'm just too lazy, so I chop the whole thing and add it to the bowl, just try to shake off some of the tomato juice, or blot it with a paper towel, so you won't have runny guac. Mince the jalapeno without the seeds. Wear gloves when you do this. I have a box of these kind that we use for spray painting, car engine work, and cutting fiery jalapenos. Put the 1/2 tbsp jalapeno in the bowl and if you have some left, bag that too and put in the freezer (I actually put mine in a canning jar and store in the freezer). Give the mix a little stir. If you want to take this to a party, just stop here and bring the avocados and lime with you to the party. Then continue with the steps below when you are ready to serve.

Cut the avocados in half, working your way around the big pit. Twist the avocado to separate the halves. Then cut straight down into the pit with your sharp knife and twist to remove it. Use a spoon to scoop out the flesh and dump into the bowl with the other ingredients. Squeeze the lime juice over the top of everything. Then mash with a fork. I like it chunky so I don't mash around very long. Serve immediately since the avocado will brown even with that lime juice. Ole!


Photobucket

June 28, 2012

Chicken Feta Soft Tacos - Fast Weeknight Dinner


You know I avoid the kitchen most all summer long. I just don't love being in there where it is hot. I get all whiny and complaining, kinda like my kids and it isn't pretty. I LOVE cooking on the grill in summer. I mean it's already hot outside, so cooking out there doesn't change much. It's already 92 in the shade.

Actually, I guess I should say, I love getting my HUSBAND to grill. I do all the prep work and then he stands out there sweating and feeling very manly. Works out great for everyone involved.

This recipe was born of leftover grilled chicken. I often have the Grillmaster cook a couple of extra pieces of chicken to have for salads the next day. This night, I needed fast and had the extra chicken already done, but it's really fast even when starting from nothing. I just happen to have these ingredients in the fridge, so I set them all out. Thankfully it came together beautifully. Really, simple, delicious, fresh...exactly what summer is all about.

Chicken Feta Soft Tacos
chicken breasts
feta cheese
cilantro
cabbage (or lettuce)
limes
pumpkin seeds, roasted and salted
sour cream
tortillas

Drizzle some olive oil over the chicken and sprinkle with some salt and pepper (oregano is good too if you have it). Make sure the chicken is at room temperature before putting on the grill. Grill with indirect heat on medium for about 10-15 minutes until the juices run clear. After the chicken comes off the grill, let it rest for 10 minutes and then chop it into small pieces. Serve all the ingredients in a divided chip tray (like Help Yourself Oatmeal) with warmed tortillas. Let everyone custom make with their choices. My kids especially love the pumpkin seeds, so pick these up next time and keep in the pantry. Summer is served!

 
Photobucket

May 27, 2012

Pickled Pink Onions


While I was browsing the most recent blog I was assigned for Secret Recipe Club, when I made the Spring Green Risotto, I found these beauties - Pickled Onions. Not something I had ever eaten plain or made, but intriguing and oh, so simple. Kate at a Spoonful of Thyme had whipped them up to use with her tacos and fresh made salsa, but I had another idea in mind. They just seemed the perfect little topping for deviled party eggs. {When our kids asked why they were named deviled egg, I couldn't explain, so we adopted my Aunt's name for them...party eggs. Much more descriptive I think.}

I pickled an entire purple onion, so I had plenty to go around. Some of them, I served when we had friends over for barbecue. We put them on our barbecue sandwiches, instead of the traditional pickles like I normally do. I use a slow cooker recipe that has a can of Coke in it, because I DO live in Atlanta. I will share this recipe with you next week, but here's the photo (with traditional pickles).


Anyway, after the cookout and smore's roasting, there were plenty of the lovely pickled onions left over, so I came up with the party egg idea. Notice how one of them looks like the pink breast cancer ribbon??!!  How cool is that? I'm thinking fund raising party for anyone walking to raise money.


The last few of the onions got chopped up and tossed in my favorite broccoli salad. The one with mayo, red wine vinegar and Parmesan cheese? I could eat that salad almost everyday, even without the bacon. On your next barbecue or party, whip these beauties up and see what you can use them for. I'd love to hear what you come up with.

Pickled Pink Onions

Ingredients
1 med red (purple) onion
1/4 c apple cider vinegar
1 tsp sugar
2 tsp salt

Thinly slice the onion. Mix the vinegar, sugar and salt in a bowl. Add the onion slices and let sit in fridge for at least 30 minutes. Will keep for 2 days in fridge.

In hindsight, I'm guessing you could use the pink salt liquid that is created for pretty pink pickled eggs!


Photobucket

May 23, 2012

Spectacular Strawberry Angel Food Cake

Do you have some of these laying around? We have been eating strawberries almost everyday and I still don't get tired of them. We most often eat them plain or with breakfast, but I do make this Fresh Strawberry Cake, and this Strawberry Vinaigrette from my friend Chris. I love to take the kids strawberry picking because those seem to be the most delicious. This year, we planted strawberries and we've had a few small ones. Hopefully next year we will have a better crop.
This simple cake looks spectacular, but it's really easy. Bake or buy an angel food cake. I used an angel food Betty Crocker mix for this one. After the cake has cooled, split it in the middle. Fill the middle with cream and macerated strawberries and then put the top back on. Add more cream on top and decorate with whole strawberries. Delicious!


Whipped Cream Delight
1 pt whipping cream
1/4 c powdered sugar
3 oz mascarpone cheese or cream cheese, softened
Put the whipping cream in a mixer with wire attachment. Beat on higher until it seems to be getting thicker. Add powdered sugar and beat until it forms soft peaks. Stir in the softened cheese.

Macerated Strawberries
1 pt strawberries
4 tbsp sugar
Slice all but four or five strawberries into a bowl. Add the sugar and stir. Keep in fridge and stir occasionally. This can be made the morning or afternoon of when you want to serve the cake. The berries will create a wonderful syrup that you can pour into the bottom half of the cake.

Photobucket

May 3, 2012

Kiwi Kale Smoothie

 
I have a confession to make, I've never tried a green smoothie, until now. Something about greens shredded up in a blender, just did NOT sound delicious to me. I love salads and adore my seaweed wrapped sushi, but mixed up with my favorite fruits...nah, I would always pass. It was way too Dr. Seuss- like. "I do not like green eggs and ham Sam-I-Am."

Last week, when my sweet friend Amy passed along some kale with that kohlrabi I figured I would saute it up like I normally do with greens like swiss chard or make these kale chips like I've done in the past.. But something on that stinkin Pinterest caught my eye (yes, I have an addiction and the boards to prove it). Those crazy green smoothies. They looked, well... yummy.  How bad could it be if so many people drank them? I had the kale and it was hot outside. Which at our house means I should be making smoothies or doling out popsicles. I figured if it was terrible tasting, I could always foist it off to the baby, because she'll eat/ drink just about anything. So I threw caution to the wind and made my first green smoothie!

I had a big bag of kiwi's from Aldi in the fridge. Hey, they are green and they would disguise the greenness of the kale. I had some apple juice and frozen bananas to sweeten it because adding my normal yogurt/ milk didn't seem right with vegetables.

Turns out this concoction was delicious, which probably most of you already know. I'm sure I'm the last green smoothie holdout, right? (It's like texting, I'm slow on the bandwagon, but I'm on now.)

This thing was REALLY tasty. Everyone liked it and asked for seconds. The baby finished hers first and was going around trying to steal from the others. So here's my endorsement, if you've never tried it, you might just like green smoothies....and ham, Sam-I-Am. Now please excuse me, I headed out to buy some kale.
Kiwi Kale Smoothie
8 leaves kale
1 c water
2 bananas, frozen is better but not necessary
3 kiwi, peeled
1 c apple juice
ice

Strip the kale off the stem just like you do with flowers. Hold the stem with one hand and pinch it with the other and pull up until the leaves slide off the stem. (Need a step-by-step of what I'm talking about?)

Stuff the kale into a blender. Add water. Blend until you have a very green smooth pulp. Add the banana, kiwi and apple juice. Blend again until smooth. Now top off your blender with the ice and whirl until you have a frosty smoothie. Serve immediately with straws for fun. :)


Photobucket

LinkWithin

Related Posts Plugin for WordPress, Blogger...