Showing posts with label desserts. Show all posts

March 20, 2013

Beautiful Berry Cream-Filled Tart: My Favorite Dessert


This dessert seriously makes me swoon. It is my all time favorite dessert, ever since I was a teenager. I was that weird kid that was thrilled to see fruit in my lunch box (thanks Mom). I guess I have a special place in my heart for berries because they are so perishable and the season is pretty short. You gotta get 'em while the getting is good. Kinda like kisses from my kids - I'll take them whenever they are ripe for taking. Even the wet sloppy ones from the 2 year old!

The tart may look a little difficult because it's so showy (like the pavlova) but it's really not. Pull together the ingredients for the crust and press it into a pie pan or a tart pan (see below) and then make the creamy filling. After that, it's just a matter of piling on the berries!

Beautiful Berry Cream-Filled Tart

Ingredients
Pastry Shell
1 1/2 c flour
1/4 c sugar
1/8 tsp salt
8 tbsp cold butter, cut into small pieces
1 egg yolk, beaten with 2 tbsp heavy cream

Put flour, sugar and salt into a bowl of a food processor. Pulse to mix. Add the butter pieces and pulse. Add the egg/ cream and pulse until the dough is chunky and holds together when squeezed. (You can also do this in a bowl with a pastry cutter, it just takes more work.) Dump the dough onto was paper and chill in the fridge for 30 minutes. 

Roll dough out into the shape of your tart pan. This dough makes enough for a 9" round pan. (A tart pan has a bottom that comes apart from the sides like a cheesecake pan to make serving a cutting the tart easier. You just lift the bottom of the pan out of the sides and serve the tart on the bottom. You can use a pie pan, just serve it right out of the pan like a pie.) Fit the dough into the pan and cover it with foil or parchment paper. Put some pie weights or dried beans on top of the foil to keep it from puffing up and bake at 425 degrees for 5 minutes. Reduce oven temperature to 350 degrees, remove the weights, prick the bottom of the pastry with a fork. Bake 15-20 minutes, until golden. Cool on a wire rack.

Cream Filling
2/3 c sour cream
1 (8 oz) package cream cheese, softened
2 tbsp lemon juice
1/2 c sugar
1 tsp vanilla
1/4 c heavy cream
Beat sour cream, cream cheese, lemon juice, sugar, vanilla, and cream together in a large bowl. Spread mixture over cooled pastry shell. Arrange berries over the top and garnish with mint leaves if desired.

Chill between 1-4 hours before serving. This doesn't keep well in the fridge for more than a day, since the crust gets soggy.
 
Photobucket

March 14, 2013

Easter Egg Nest Cupcakes

Easter is coming!! I can't wait since we celebrate with our families at our house. I'm ready to have everyone over and celebrate. Easter brings joy and it's just what we need. I'm ever so grateful for the eternal gift I've been given through Jesus' sacrifice.

Easter time is also when our Girls are ramping up their laying! We have eggs coming out of our ears right now. I was inspired to create this cute cupcake. They are a totally fun Easter treat I made for the preschool and elementary aged kids. Super easy. Just whip up some cupcakes and top with icing. Then sprinkle on some chow mein noodles and add a few speckled jelly beans or whoppers to the top. How simple is that???
Photobucket

February 15, 2013

Lemon Love Note Bars - Sweet and Sour


These bars are sweet and sour all at the same time

...kinda like marriage.

I love my husband. It's true, he's the man for me. He puts up with my moods and endless chatter. He brought me flowers and a huge balloon for Valentine's Day, and the man HATES balloons. He eats everything I put in front of him. He can build me anything I ask for. He's the most supportive and encouraging person I know. He's there for me whenever I need him. (Boy, oh boy, have I realized how much I need him lately.) We are a team and a great one at that. (I'm pretty sure we could win the Amazing Race.)

However, there are definitely times when we seem to treat each other more "sour" than sweet.

Everyone has some sour moments - right? At this point in our marriage (ten years) I'm pretty sure it's normal. I mean, you are not really supposed to get along with someone every single day right?

I logically knew it wouldn't all be roses before we got married. I even engraved it on the inside of his wedding band, "Come What May". And while I don't love being in the down times, I do love the wonderful tenderness that comes after we get out of the funk.

The sour, just makes the sweet all that much sweeter.

Honey, MacGuyver, Babe, Husband....this one is for you. I love you...come what may.

Lemon Love Notes

Ingredients
1 c butter
2 c flour
1/2 c powdered sugar
1 lemon, zested and juiced
4 eggs
2 c sugar
4 tbsp flour
1 tsp baking powder
1 1/2 c powered sugar
1 tsp vanilla
2 tbsp butter, melted and cooled
3 tsp milk

Blend butter flour and sugar together with pastry cutter or a fork. Pat into a 9x13" ungreased baking dish. Make sure this is very flat and even. Bake at 350 degrees for 15 minutes. Cool until you can touch the baking pan.

While that is baking and cooling, make the filling. Mix together zest of one lemon and the juice of the lemon with eggs, sugar, flour and baking powder. Pour this on the cooled crust and bake again at 350 degrees for 25 minutes. Cool again.

Melt butter. After the bars are cooled off enough you can touch the pan again, make the icing. In a small bowl, whisk together the sugar, vanilla, melted butter and milk. Pour over the top of the pan. Cut into small bars because these are super rich. They will keep fresh for only a few days.
Photobucket


February 8, 2013

Moose Munch - Chocolate Covered Caramel Popcorn


See. I wasn't kidding.

I've been making everything. Chocolate covered caramel popcorn this go round.

My Mom made this addicting stuff for us for Christmas. It's a take on Harry and David's Moose Munch. I figured it would make great thank you gifts. One bag to a neighbor who has taken care of my kids during all this chaos and another bag to our marriage mentors, who keep us from taking the stress out on each other. The problem was: I tried it, the kids tasted it and I let my husband taste it. We ate the whole recipe! It's that crazy good.

There is no way you can eat just a little bit of this stuff. You have been warned. Make a double recipe and give a bag to your loved ones for Valentine's. Attach a note to let them know how much you love them. Send it to someone you haven't seen in a while and you miss. Don't wait for the "perfect time" to reach out. Now is the perfect time.


Chocolate Covered Caramel Popcorn

Ingredients
8 c popped popcorn
1 stick butter, cut into fourths)
3 tbsp corn syrup (the recipe will work without this, but the caramel won't be shiny or as crunchy)
1/2 tsp salt
3/4 c brown sugar
1/4 tsp vanilla
1/4 tsp baking soda
chocolate chips (Mom choose dark chocolate)
peanuts, m&m's, mini marshmallows (optional)
Preheat oven to 300 degrees.

Remove all unpopped kernels from popcorn and pour popcorn into a large bowl. Combine butter, corn syrup, salt and brown sugar in microwave safe bowl. Cook on high until mixture boils - watch this carefully - don't let it boil over. Remove, stir and microwave for another few minutes. (Or you can do this in a pot on the stove over med-high heat).  Cook and stir until mixture boils. Remove from heat and stir in baking soda and vanilla.
Pour caramel over popcorn and stir to coat. Work quickly before the caramel cools. Spread onto silicone lined (or greased) baking sheet and bake for 10-15 minutes (10 for chewy, 15 for crunchy).
Remove from oven and add chocolate chips, stir around on sheet to melt the chips. You can also melt the chocolate and drizzle over the popcorn for a fancier look. 
Photobucket

July 23, 2012

Brown Butter Glazed Pineapple with Vanilla Bean Icecream

Ahh, palm trees, ocean breezes, crabs, and snorkeling...you guessed it, I'm not in Georgia anymore! We are visiting relatives in sunny, steamy, south Florida. That's right -- at precisely the time of year when most people are fleeing the summer heat of the tropics, we're enjoying the quiet beaches and light traffic of Florida in the summertime. My kids are totally grooving on the screened in pool in the backyard, as well a diverse selection of Florida critters including lizards, snails, land crabs, cicadas and manatees. OK, it may not be everyone's idea of heaven, but we adore the beach in all types of conditions, and when you have a free place to stay that's (literally) right around the corner from the beach it makes us want to stay for a LONG time! And by offering to cook in exchange for a place to stay, I get the best of both worlds: wonderful food AND the beach!   

Since it's Secret Recipe Club time, I was hoping to find the perfect tropical desert. For our main menu, I made these fresh amazing chicken feta tacos (which I actually made into fish feta tacos this go round since we're, duh, at the ocean). I was hoping for something fresh & fruity, something light, something that tasted like.... well, Florida! And then, as I was searching through Cairns Manor, I came across the perfect dessert for the occasion:  Brown Butter and Rum Glazed Pineapple.

Fresh, fruity, tropical and delish -- what's not to love? Off we went to the store to get pineapple and few hundred other things I'll need on this trip. Along the way I made some adjustments to Jo's recipe, removing the rum and adding some extra spices, including salt and pepper because sweet and salty always go together. The end result was delicious with a great blend of tastes and textures and warm pineapple pairing nicely with ice cream.  

Before I get into this yummy recipe, a quick side note to introduce: Jo over at Cairns Manor: Jo is a Midwife, and people like her hold a special place in my heart because I could never do her job. I'm a real medical wimp and I stand in awe of those in the industry. My Mom was a Nurse  and actually is still involved in the medical field as a consultant. Jo and my Mom are heroes. I'm so glad God did not create us all alike, because wimps like me could never give anyone a shot!! Thank you Jo for all you do.

On Jo's blog, she made this pineapple dessert and served it with angel food cake. I decided on pound cake AND ice cream. Really good Breyer's Vanilla Bean ice cream. It was delicious. Everyone asked for seconds. The pineapple glaze ran over the cake. The heat of the pineapple melted the ice cream a little and they all mixed together for sweet, salty, tangy perfection. Go out and buy a pineapple, make this poundcake and serve this dessert tonight. If you don't want to heat up your kitchen, grill the pineapple. Ah-may-zing!


Brown Butter Glazed Pineapple
1 pineapple
1/2 c butter, unsalted
1/2 c packed brown sugar
1/2 tsp ground cinnamon
1/4 tsp ground cloves
1/8 tsp grated nutmeg
1/2 tsp salt
1/4 tsp pepper

Cut top and bottom off the pineapple. Following the curve of the pineapple and cut off the skin. Cut pineapple in half from top to bottom. Cut again in quarters. Now the core can easily be cut out by cutting off the point of the quartered pineapple. Cut into 1/2 inch slices and set aside.

Melt butter in a large skillet over medium high heat. Once melted allow to continue to cook until it foams up, the foam subsides and the butter starts to brown, then let it cook to your desired browness. Just be very careful not to let it burn! Add in the brown sugar and spices. Cook until slightly thickened, about 1 minute.

Add the pineapple to the pan. Lower heat to medium low. Cook until deep golden, about 8 minutes. Transfer the pineapple to a bowl, leaving as much glaze as you can in the skillet.

Return the pan with glaze to medium-high heat. Simmer until again thickened, about 3-4 minutes.

Grilling option: melt butter in microwave. Mix butter, sugar and spices in a large bowl. Toss with pineapple to coat. Grill pineapple over med direct heat for 5 minutes until warm with lovely grill marks.

Serve immediately with ice cream and pound cake if you dare.

Photobucket

June 25, 2012

Patriotic Cupcakes


Any excuse to celebrate is my motto. I am the geeky Mom who has Valentine's Day decorations, St Patrick's Day fun, we even celebrated National Doughnut Day here in Chickenville. 
Complete with a blind taste test of the top two national doughnut brands. It was Krispy Kreme by a landslide (I'm raising them right).
I'm sure one day my kids will look at me and realize I'm a little holiday crazy, but until then, I keep on celebrating.

I made these cupcakes for Memorial Day, but they would be perfect for next week on the 4th of July. I bake this Fresh Strawberry Cake and icing recipe into cupcakes. Then topped with fun marshmallow stars from Walmart.  I got the big size, but they come smaller too which would be perfect for decorating mini cupcakes or even homeschool projects like these.
Photobucket

June 7, 2012

Toffee Nut Crunch Cookies


Life at our house these days is wonderful. The kids are playing outside in this beautiful weather with much later bedtimes. The pollen seems to have gone down here in landlocked Atlanta with all of our rain. The garden veggies seem to get bigger by the minute. I have even had time to bake just for fun. *Gasp* Usually I bake for a purpose. Something to share with others or an event to celebrate, but occasionally I bake just because. It's a walk on the wild side!

These cookies were good. No, these were GREAT. The entire large batch disappeared from our house in only a couple of days. Ok, we did share a few. I was thinking about omitting the coconut because I don't usually like bagged coconut (give me a coconut right off the tree, that's another story), but it didn't overwhelm this flavorful recipe. They are crunchy, sweet, nutty and buttery.  Really, what else could you ask for in a cookie??


Toffee Nut Crunch Cookies
from Taste of Home

Ingredients
1 c butter, softened
1/2 c vegetable oil
1 c sugar
1 c brown sugar
1 tsp vanilla
2 eggs
3 1/2 c flour
2 tsp baking powder
1/2 tsp baking soda
1 tsp salt
1 c oats
1 c flaked coconut
3 c rice cereal (Rice Crispies)
1 c chopped walnuts or pecans

Heat oven to 350 degrees.

In a mixer, cream butter, oil, sugars and vanilla. Add the eggs, one at a time, beating well in between. In another bowl, whisk together flour, powder, soda and salt. Add flour mixture to mixer bowl on a slow mix to combine. Add in oats and coconut combine again. Remove from mixer stand and stir in the cereal, nuts, and toffee bits.

Drop by small ice cream scoopfuls or tablespoonfuls onto an ungreased sheet (lined with silicone baking sheet if you have it). Bake for 10 minutes, until light brown. Cool on wire racks.


Photobucket

May 23, 2012

Spectacular Strawberry Angel Food Cake

Do you have some of these laying around? We have been eating strawberries almost everyday and I still don't get tired of them. We most often eat them plain or with breakfast, but I do make this Fresh Strawberry Cake, and this Strawberry Vinaigrette from my friend Chris. I love to take the kids strawberry picking because those seem to be the most delicious. This year, we planted strawberries and we've had a few small ones. Hopefully next year we will have a better crop.
This simple cake looks spectacular, but it's really easy. Bake or buy an angel food cake. I used an angel food Betty Crocker mix for this one. After the cake has cooled, split it in the middle. Fill the middle with cream and macerated strawberries and then put the top back on. Add more cream on top and decorate with whole strawberries. Delicious!


Whipped Cream Delight
1 pt whipping cream
1/4 c powdered sugar
3 oz mascarpone cheese or cream cheese, softened
Put the whipping cream in a mixer with wire attachment. Beat on higher until it seems to be getting thicker. Add powdered sugar and beat until it forms soft peaks. Stir in the softened cheese.

Macerated Strawberries
1 pt strawberries
4 tbsp sugar
Slice all but four or five strawberries into a bowl. Add the sugar and stir. Keep in fridge and stir occasionally. This can be made the morning or afternoon of when you want to serve the cake. The berries will create a wonderful syrup that you can pour into the bottom half of the cake.

Photobucket

April 23, 2012

The Most Incredible Poundcake Recipe EVER

UPDATE: Welcome pinners. This has become my most popular recipe to date! Wow, you all are really looking for a good great poundcake. I can tell you, you've found it. I hope while you are checking this one out, you'll poke around some other recipes. One easy way to do this is by season. Click on the seasonal link in the cloud list on the right hand sidebar and see what you can make right now. Or you may be interested in the other cakes I've made, including some fun birthday cakes. Either way, I'd love to hear from you, so leave a comment or shoot me an email. tochickenville {at} gmail {dot} come. Thanks for visiting!

------------------------------
Secret Recipe Club alert!! Why "secret"? In the Club we are assigned another food blog from the members and then secretly make one of their recipes. This month, I was assigned Anne From My Sweet Heart, a blog laser focused on desserts. Just so happens this is a GREAT time for me to make a cake. My aunt, my mother-in-law, brother, AND sister-in-law (she of the Kickin' Vinaigrette dressing) all have birthdays in April!! The kids spend at least two days making all of their cards and sometimes I get to spend some time in the kitchen cooking up a celebration dinner. This month, I got to make dinner for my brother and his wife for their birthdays. My parents joined us for the evening. It was loud  (actually our house is always loud with four kids) with lots of laughing and fun. The big kids put on a gymnastics's show AND a theatre production.

Mom and Dad brought the main dish, a pork loin, which I seasoned and my husband grilled. As usual it was moist, delicious and perfectly delicious. You cannot miss with my Disappearing Pork Loin recipe. I made Kohlrabi-Carrot Bake, Broccoli Salad (which I did not get enough of on Easter), homemade Honey Wheat Seeded bread, cheese grits, a green salad and the afore mentioned delicious pound cake.

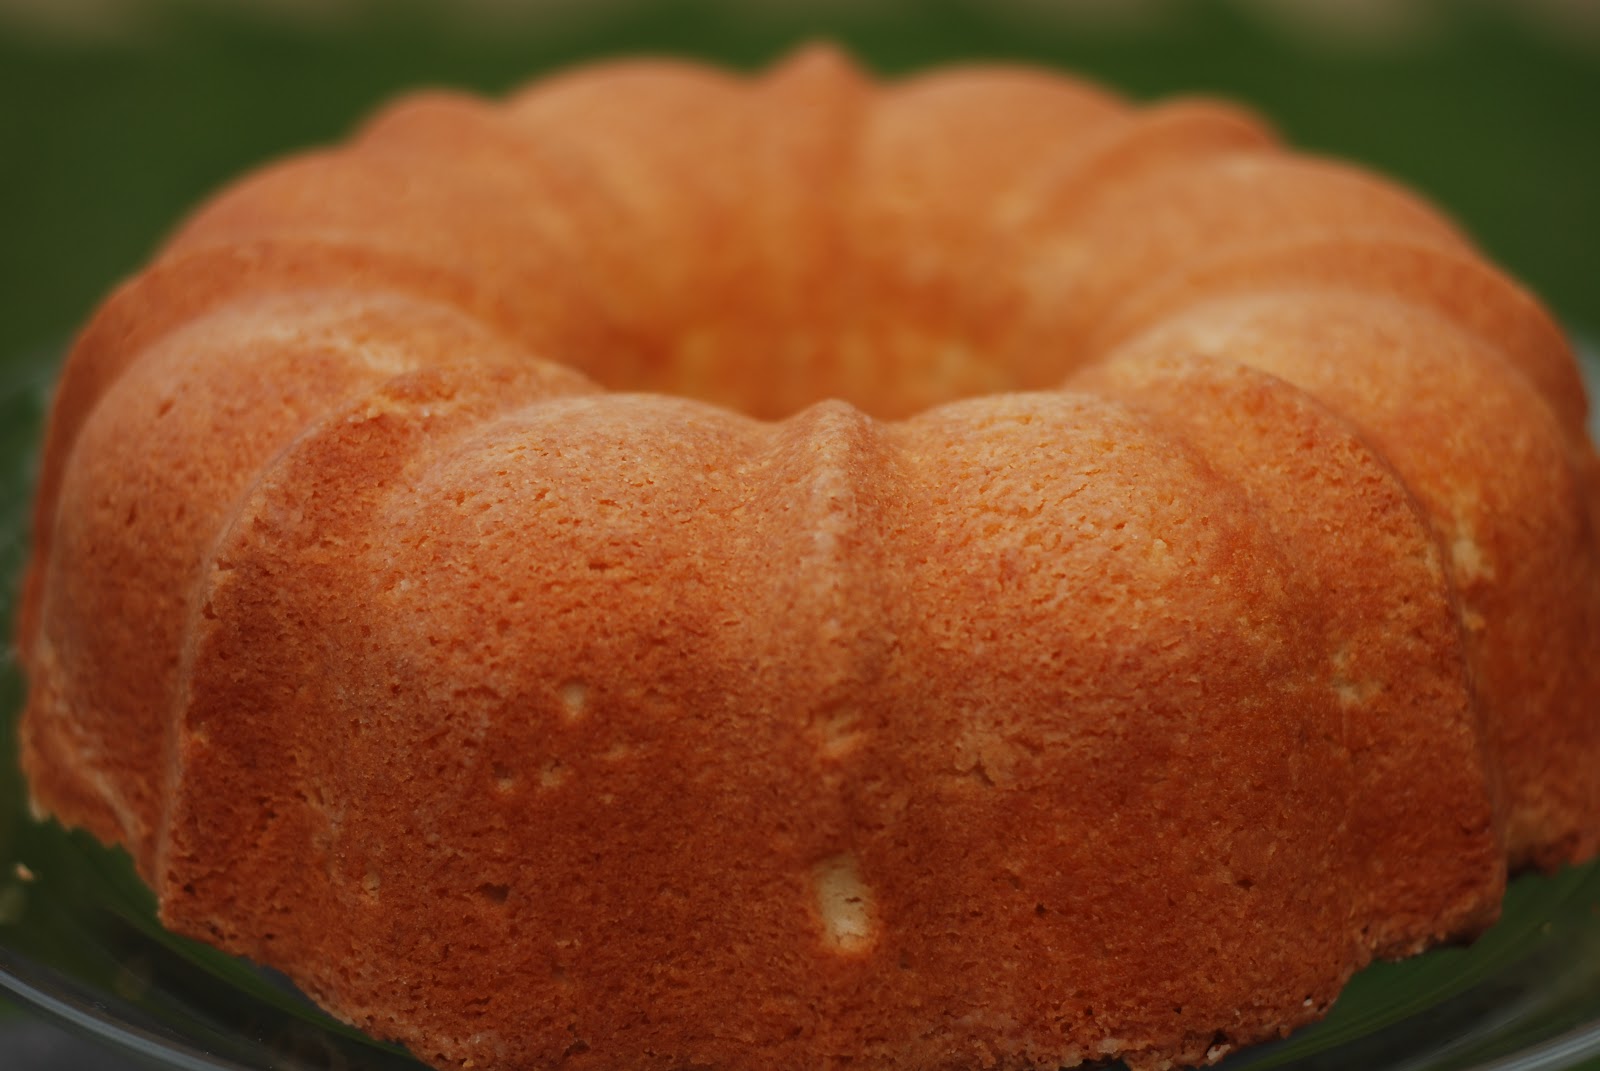
This cake is moist and held a perfect crumb. The bottom crust was crispy, but the inside was soft. I served it with strawberries macerated in sugar (directions in the recipe below) and Breyers vanilla bean ice cream. My husband went back for a plain piece because he said the berries just got in his way of tasting the amazing cake. I swapped out a little of the vanilla in the original recipe for some almond, which took it over the top (this does not make it almond tasting, it only adds a little depth of flavor). Whatever you choose, make sure it's good quality, pure extract, not imitation, because it will be the dominate flavor.

This recipe turned out to be the best poundcake I've ever tasted!! Right up there with my favorite cake - Famous Fresh Strawberry Cake. I'm not kidding you folks, this was really THAT good. Find an excuse to make this cake and you will be a hero to your family.

Cream Cheese Poundcake
From My Sweet Heart

3 sticks unsalted butter, at room temperature
8 oz. cream cheese, at room temperature
3 cups sugar
1/2 tsp salt
1 tbsp pure vanilla extract
1 tsp almond extract (my preference or you could do lemon, more vanilla, or something else)
6 large eggs
3 cups of sifted flour
1 tsp baking powder

Preheat your oven to 325°F. Spray a bundt pan with cooking spray and then sprinkle some flour over the spray. Shake it around until the flour covers the oil and then tap out the excess. It should look like this. If you don't have a bundt pan, you can bake it in two 8 1/2 by 4 1/2 inch loaf pans for 60 minutes.
In the mixer bowl, beat the butter and cream cheese together until creamy. Gradually add the sugar with the mixer still running, and continue to beat until light and fluffy. Beat in the salt and extracts. Add the eggs to the mix, one at a time. Beat well after each addition. This is easy when you have a little helper.

Stop the electric mixer and sift the flour and baking powder into the bowl. With a rubber spatula, gently stir the flour into the mix, until no traces of flour are seen and the batter is smooth.

Pour the batter into the prepared bundt pan. Bake on center rack for 75 minutes. The top should be golden and become slightly cracked; and when a toothpick inserted into the center comes out with a few moist crumbs.  Transfer to a wire rack and let the pans cool for 15 minutes. Carefully turn the cake out of the pan onto a wire rack for cooling.

To serve with strawberries. While cake is baking, wash, hull (remove the stems) and cut up the berries. Sprinkle with sugar. Let stand in fridge, every once in a while, give them a stir. You want them to sit for an hour or so. When they are ready, there will be a nice juicy, sweet syrup in the bottom of the bowl.

The most perfect Poundcake recipe EVER. Happy Birthday Nadia and Jason!!

Photobucket

April 10, 2012

Real Pecan Pie...Frozen

I love pecan pie, but NOT the nasty slimy middle. I solved this problem one time when I bought a piece of pecan pie from the freezer section - Edwards or some brand. I figured it was only one piece so I couldn't go overboard, but when I got it home it was all I could think about (restraint is not my strong point). That silly piece of pie was calling my name. I got home, ripped open the cardboard package and ate the entire slice without letting it thaw or even using a fork.

Turns out it was the best pecan pie I ever ate! It had nothing to do with the brand but the simple fact that the pie was still pretty frozen. When the jiggly middle is frozen it turns to a wonderful gooey, caramel like treat that I LOVED! Now, I make and serve pecan pie to my guests and then freeze my leftovers for me to enjoy another day. I encourage everyone to try pecan pie frozen - you may love it. I've even converted my very southern husband to freezing his.

I decided I needed to make a pecan pie because my husband's wonderful Aunt and Uncle gave us a HUGE bag of pecans. Apparently they have the largest pecan tree in Fayette County, which is really saying something. They gathered the nuts for us and I put the kids to work cracking them with this cool contraption. I won't say it makes cracking the pecans easy...let's say easIER. Once we had enough nuts, I was all set to make my pie.

Real Pecan Pie
adapted from Baking Illustrated by way of Brown Eyed Baker

Single crust pie shell, store bought or homemade
6 tbsp butter, cut into 1-inch pieces
1 c brown sugar
½ tsp salt (if using unsalted butter)
3 eggs
¾ c light corn syrup
1 tbsp vanilla
2 c pecans, chopped into small pieces

Toast your pecans in a dry skillet on the stove for a few minutes until they smell nutty or toast them on a tray in your toaster oven. Just be sure to watch them as nutty and delicious can turn burnt VERY quickly. Let cool.

Preheat oven to 400 degrees. Prick the crusts with a fork all over the bottom.

Then cover the crust with aluminum foil and fill with dried beans. This keeps the pie shell from puffing up with air and becoming brittle. Bake for 15 minutes.

Remove foil and beans weights bake 5 additional minutes until crust is golden brown and crisp. Remove from oven and reduce the temp to 275 degrees.

Melt the butter in a double boiler. {See my new one??} Remove from heat and stir in the sugar and salt with a wooden spoon until the butter is absorbed. Beat in the eggs, then the corn syrup and vanilla. Return to this stove; stir until the mixture is shiny and hot to the touch, about 130 degrees on an instant-read thermometer. Remove from the heat; stir in the pecans.


 Pour the pecan mixture into the hot pie shell.

Bake on the middle rack until the pie looks set and yet soft, like gelatin, when gently pressed with the back of a spoon, 50 to 60 minutes. Transfer the pie to a rack; cool completely, at least 4 hours. Then to really make magic, put it in the freezer. Promise me you'll do it with a least one piece, just to try. I bet you'll love it!!

Photobucket

February 29, 2012

Hot Chocolate Cake

Happy Leap Day! First, I must wish my #3 child Happy Birthday today!!  He's four, but according to the calendar he's only one. Since his Leap Day birthday only rolls around once every four years we are celebrating BIG today. I took in homemade cinnamon rolls for his birthday snack at preschool and we'll be dining at IHOP at his request :) This weekend we are having a Super Fast Racecar Birthday Party to celebrate, so stay tuned for those photos. I don't imagine it will be as loud as last year's Marching Band party, but it will be just as much fun.

As promised, here is the Hot Chocolate Cake recipe. This is a doctored box mix cake that turned out fabulous!  Really, really, good. I don't usually like chocolate cake, but this one was great. It was moist and dense in all the right places. I served it with chocolate buttercream icing. My 8 year old decided on the the flavor, just assuming I could make it happen! I was pretty relieved when it came out delicious - nothing like letting your foodie child down. He would have been the first person to tell me if it was terrible.

Hot Chocolate Cake
1 box of chocolate cake mix, regular chocolate or devil's food
4 eggs
1/2 c water
1 c buttermilk
1/3 c vegetable oil
1 sm box pumpkin pie instant pudding mix (if you can't get this substitute 1 box chocolate or vanilla pudding mix and 2 tsp cinnamon)
1/2 c semi sweet chocolate chips
1 c mini marshmallows or cut up large ones

Put chocolate cake mix, eggs, water, buttermilk, oil and pudding in mixer bowl. Beat as directed on the cake mix box. Then add the chocolate chips and marshmallows and stir. Pour cake mix into greased cake pans and bake as directed on your cake mix box according to your cake pan size.

I used this to make my Magic Tree House birthday cake and it was moist and delicious. I frosted it with a chocolate buttercream icing.

Photobucket

January 25, 2012

Cookie Dough Truffles


Are you suffering from sugar withdrawal? After all of those Christmas treats and wonderful parties, I sometimes find January a bit depressing - even if we really like being healthy around here. I was searching for a sweet treat when I remembered this one. I have to say, this really was a recipe for my kids. They are big fans of licking the bowl, but I don't let them when we are cooking with eggs - even though I know where the eggs came from. I actually am not a fan of eating cookie dough *shock* or even cookies 'n cream ice cream. I don't know, call me a cookie snob, but I like my cookies soft, homemade and well... baked. However, I recognize that not everyone falls in this category and some people actually like eating the raw dough. I remember back in college when my roommates introduced me to Ben and Jerry's Ice Cream. There was a little store in downtown Chapel Hill on Franklin Street. We would walk there from across campus and get a VERY small, delicious, expensive ice cream cone. That was the first time I ever even heard of someone eating cookie dough - and in an ice cream flavor! I thought it was crazy, but I soon learned there are many "cookie doughers" out there.

These truffles come from Taste of Home magazine. I love the down-home feel of their cookbooks. I figured I could make these for the kids and they would be tickled to eactually eat the raw cookie dough. The recipe doesn't use eggs, but it mimics the taste of cookie dough very well. (I had to taste it to see!) You take a small ball of the cookie dough and coat it in melted chocolate. That's where their recipe ends. I had to add to it. They were SOOOOOO super sweet I felt like they needed some salt, so I sprinkled some course sea salt on top of the truffles at the chocolate cooled.

The dough itself was very easy. Coating them in chocolate takes a little time, but it's not hard (and you really don't have to be that neat - mine are definitely not). No doubt a sweet teacher or students would LOVE these for Valentines Day.
If you need other ideas for Valetine's Day, just click on the label "Valentine's" on the side to get to my other recipes and crafts perfect for this time of year.
Cookie Dough Truffles
from Taste of Home
1/2 c soft butter
3/4 c packed brown sugar
1 tsp vanilla
2 c flour
1- 14 oz can sweetened condensed milk - NOT evaporated milk
1/2 c chocolate chips
1 1/2 lbs chocolate melting candy (sometimes called almond bark - find it in the grocery or Walmart) OR you can use melted real chocolate that you know will harden when cool
course salt

In a large bowl, cream the butter and brown sugar until light and fluffy and then beat in vanilla. Gradually add flour, alternately with milk, beating well after each addition. Stir in chocolate chips. Shape into 1 inch balls, or smaller - these are rich. Place on waxed paper-lined baking sheets. Refrigerate for 1-2 hours or put in the freezer for 30 minutes. You want them firm so they can be dipped in the chocolate. In a microwave or double boiler (I got one for Christmas - thanks honey!) melt candy coating according to package directions. Dip balls in coating; allow excess to drip off. Place on cookie racks so the chocolate runs off as cooling, sprinkle with course salt. Refrigerate until firm, about 15 minutes. Store these gems in the refrigerator. 

Yield: 5-1/2 dozen.

Photobucket

LinkWithin

Related Posts Plugin for WordPress, Blogger...