Showing posts with label everyday cooking. Show all posts

February 6, 2013

Butternut Squash Bean Chili

Difficult season of life right now...

My Dad is terminally ill with cancer. My father-in-law had a major car accident and is living with us for a bit. 

At this point, functioning is difficult. Writing complete, coherent sentences with correct spelling is a challenge. Please forgive my choppiness. I need sleep. 

I'm taking comfort in food which is a dangerous place to be. I know me - stress equals eating. 

I need to make healthy things. Vegetarian chili comes to mind. We have a butternut squash and out came this. Warm comfort in a chocolate bowl.


Butternut Squash Bean Chili

Ingredients
1 1/2 tbsp olive oil


2 onions, chopped
4 garlic cloves, minced
2 jalapenos, seeded and minced
2 tbsp chili powder
2 tbsp cumin
1 tbsp oregano
1 tbsp lime juice
2 14.5 oz cans tomatoes, undrained
2 14.5 oz cans any beans (black, red, pinto, etc), drained and rinsed
2 c butternut squash, peeled, seeded, cut into 1/2-inch cubes (about 1lb)
Salt and Pepper
Sour cream 
Chopped fresh cilantro

Heat oil in pot over med-high heat. Add onions and cook until soft and beginning to brown, stirring often, about 8 minutes. Add garlic and jalapenos, stir 1 minute. Add spices: chili powder, cumin, oregano and lime juice, stir 1 minute. Add in tomatoes with juice, beans, and butternut squash. Cook with lid on until squash is soft, about 20 minutes. Stir the pot around 10 minutes, add water if necessary. Season to taste with salt and pepper. Serve with sour cream, cilantro, and lime wedges.
 
Photobucket

October 19, 2012

Acorn Squash Soup with Parmesean Cheese


Dinner tonight was AMAZING! Really. I'm trying to incorporate more vegetarian meals in our dinner routine both for health and for expense. I've encountered resistance from just about everyone in the family except the baby - she's happy to eat anything. My darling husband, Mr MacGuyver on the other hand insists on meat - protein for him he says. I think he might be finally softening after a few really good meatless meals we've had.

Tonight was one of them. Acorn Squash Soup that was delicious...creamy, tangy, sweet. So many flavors, it was hard to pin down and perfect for a cold night after everyone had played outside all afternoon. The recipe is pretty easy too, which always makes me happy on weekends when I really want/need to do other things besides cook. I'm guessing I'm the odd-ball there because most of you probably want fast dinners on weeknights. With homeschooling and really limiting what are kids are in involved in, weeknights are actually easier for me. I can start dinner anytime after 4pm when the baby wakes up, so I have plenty of time.

Weekends are are another story. There is NEVER enough time on the weekend. I want to play games with the kids, work in the yard, work on the computer, go on adventures, everything gets done on weekends around here. Whichever night you choose, this soup is one you should pin, stumble, or bookmark for an easy dinner meal.
Acorn Squash Soup with a Lime Twist
Adapted from Sargento's Website

Ingredients
2 large acorn squash
2 Tbsp. butter or margarine
1 small onion, chopped
1 can chicken or vegetable broth
1/4 tsp. nutmeg 
1/4 tsp. salt  
4 slices Parmesan cheese

Place whole squash on paper towel in microwave oven; cook on HIGH 5 minutes. Turn over; continue cooking 4 minutes more or until squash is barely tender when pierced with a knife. Let stand 5 minutes. Melt butter in large saucepan over medium heat. Add onion; cook 8 minutes or until onion is soft, stirring occasionally. Cut squash in half; scoop out and discard seeds and membrane. Keeping squash shell intact, scoop out flesh, leaving 1/4-inch thick shell. Add squash pulp to onion mixture; cook 1 minute. Add chicken broth, nutmeg and, if desired, cayenne pepper and salt; bring to a boil. Reduce heat; simmer, uncovered, 10 minutes or until squash is very tender, stirring occasionally. Transfer squash mixture to food processor or blender; process until smooth. Reheat soup until very hot. Arrange squash shells, cut sides up, in ovenproof bowls; place bowls on baking sheet; fill with hot soup. Top with toast and cheese. Place under preheated broiler 5 inches from heat; broil 3 minutes or until cheese is melted and golden brown.
Photobucket

September 17, 2012

Eggplant, Roasted Tomato, Polenta Stacks


When this month's Secret Recipe Club assignment arrived, I went straight to the blog of A Couple in the Kitchen. I was jealous you see. 

Oh, how I wish I could be part of "a couple in the kitchen". I wish my wonderful husband cared just a little about cooking, but that is just, not how he rolls. I mean, he REALLY enjoys the eating, and definitely helps with the cleaning, but he is never gonna join me in the cooking. It's just not his deal. With all of his other wonderful MacGuyver traits, I suppose that is okay. I guess I've come to terms with it. 

It's just, when I read the title of my new friends Amy and Chris's blog, I couldn't help but be a little jealous. I wanna be a couple in the kitchen...waaah. I know, I know. You are saying, "get over it Aimee"!

After I looked through Chris and Amy's blog, I came upon Slow Roasted Tomatoes and I knew this was the recipe I wanted to make. We have tomatoes coming out our ears. I canned some, sliced some for sandwiches, eat some right from the bush, gave away some, and even tossed a few rotten ones to the Girls in their coop. (Yes, until recently, they were still trapped in their coop so they didn't eat my hard work.) Roasting some tomatoes and storing them in oil, seemed like a perfect way to prolong our season.

Once I had some roasted lovelies, I had to think what to do with them. I froze several half pints for presents later in the year. Hee hee, I'm getting ready for Christmas already and I love it! I served some with my Roasted Chicken and saved some for Eggplant, Tomato, Polenta Stacks.

This easy vegetarian dinner was a product of what was laying around....lots and lots of Japanese eggplants! My one bush has given us a ton of these purple beauties. This dinner was fabulous!!! Course, if you don't have any eggplant laying around, you could always substitute zucchini for the eggplant or make orzo (small rice shaped pasta) dish also from A Couple in the Kitchen.

Eggplant, Roasted Tomato and Polenta Stacks

Ingredients
1 lg Japanese eggplant (or zucchini can be used)
salt and pepper to taste
3 c water
1 c polenta
1/4 c butter
1/2 tsp salt
olive oil
roasted tomatoes
1/4 c greek yogurt
2 tsp honey
chopped nuts for garnish (I just used an assortment we had from the pantry)

Slice eggplant into thin disks. Lay on paper towels and sprinkle with salt. Leave for 15 minutes or so.

Bring water to a boil in saucepan, add salt. Slowly add polenta and whisk into water. Reduce heat to low and cook for 5 minutes. Add butter and stir until melted and polenta is thick. Pour into a greased pan or bowl. Set aside.

Rinse eggplant with water and pat dry with paper towels. Heat a little olive oil in a saute pan or skillet. When hot, carefully put eggplant slices in pan and cook for a 1-2 minutes. Flip and cook another minute until golden brown. Cook in small batches until all the eggplant is done.

Mix honey and yogurt in a small dish.

Slice polenta into squares like you would brownies. Put a slice of polenta on each plate and then stack the eggplant on top. Sprinkle with roasted tomatoes. Add a dollop of yogurt and sprinkle with chopped nuts. Serve.


Roasted Tomatoes

Ingredients:
4 cups cherry or grape tomatoes, halved
2 tablespoons fresh basil, chiffonade (which is a fancy way of saying slice small strips)
2 tablespoons olive oil
kosher salt
freshly ground black pepper
4 cloves garlic
1/4 to 1/2 cup olive oil for storage
Preheat oven to 200 F. In a large bowl, place the halved tomatoes and basil. Drizzle with olive oil and season with salt and pepper to taste. Gently mix well with your hands. Line baking sheets with silicone baking mats (you know how I love these). Then line sheets with tomatoes in one layer, place garlic cloves in different areas on the baking sheet. Bake for 2-3 hours, until tomatoes look mostly dry. If storing, place them in canning jars, packing them in well and using a metal knife, get the air bubbles out. Cover completely with olive oil and seal with airtight lid. Store in refrigerator for up to six weeks or freezer for several months.

July 9, 2012

Fresh Chunky Guacamole: Only 7 Ingredients

I'm addicted.


I need this stuff at least once a week. I have been known to serve this to my family with veggies and chips and call it dinner. That can be dinner - right?? It's not wrong to wish you didn't have to feed your children is it? Especially when your air conditioning is NOT working. Ugghh. Hopefully it will be fixed today and then I'll feed my kids a real dinner...promise.

This recipe showcases the best in summer. Much like the Summer Fresh Peach-Tomato Salad (which you absolutely MUST make in July and August when the tomatoes and peaches are plentiful and just dripping with flavor.) Using what's in season makes everything better. If you haven't tried my new seasonal search categories, you need to check them out. Look down on bottom right side. Click on "summer" and you will find all kinds of delights perfectly in season right now.


I first tasted this version of guac at On the Border Mexican Restaurant. We went with my parents and my brother and sister-in-law to celebrate my Mom's birthday. I had never been there, mostly because I like Mexican food the way I make it and not out at restaurants. I have to say I LOVED the guacamole there. The kids and I were fighting over who could hold the dish!! In fact, I don't think my sister-in-law (who actually ordered the guac) got more than one chip's worth. Sorry Nadia :) The tricks on this recipe are no garlic and lots of fresh cilantro. Very yummy.


Fresh Chunky Guacamole

Ingredients
3 tbsp minced red onion
2 tbsp chopped fresh cilantro
1 chopped tomato
1 tbsp minced jalapeno 
1/4 tsp salt
1/8 tsp pepper
2 limes
4 ripe avocados


Put the minced onion in a medium bowl. (Hint: Mince the entire red onion and store the remainder in a baggie in the freezer for the next batch of guacamole.)
 Strip the cilantro from the stems and chop the leaves, add to bowl. Chop the tomato. I know many people tell you to discard the insides, but they taste the same and really, I'm just too lazy, so I chop the whole thing and add it to the bowl, just try to shake off some of the tomato juice, or blot it with a paper towel, so you won't have runny guac. Mince the jalapeno without the seeds. Wear gloves when you do this. I have a box of these kind that we use for spray painting, car engine work, and cutting fiery jalapenos. Put the 1/2 tbsp jalapeno in the bowl and if you have some left, bag that too and put in the freezer (I actually put mine in a canning jar and store in the freezer). Give the mix a little stir. If you want to take this to a party, just stop here and bring the avocados and lime with you to the party. Then continue with the steps below when you are ready to serve.

Cut the avocados in half, working your way around the big pit. Twist the avocado to separate the halves. Then cut straight down into the pit with your sharp knife and twist to remove it. Use a spoon to scoop out the flesh and dump into the bowl with the other ingredients. Squeeze the lime juice over the top of everything. Then mash with a fork. I like it chunky so I don't mash around very long. Serve immediately since the avocado will brown even with that lime juice. Ole!


Photobucket

June 28, 2012

Chicken Feta Soft Tacos - Fast Weeknight Dinner


You know I avoid the kitchen most all summer long. I just don't love being in there where it is hot. I get all whiny and complaining, kinda like my kids and it isn't pretty. I LOVE cooking on the grill in summer. I mean it's already hot outside, so cooking out there doesn't change much. It's already 92 in the shade.

Actually, I guess I should say, I love getting my HUSBAND to grill. I do all the prep work and then he stands out there sweating and feeling very manly. Works out great for everyone involved.

This recipe was born of leftover grilled chicken. I often have the Grillmaster cook a couple of extra pieces of chicken to have for salads the next day. This night, I needed fast and had the extra chicken already done, but it's really fast even when starting from nothing. I just happen to have these ingredients in the fridge, so I set them all out. Thankfully it came together beautifully. Really, simple, delicious, fresh...exactly what summer is all about.

Chicken Feta Soft Tacos
chicken breasts
feta cheese
cilantro
cabbage (or lettuce)
limes
pumpkin seeds, roasted and salted
sour cream
tortillas

Drizzle some olive oil over the chicken and sprinkle with some salt and pepper (oregano is good too if you have it). Make sure the chicken is at room temperature before putting on the grill. Grill with indirect heat on medium for about 10-15 minutes until the juices run clear. After the chicken comes off the grill, let it rest for 10 minutes and then chop it into small pieces. Serve all the ingredients in a divided chip tray (like Help Yourself Oatmeal) with warmed tortillas. Let everyone custom make with their choices. My kids especially love the pumpkin seeds, so pick these up next time and keep in the pantry. Summer is served!

 
Photobucket

May 21, 2012

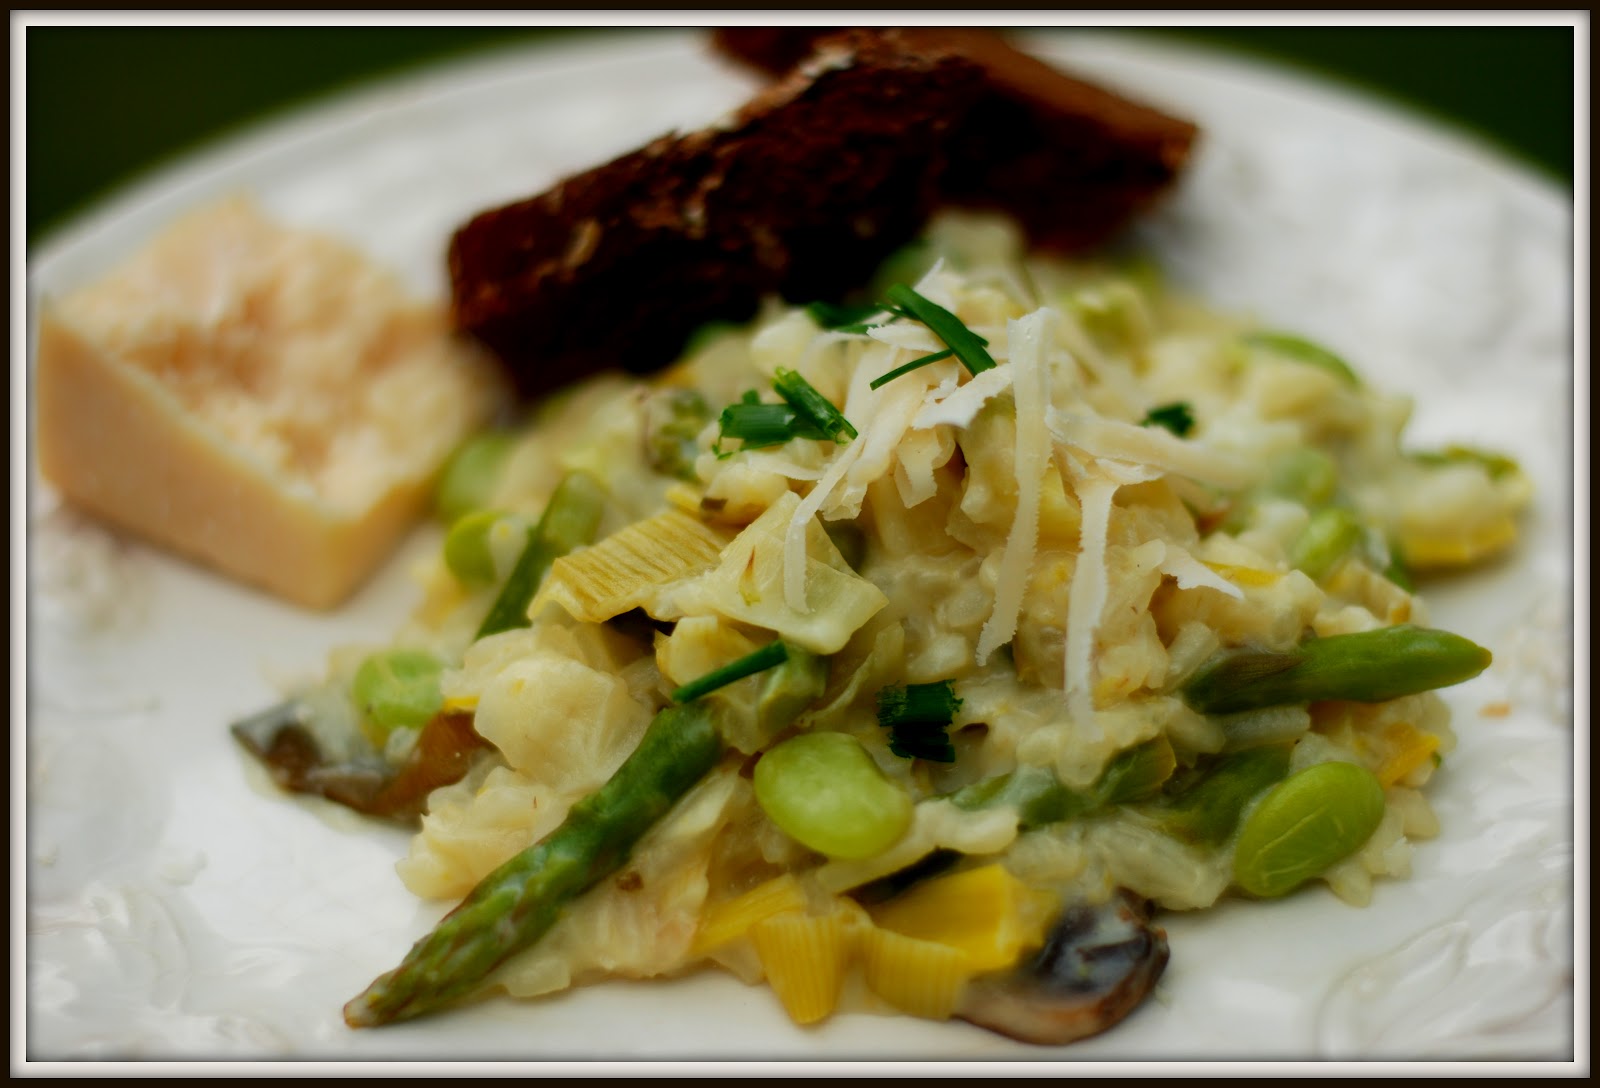
Creamy Spring Green Risotto

Secret Recipe Club time! It's funny how you start to know many of the foodies in the Club as you participate month after month. When I got my assignment, I already "knew" Kate and her blog, A Spoonful of Thyme. I had tried to eat my way through the computer screen with her Pulled Pork Sandwich. Her husband has the most awesome looking smoker! Serious man grilling.

I eventually chose Kate's Spring Green Risotto since it's fresh and uses all the of the spring veggies I love like peas and asparagus. We eat asparagus all the time. My favorite way is tossed with a little olive oil, salt and pepper and thrown on the grilled for a few moments. The kids are big fans of the little charred bits that happen.

I adore risotto and normally serve it during the colder months. But Kate proved to me risotto could be a warm weather dish with the addition of fresh green veggies. It turned out delicious! My husband declared it restaurant quality and we agreed it should be "on the rotation" just like Kate said.

I made a few changes and rewrote the recipe because it seemed a little confusing to me and I thought it could read simpler. (I'm sure that had something to do with the fact that is a recipe from Ina Garten - just saying.) I did leave out the fennel, because it just didn't look good at the grocery store when I went. I added mushrooms because that's one of my favorite risotto ingredients and I added lima beans to up the protein. You could easily make this a vegetarian recipe by using veggie stock. It may seem like a lot, but it is just one dish and we made it our main meal. I added a couple of pieces of tilapia and some sweet pumpernickle bread and dinner was done.
Spring Green Risotto

Ingredients
1 lb asparagus
5 oz lima beans
1 1/2 tbsp olive oil
1 1/2 tbsp butter
3 c finely chopped leeks, white and light green parts (1 leek)
8 mushrooms, sliced 
1 1/2 c Arborio rice
2/3 c white wine
4-5 c chicken stock
5 oz frozen peas, defrosted
1 tsp pepper
2 lemons, zest and juice
1/3 c mascarpone cheese or cream cheese 
1/2 c grated Parmesan cheese 
3 tbsp chives, minced 

Bring a medium pot with a small amount of water (maybe 3 inches) to a boil. Put ice in a large bowl and add water to make an ice bath. Snap the tough ends off the asparagus and give to your very grateful chickens. Then cut the asparagus spears into 1 1/2-inch lengths (on the angle if you want to be fancy).  Put asparagus and lima beans in the boiling water for 3-4 minutes. Drain and plunge the veggies immediately in the bowl of ice water. Dry your pot over low heat to use for the next step. Drain the vegetables.
Heat the olive oil and butter in the dry pot over medium heat. Add the leeks and mushrooms, cook for 6 mins. Add the rice and stir for 3 more minutes. {There is a lot of stirring coming up, about 25 minutes of it, so if you can rope in a sous chef, this is the time. You really don't have to stir constantly, but you do need to stay with it. It's worth it - really.}

Add the white wine and simmer over low heat, stirring constantly, until most of the wine has been absorbed. Add the chicken stock, 1 cup at a time, stirring almost constantly and waiting for the stock to be absorbed before adding more. Immediately after adding the last cup of stock, add the asparagus, lima beans, peas, and pepper. Zest both lemons right into the pot.

Squeeze the lemon juice from both lemons into a small bowl, add the mascarpone. Whisk together with a fork.

After a total of about 25 minutes of cooking and stirring the risotto, all the liquid should be absorbed. Then you are ready for the next step. Turn off the heat and add the mascarpone-lemon mixture plus the Parmesan cheese and chives.

Serve with an additional garnish of Parmesan cheese and chives if you want to fancy it up.
Photobucket

April 25, 2012

Carrot Kohlrabi Bake


My Sausage Boy had a playdate last week with one of his preschool pals. When I went over to their house to pick him up the mom, Amy, and I got into a discussion about her winter garden. Apparently she has a green thumb and her Dad has an emerald thumb. He can and does grow anything. He set Amy up with lettuces, broccoli, kale, and kohlrabi for her winter garden. Turns out Amy loves it all BUT the kohlrabi. Being her friend, of course I told her I would take it if she insisted. I played it cool, but I was pretty excited to get my hands on the kohlrabi. I mean it's not something you see in the local Kroger and I was having a dinner party for my family, they will eat just about anything. I figure if I screwed it up, I was still pretty safe. See I've eaten it grated raw in slaw, but I wanted to take it into my kitchen and make something with it.

This is kohlrabi in all it's glory.

I admit, it is a strange plant. You eat the bulbous part that grows just above ground. You can eat the greens too. It's a member of the cabbage family and tastes kinda like a radish, but sweeter.  I got mine home and pulled off the roots. Then I snapped off the leaves and gave those to the Girls - who were pretty excited about something new. Then I peeled the bulbs so they would not have a "woody" texture since I was baking them. Once I chopped them up, they were perfect for this recipe. I bet I could even convert Amy into a kohlrabi lover with this one. The carrots are sweet and the kohlrabi adds some bite. It's delicious and my family agreed.

Carrot Kohlrabi Bake
from Birds & Blooms

Ingredients
3 medium kohlrabies, peeled and chopped
4 medium carrots, peeled and sliced
1/2 c chopped onion

3 tbsp butter
2 tbsp flour
1/2 tsp salt
dash of pepper
1 1/2 c milk
1 tbsp dried parsley
1 tbsp lemon juice
3/4 c soft bread crumbs

Microwave carrots and kohlrabies in a little water on High for 10 minutes. Drain off the water.

In a small skillet, saute onion in butter until tender. Add flour, salt and pepper. Stir until blended. Cook for 2 minutes. Gradually whisk in the milk a little at a time. Each time you are waiting for the sauce to thicken before you add the next bit of milk. Add about 1/4 c each time. Bring to a boil and stir until thickened again.

Pour sauce, parsley, lemon into carrot/ kohlrabi mix and stir. Dump into a greased two quart baking dish (basically a little smaller than a 9x13 pan). Sprinkle the top with bread crumbs. (See recipe below to make them.)

Bake at 350 degrees for 25 minutes.

Soft Bread Crumbs
frozen bread
food processor

I keep these on hand in a bag in the freezer. My kids don't like the ends of bread loaves so I collect them in a bread bag in the freezer. I also use my mistakes - bread that just didn't rise enough when I made it. Or rolls that are always leftover from whatever party/ holiday event was most recent. When I have enough bread frozen, I pull out the food processor. Just put the slices in and turn that baby on. Pulse it until you have large crumbs, then put them all back in the bag and back in the freezer. Easy! You can use them to top mac n cheese, or just about any casserole. You can also use them to bread fish like this. What do you put them on?
Photobucket

April 23, 2012

The Most Incredible Poundcake Recipe EVER

UPDATE: Welcome pinners. This has become my most popular recipe to date! Wow, you all are really looking for a good great poundcake. I can tell you, you've found it. I hope while you are checking this one out, you'll poke around some other recipes. One easy way to do this is by season. Click on the seasonal link in the cloud list on the right hand sidebar and see what you can make right now. Or you may be interested in the other cakes I've made, including some fun birthday cakes. Either way, I'd love to hear from you, so leave a comment or shoot me an email. tochickenville {at} gmail {dot} come. Thanks for visiting!

------------------------------
Secret Recipe Club alert!! Why "secret"? In the Club we are assigned another food blog from the members and then secretly make one of their recipes. This month, I was assigned Anne From My Sweet Heart, a blog laser focused on desserts. Just so happens this is a GREAT time for me to make a cake. My aunt, my mother-in-law, brother, AND sister-in-law (she of the Kickin' Vinaigrette dressing) all have birthdays in April!! The kids spend at least two days making all of their cards and sometimes I get to spend some time in the kitchen cooking up a celebration dinner. This month, I got to make dinner for my brother and his wife for their birthdays. My parents joined us for the evening. It was loud  (actually our house is always loud with four kids) with lots of laughing and fun. The big kids put on a gymnastics's show AND a theatre production.

Mom and Dad brought the main dish, a pork loin, which I seasoned and my husband grilled. As usual it was moist, delicious and perfectly delicious. You cannot miss with my Disappearing Pork Loin recipe. I made Kohlrabi-Carrot Bake, Broccoli Salad (which I did not get enough of on Easter), homemade Honey Wheat Seeded bread, cheese grits, a green salad and the afore mentioned delicious pound cake.

This cake is moist and held a perfect crumb. The bottom crust was crispy, but the inside was soft. I served it with strawberries macerated in sugar (directions in the recipe below) and Breyers vanilla bean ice cream. My husband went back for a plain piece because he said the berries just got in his way of tasting the amazing cake. I swapped out a little of the vanilla in the original recipe for some almond, which took it over the top (this does not make it almond tasting, it only adds a little depth of flavor). Whatever you choose, make sure it's good quality, pure extract, not imitation, because it will be the dominate flavor.

This recipe turned out to be the best poundcake I've ever tasted!! Right up there with my favorite cake - Famous Fresh Strawberry Cake. I'm not kidding you folks, this was really THAT good. Find an excuse to make this cake and you will be a hero to your family.

Cream Cheese Poundcake
From My Sweet Heart

3 sticks unsalted butter, at room temperature
8 oz. cream cheese, at room temperature
3 cups sugar
1/2 tsp salt
1 tbsp pure vanilla extract
1 tsp almond extract (my preference or you could do lemon, more vanilla, or something else)
6 large eggs
3 cups of sifted flour
1 tsp baking powder

Preheat your oven to 325°F. Spray a bundt pan with cooking spray and then sprinkle some flour over the spray. Shake it around until the flour covers the oil and then tap out the excess. It should look like this. If you don't have a bundt pan, you can bake it in two 8 1/2 by 4 1/2 inch loaf pans for 60 minutes.
In the mixer bowl, beat the butter and cream cheese together until creamy. Gradually add the sugar with the mixer still running, and continue to beat until light and fluffy. Beat in the salt and extracts. Add the eggs to the mix, one at a time. Beat well after each addition. This is easy when you have a little helper.

Stop the electric mixer and sift the flour and baking powder into the bowl. With a rubber spatula, gently stir the flour into the mix, until no traces of flour are seen and the batter is smooth.

Pour the batter into the prepared bundt pan. Bake on center rack for 75 minutes. The top should be golden and become slightly cracked; and when a toothpick inserted into the center comes out with a few moist crumbs.  Transfer to a wire rack and let the pans cool for 15 minutes. Carefully turn the cake out of the pan onto a wire rack for cooling.

To serve with strawberries. While cake is baking, wash, hull (remove the stems) and cut up the berries. Sprinkle with sugar. Let stand in fridge, every once in a while, give them a stir. You want them to sit for an hour or so. When they are ready, there will be a nice juicy, sweet syrup in the bottom of the bowl.

The most perfect Poundcake recipe EVER. Happy Birthday Nadia and Jason!!

Photobucket

April 10, 2012

Real Pecan Pie...Frozen

I love pecan pie, but NOT the nasty slimy middle. I solved this problem one time when I bought a piece of pecan pie from the freezer section - Edwards or some brand. I figured it was only one piece so I couldn't go overboard, but when I got it home it was all I could think about (restraint is not my strong point). That silly piece of pie was calling my name. I got home, ripped open the cardboard package and ate the entire slice without letting it thaw or even using a fork.

Turns out it was the best pecan pie I ever ate! It had nothing to do with the brand but the simple fact that the pie was still pretty frozen. When the jiggly middle is frozen it turns to a wonderful gooey, caramel like treat that I LOVED! Now, I make and serve pecan pie to my guests and then freeze my leftovers for me to enjoy another day. I encourage everyone to try pecan pie frozen - you may love it. I've even converted my very southern husband to freezing his.

I decided I needed to make a pecan pie because my husband's wonderful Aunt and Uncle gave us a HUGE bag of pecans. Apparently they have the largest pecan tree in Fayette County, which is really saying something. They gathered the nuts for us and I put the kids to work cracking them with this cool contraption. I won't say it makes cracking the pecans easy...let's say easIER. Once we had enough nuts, I was all set to make my pie.

Real Pecan Pie
adapted from Baking Illustrated by way of Brown Eyed Baker

Single crust pie shell, store bought or homemade
6 tbsp butter, cut into 1-inch pieces
1 c brown sugar
½ tsp salt (if using unsalted butter)
3 eggs
¾ c light corn syrup
1 tbsp vanilla
2 c pecans, chopped into small pieces

Toast your pecans in a dry skillet on the stove for a few minutes until they smell nutty or toast them on a tray in your toaster oven. Just be sure to watch them as nutty and delicious can turn burnt VERY quickly. Let cool.

Preheat oven to 400 degrees. Prick the crusts with a fork all over the bottom.

Then cover the crust with aluminum foil and fill with dried beans. This keeps the pie shell from puffing up with air and becoming brittle. Bake for 15 minutes.

Remove foil and beans weights bake 5 additional minutes until crust is golden brown and crisp. Remove from oven and reduce the temp to 275 degrees.

Melt the butter in a double boiler. {See my new one??} Remove from heat and stir in the sugar and salt with a wooden spoon until the butter is absorbed. Beat in the eggs, then the corn syrup and vanilla. Return to this stove; stir until the mixture is shiny and hot to the touch, about 130 degrees on an instant-read thermometer. Remove from the heat; stir in the pecans.


 Pour the pecan mixture into the hot pie shell.

Bake on the middle rack until the pie looks set and yet soft, like gelatin, when gently pressed with the back of a spoon, 50 to 60 minutes. Transfer the pie to a rack; cool completely, at least 4 hours. Then to really make magic, put it in the freezer. Promise me you'll do it with a least one piece, just to try. I bet you'll love it!!

Photobucket

March 19, 2012

Anise Dusted Venison with Red Wine Grape Sauce

It's Secret Recipe Club time again!! I was pretty excited when I was assigned a blog from outside the US called Lavender and Lime. Tandy is from South Africa, a country where I know exactly two people...Ronald and Lize. I met Ronald in Australia, where he told me many South Africans often come to visit or live. I met Lize our preschool where I got to teach her precious daughter Neika at Vacation Bible School. So Tandy makes three people, wow, I'm on a roll.

I was charmed by the language used in Tandy's writing. For instance, the word "dessicated" which you never see used in the US, (we say dried) but dessicated sounds so much more intense. I also loved how her recipes are in grams. We really should have stuck with the metric system in the United States, it makes a lot more sense.

When I was browsing Tandy's blog I noticed she eats lots of foods that are not common here in the US: ostrich (which was yummy when I had it in Australia), springbok, lamb, liver, and crawfish. Talk about an adventurous eater, but maybe not by her country's standards. For all I know, ostrich may be a South African staple. That's why I like taking my kids to eat at different ethic restaurants. There they can learn people eat different things, look different, talk differently and dress differently. Respecting differences is something I was taught as a child and it's never left me. It's my hope that raising my kids this way, will teach them God created people to treasure differences. The only hard part is when they learn that not every kid has this respect. It wasn't until my son starting taking his lunch to the homeschool co-op that he even knew it was "unusual" for kids to eat sushi, liverwurst, deer burgers or Cesar salad. It actually broke my heart a little the first time he came home and told me the other kids said his lunch was yucky and weird. How sad is that? Especially when his lunch was SOOO much more delicious than the applesauce cup and Lunchable the other kids had.
I had some serious trouble deciding which recipe to make when I browsed through all the choices. The Orange Marinated Duck sounded delicious and I can see making it with chicken. I also really wanted to make these Cranberry Oat Slices because you know I'm a little obsessed by cranberries. I'm guessing I will make this outside of today's post.

When it came down to it, I decided to make two things from Lavender and Lime. Her Venison dish with anise and grapes got my attention since I have a freezer shelf full of deer thanks to my hunter husband. This dish sounded like something I would order at a restaurant - something fancy - something I would not normally make at home. I had to give it a go. I also decided to make her chai tea mix. I'll share that one tomorrow.

I did change Tandy's recipe a little just to accommodate my family. I choose to do a large venison roast so I could feed the entire family. I usually save the tenderloins for DNI. I marinated the venison overnight (which I do with all of the whole cuts, not the ground). We also cooked it on the grill since it was a beautiful spring day, but that meant I didn't have the pan drippings that Tandy did. I used anise seed because I had it and I didn't have the star anise. Never in my life would I have thought of putting anise and meat together, but it was a beautiful pairing and everyone loved it.

Anise Dusted Venison with Red Wine Grape Sauce
Adapted from Lavender and Lime

Ingredients
2-3 lb venison roast (you could use a piece of beef)
3/4 c apple cider vinegar
1/4 c soy sauce

2 tsp anise seeds (or 2 star anise or 2 tsp five spice powder)
1/2 tsp pepper
2 tsp salt
2 Tbsp butter
2 Tbsp olive oil
1/2 c red wine
1 bunch of red or black grapes cut in half (apprx 20 grapes)

Combine the vinegar and soy sauce in a large zip lock bag and add venison. Marinate 2 hours or more (I leave overnight) in the fridge. Dump marinade and pat the meat dry with a paper towel. Let rest on a plate so it comes to room temperature. You never want to grill a cold piece of meat. Crush the anise seed in a spice grinder or mortar and pestle. Combine anise, pepper and salt together and dust over the meat on both sides. When meat is room temp (about 30 minutes of sitting out) grill over med high heat for 25 minutes, turning once.

While it's cooking, melt the butter, olive oil and wine over med-low heat in a skillet. When butter is melted add the halved grapes and stir around for a minute or two. Remove from heat. When the roast is done, put on a clean cutting board. Let sit for a few minutes before slicing into 1/2 inch pieces. Serve with grape sauce over the sliced venison.

Delicious, thanks Tandy!

PS. This was my recipe that was made over on Foodness Gracious. It's my Moist Chocolate Buttermilk Cake with Cream Cheese Icing.

Photobucket

February 22, 2012

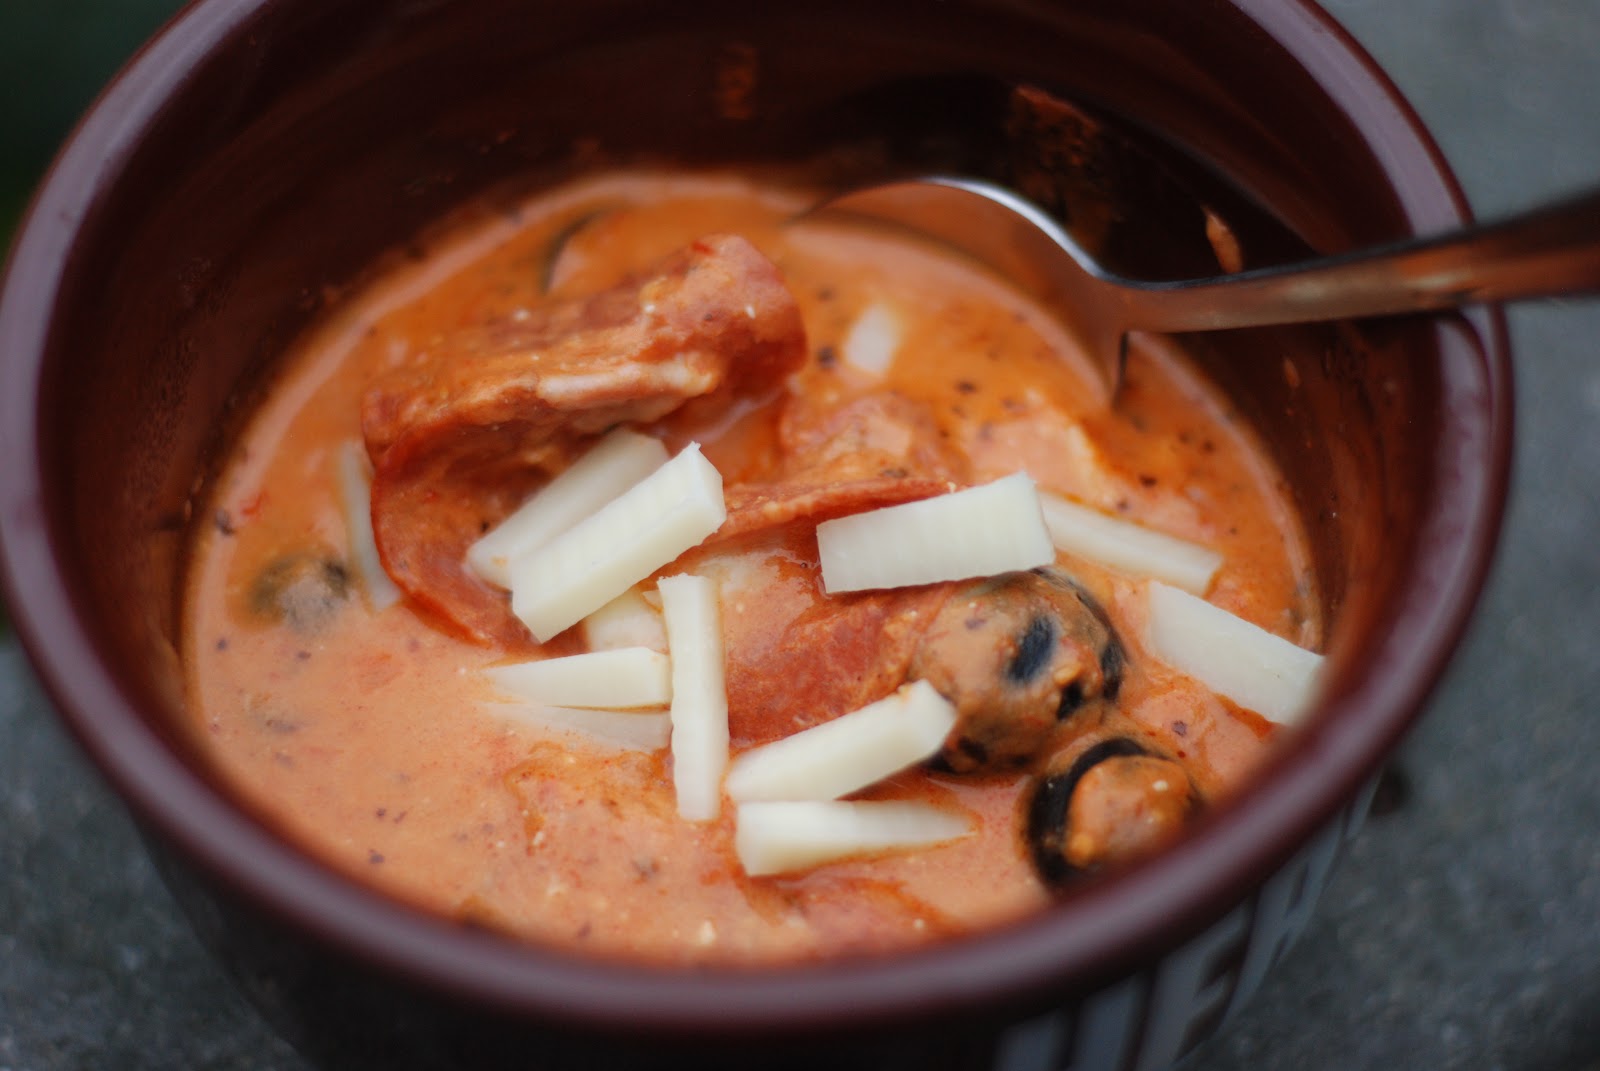
Pizza Soup - Fast and Easy

When I was busy recovering from my fourth cesarean section with our last baby (who is now 16 months old - yikes) a neighbor made this wonderful soup for us. I was a little unsure over the name Pizza Soup, thinking it would be more of a "kid recipe". I am not the biggest pizza fan unless it's really good pizza. So far I haven't found a pizza joint in Roswell that I love. I guess I just prefer making it, kinda like how I am about Mexican food too. Do I sound high-maintenance? I don't feel that way, but when I actually say it out loud, I sound like a food snob. I'm not, I promise. In fact the food item I craved most when pregnant with all four of the kids was McDonald's french fries. Nothing else would cure that craving - nothing. And yes, I now they are soooo bad for you and contain all kinds of preservatives and sodium levels off the charts, but it's what my body said it NEEDED and who was I to deny? Since the kids turned out healthy and *mostly* sane, I guess I didn't do any damage. All that to say I do like junk food occasionally. I'm not much of a Mexican food fan (unless it's homemade), I don't like hot dogs and I don't crave pizza, but those McDonald's fries are my weakness.

I do have a twist on junk food with this pizza soup. It breaks the pizza mold by going into a bowl, not a crust. I loved it. It was a creamy soup with a little kick from the pepperoni. The great thing about it, well actually there are two. One, you can customize the recipe so easily just like making your pizza the way you like it. Two, the basic recipe is SIMPLE. Don't thank me, thank Sybil, who introduced me to the simple pleasure of....

Pizza Soup
1 jar of spaghetti sauce
6 oz cream cheese, I used non-fat
1 c milk, I used skim
Assorted pizza toppings: pepperoni (we like turkey pepperoni), candian bacon, mushrooms, black olives, spinach, mozzarella, oregano, hot pepper flakes, whatever you like

Put the sauce, cream cheese and milk in a pot and stir until it's all melted. Add toppings to warm the up and serve. How easy is that??? Dinner's ready in a hurry!

Photobucket

February 16, 2012

Closed Silicone Baking Mat Giveaway

Congratulations Sherry!! lilsis_75@...


Happy Birthday to Me, Happy Birthday to Me! My birthday is this month and I'm celebrating! Okay, okay, I'm a little bit of a celebration freak - I know. Any excuse to have a party. Remember last year? It was all about the cupcakes. :) I just like celebrations and birthday parties, blame it on my Mom. She always throws a good party and raised me to do the same.

The problem is, when you're the birthday party chief in your house, there is no one to plan YOUR party. I guess I'll just have to bake my cake and eat it too! While I'm at it, I went out and bought YOU a present. There is nothing like sharing Mom always said. So I spent money generated from this blog and bought you something to show my thanks.

I bought TWO silicone baking mats to giveaway!!

You know, those mats that I'm always talking about for baking or roasting and telling you how much you MUST get them?? Yep, those are the ones.
Here are the ways to enter, be sure to leave a separate comment for each one you choose to complete...
  • Subscribe to Chickenville by RSS or Email and then leave a comment on this post (on the blog, not on facebook)
  • Share this post on Facebook by hitting the FB button at the top of the post and where it says "write something" share your favorite Chickenville recipe, then tell me in the comment here what recipe it was
  • Like Chickenville on Facebook and post about it on your page too
  • Tweet this giveaway with button on top of this post this time sharing your favorite birthday cake idea from Chickenville and tell me which one it was in your comment here
This giveaway ends on Friday Feburary 24th at 11pm. Open only to US residents.
 Photobucket

February 1, 2012

Cranberry Honey Oatmeal Bread


I've been in a baking mood, and this is just the start of it. In one day, my three year old, Sausage Boy and I made this bread, the Banana Girl and I made her famous Banana Chocolate Chip Muffins and Super Bear and I made...well I can't tell you yet, you'll have to wait until the Secret Recipe Club reveal date later in Feb (around my birthday!!!)

These baking moods of mine, come and go: with life, time, and maybe that time of the month ;) Whatever it is, I'm in the kitchen right now. In fact the preschool teachers already benefited since I sent in extras with a little Valentine's Day note. While I'm a fan of sweet treats for Valentines (can we say Cookie Dough Truffles, Citrus Meringue Pie, Rosemary Chocolate Tart, or My Favorite Molasses Cookies??) there is a time and a place for less sugar. This is the time. I'm feeling large and not in charge. I need to make changes, real ones. If someone could just let me borrow their will power, I promise to give it back when I'm done.

This recipe is from a blog called "Eat Yourself Skinny" if that gives you any idea as to where I'm going. According to the blog, one slice is 196 calories. If that's true, I'd be scared to know what my Zucchini Bread ranks up at. I found this recipe at Pinterest, my new love. Apparently there are a ton of people who are just pinning things and never getting around to doing them. I am determined NOT to be one of those. I want to use this fantastic tool and not just dream about using it. Bring on the pins!!
I pinned this recipe in December and knew I wanted to make it because I love cranberries. I have a go to Cranberry Coffee Cake that I keep cranberries in the freezer all year round to make. It would be perfect for Valentine's Day since it has the red cranberries, but it contains...sugar. This Oatmeal bread only contains a little bit of honey...a very little. I found out how little after I ate a piece. It was pretty sour. I mean, I like cranberries, but I had to change the recipe to make it more suited to me. The original recipe can be found here at Allrecipes. Here is my adapted recipe - and yes, this means it will come in at more than the 196 calories (or 5 WW pts, which Kelly, the author so kindly shares). My helper said our version turned out "really good Mommy", so there it is straight from the expert.

Cranberry Honey Oatmeal Bread
Ingredients
2 1/2 c flour
1 tsp. baking powder
1 tsp. baking soda
1/2 tsp. salt
1/2 tsp. ground cinnamon
1/4 tsp nutmeg
1 c oats
1 c honey
1 tsp vanilla extract
1/3 c vegetable oil
2 eggs
1/2 c heavy cream or whole milk
1 c fresh cranberries, chopped (or dried)
1/2 c nuts, chopped (I like pecans)
Preheat oven to 350 degrees and grease a loaf pan. In a large bowl, whisk together flour, baking powder, baking soda, salt, cinnamon, nutmeg and oats (reserve a sprinkle of the oats for later).
In a medium bowl, mix together honey, vegetable oil, eggs and milk. Pour liquid into the flour mixture bowl, stirring just until moistened.  Stir in chopped cranberries and pour into prepared baking dish. Sprinkle whole oats on the top for decoration and fancyness (yes, I'm sure that's a word). Bake for 1 hour if using fresh cranberries and 45 minutes if using dried. A toothpick inserted in the center should come out clean.

Slice and serve with cream cheese or butter. Or if you are being healthy like I'm trying, enjoy it plain.


Photobucket

LinkWithin

Related Posts Plugin for WordPress, Blogger...